Sooner or later, it happens to every electric scooter rider: the dreaded flat tire. It's a massive pain, but it doesn't have to mean a trip to the repair shop and a big dent in your wallet. Learning how to change a scooter tire is one of the most valuable skills you can have. It turns a day-ruining problem into a quick fix you can handle yourself.
This guide is here to show you exactly how to do it, so you can get back on the road in no time.
Why Bother Learning to Change a Scooter Tire?
Let's be real—a flat tire never happens when it's convenient. It’s always when you’re late, miles from home, or the weather is about to turn. For anyone relying on their scooter for the daily commute in cities across the US or Australia, getting stranded is a major disruption.
Knowing how to handle it yourself puts you back in the driver's seat, literally. You're not stuck waiting for a repair shop to open or paying for labor. But it's about more than just saving a few bucks. Getting your hands dirty gives you a much better feel for how your scooter works, which helps with overall maintenance and keeps you safer in the long run. If you want a deeper dive into staying safe, check out our full guide on electric scooter safety tips.
First Things First: What Kind of Tire Do You Have?
Before you grab any tools, you need to know what you’re dealing with. Electric scooter tires come in two main flavors, and how you fix them is totally different.
- Tube-Type Tires: These are the old-school standard, especially on more affordable scooters. Think of them like a bicycle tire—there's an outer tire and a separate inner tube inside that holds the air. If you get a puncture, you usually just need to replace the tube, not the whole tire.
- Tubeless Tires: You'll find these on higher-end models. They create an airtight seal directly against the wheel rim, no tube needed. The big advantage? They’re tougher against punctures and can often be fixed with a simple plug kit without even taking the wheel off.
Not sure which one you have? Just look at the valve stem (where you pump air in). If you can wiggle the stem and unscrew the nut at its base, you’ve almost certainly got an inner tube. If the stem is stiff and looks like it's a permanent part of the rim, it's a tubeless tire.
Pro Tip: Don't automatically assume a puncture! I've seen plenty of new riders tear a wheel apart only to find the problem was a loose valve core causing a slow leak. Always check the simple stuff first.
Spotting a Failing Tire Before It Fails on You
Sometimes, a tire doesn't go out with a bang. It dies a slow death from wear and tear, and that can be just as dangerous. Keep an eye out for these warning signs to avoid a sudden blowout.
- Bald is Bad: Your tires have little raised bars in the grooves called tread wear indicators (TWI). Once your main tread is worn down even with those bars, it's time for a new tire. No excuses.
- Cracks and Bulges: Give the sidewalls a good look. Any cracks mean the rubber is getting old and brittle. If you see a bulge, stop riding immediately. That's a sign of internal damage, and the tire is a ticking time bomb.
- A "Squared-Off" Look: If you do a lot of riding in a straight line, the center of your tire can wear down and become flat. This "squared-off" profile really messes with your handling and makes cornering feel wobbly and unsafe.
To help you figure out what's going on with your tire, here's a quick cheat sheet.
Quick Diagnosis for Your Scooter Tire Problem
Use this table to quickly identify your scooter tire issue and decide on the best course of action.
| Symptom | Potential Cause | What to Do Next | Is It Safe to Ride? |
|---|---|---|---|
| Tire goes flat overnight | Slow puncture, leaky valve stem, or poor rim seal | Submerge in water to find bubbles, then patch or replace | No. A slow leak can become a fast one. |
| Visible nail, glass, or thorn | Obvious puncture | Remove the object and repair with a patch/plug or new tube | No. Riding on it will make the damage worse. |
| Sidewall bulge or bubble | Internal tire damage, broken casing | Replace the tire immediately. Do not attempt to repair. | Absolutely Not. This is a blowout waiting to happen. |
| Obvious cracks on the sidewall | Old, dried-out rubber (dry rot) | Replace the tire, even if the tread is good | No. The tire is structurally weak. |
| Tread is worn down to the wear bars | Normal end-of-life wear | Replace the tire | No. You have very little grip, especially in wet conditions. |
Hopefully, this table gives you a clear starting point. Once you know the "what," you're ready to tackle the "how."
Getting Your Gear Together
Trust me on this one: trying to wrestle a scooter tire off without the right tools is a recipe for disaster. You’ll end up with scratched rims, busted knuckles, and a whole lot of frustration. Before you touch a single nut, let's get your toolkit and workspace dialed in. A little prep work turns this job from a major headache into something you can knock out in an afternoon.
Knowing how to do this yourself is becoming a seriously handy skill. The scooter tire market is booming and expected to hit a massive USD 33.11 billion by 2032. If you're riding daily in a city, you could be swapping tires every 6-12 months. Learning to do it yourself pays for itself fast.
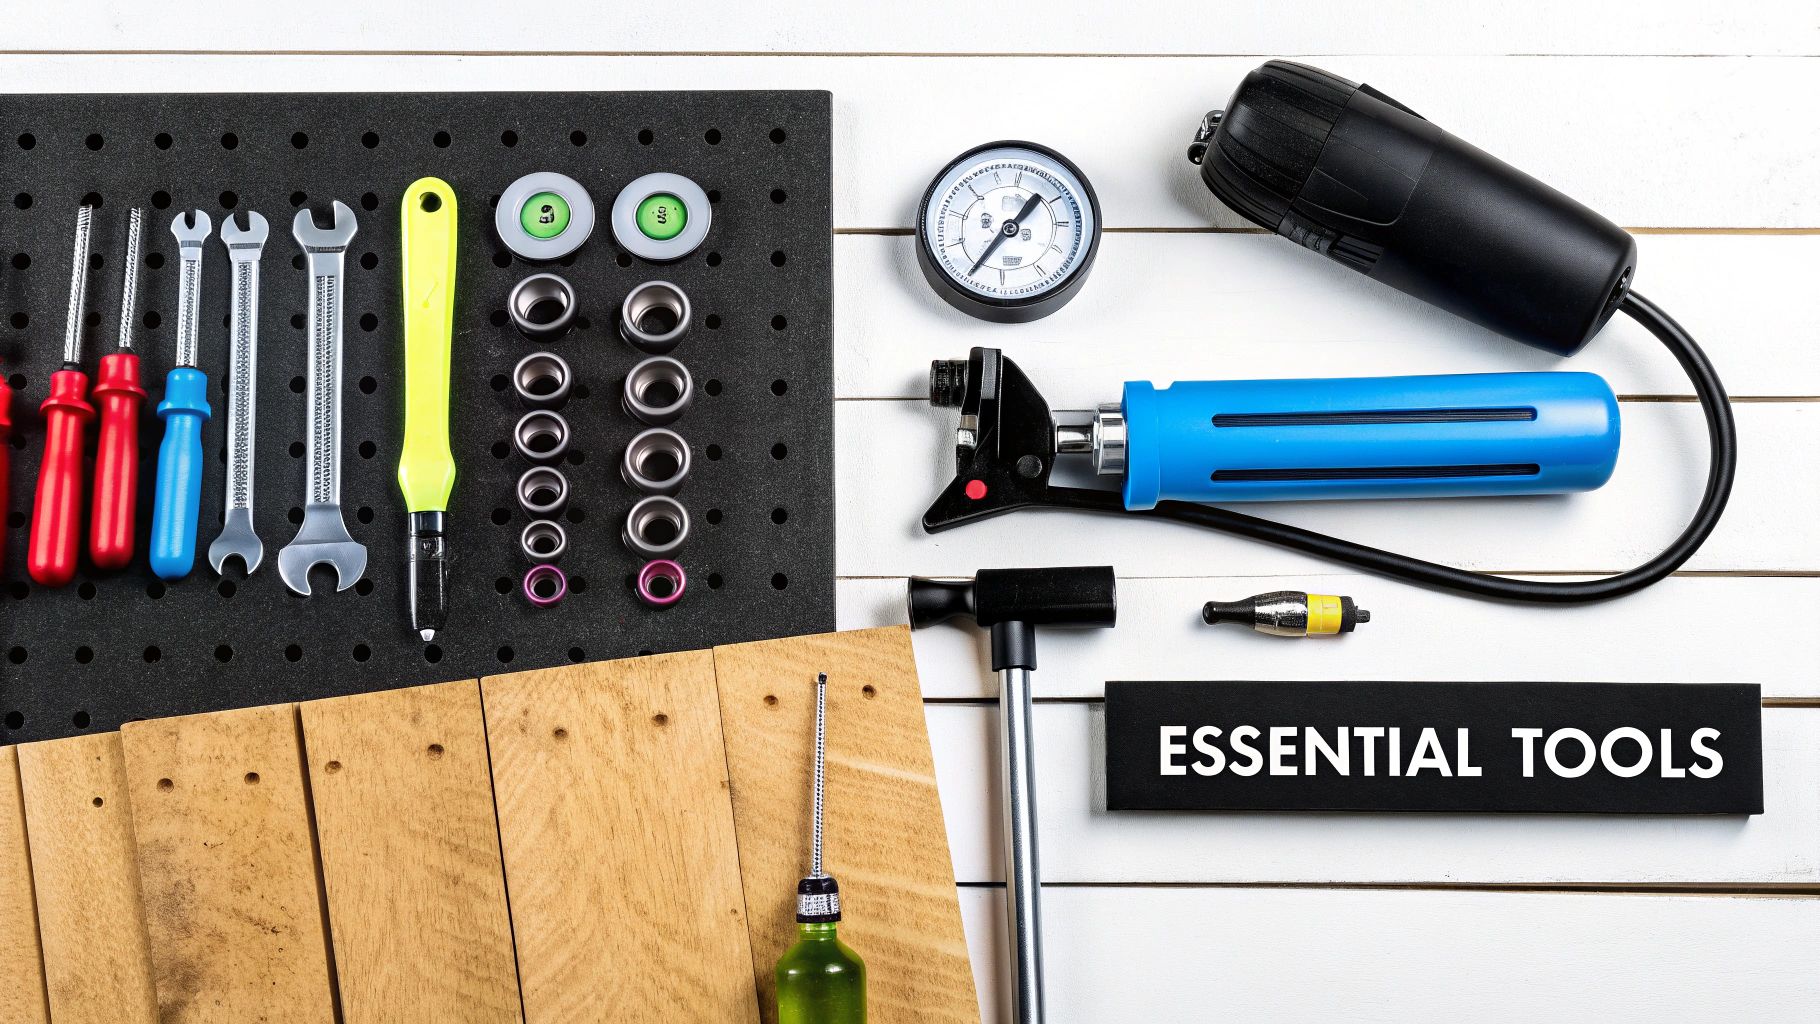
The Must-Have Toolkit
You don't need a full-blown mechanic's garage, but some tools are absolutely non-negotiable. Please don't try to make do with whatever's in your junk drawer—that's how parts get stripped and projects get abandoned.
Here's the essential gear you'll need to have on hand:
- Wrench or Socket Set: This is for the axle nuts holding the wheel on. While an adjustable wrench might work, a socket that fits perfectly is your best friend here. It gives you a solid grip and prevents you from rounding off the nut.
- Tire Levers: Don’t even think about using screwdrivers. Get a proper set of at least two, but three is even better. I’m a big fan of the metal ones coated in plastic—they’re strong enough for the job but won’t chew up your wheel rims.
- Air Pump with a Pressure Gauge: A simple hand pump will do, but a floor pump makes life way easier. The most important feature is the gauge. Getting the tire pressure right isn't just about performance; it's a critical safety step.
With these three items, you can successfully change your tire. But, if you want the job to go a lot more smoothly, there are a few other things I’d recommend.
Tools That Make Life Easier
Planning on doing your own maintenance long-term? Investing in a couple of extra tools will save you a ton of sweat and time. They aren't strictly required, but you'll thank yourself later for grabbing them.
I learned this the hard way: trying to break a stubborn bead seal without any lubricant is a nightmare. A simple spray bottle of soapy water can turn a 20-minute struggle into a 20-second fix. It's the best free tool you'll ever use.
Consider adding these to your collection:
- Soapy Water in a Spray Bottle: Your secret weapon. A quick spritz on the tire bead helps it slide off and on the rim like a dream.
- Valve Core Tool: This little gadget lets you remove the valve core, deflating the tire almost instantly. It’s a huge time-saver.
- A Paddock or Center Stand: Trying to work on a wobbly scooter propped up on its kickstand is just asking for trouble. A stand gets the wheel off the ground and keeps everything stable and secure.
Before you buy a new tire, double-check the size. If you're not sure, it's worth learning how to measure wheel diameter accurately so you can be confident you’re getting the right fit. Once you've got your tools and your new tire, you're ready to get started.
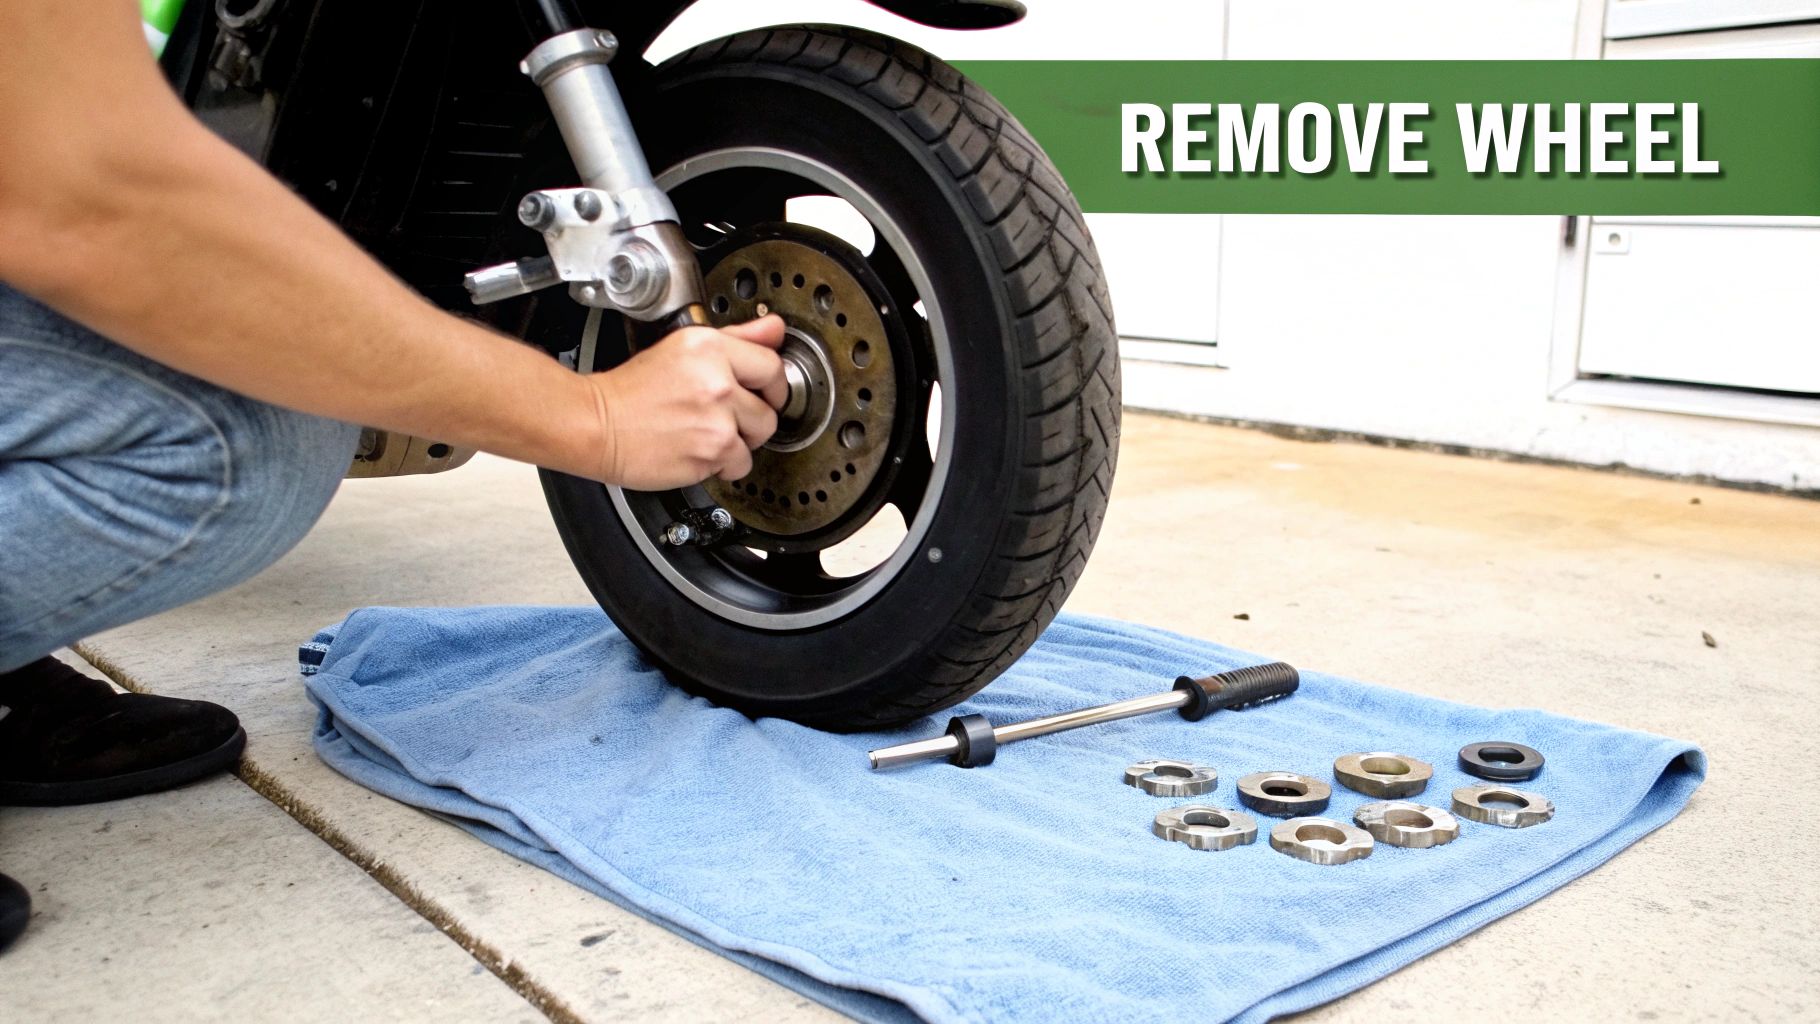
Getting the Wheel Off and Breaking the Bead
Alright, you've got your tools laid out and the scooter is stable. Now for the fun part. This is where we actually start the process to change your scooter tire. Don't be intimidated; taking the wheel off is pretty straightforward if you just take it slow and keep things organized.
Honestly, learning this skill is a rite of passage for any scooter owner. It's why the aftermarket parts industry is so massive—the aftermarket segment actually makes up a 74.0% share of the global two-wheeler tire market, mostly driven by people like us doing our own replacements. When you consider a city-ridden scooter tire might only last 3,000 to 6,000 miles, doing it yourself will save you a ton of cash. You can dig into more stats about the growing scooter tire market at Fact.MR if you're curious.
Loosening the Axle Nuts
First things first, find the big axle nuts on each side of the wheel. Grab your socket wrench or a big spanner and get it seated firmly on one nut. You'll probably need a second wrench on the other side to keep the whole axle from spinning while you work.
Just remember the old mechanic's wisdom: "righty-tighty, lefty-loosey." Turn that wrench counter-clockwise. These nuts are torqued on tight for good reason, so you might have to put some real muscle into it to get them to budge. A little grunt work is normal here.
Once you feel it break free, just loosen it a bit. Don't take it all the way off just yet.
Don't Lose Your Bits and Pieces
This is where a little bit of patience now saves a massive headache later. As you start taking things apart, you'll encounter washers, spacers, and other small bits. It is absolutely critical that these go back on in the exact same order and orientation they came off.
Here’s my go-to method: I lay a clean shop towel on the ground next to me. As I remove a part—nut, washer, spacer—I place it on the towel in a line, left to right. When it’s time to put it all back together, I just pick them up from right to left. It’s a dead-simple system that makes reassembly foolproof.
A Lesson Learned: The first time I did this, I was feeling confident and just tossed all the small parts into a magnetic tray. Big mistake. I easily wasted 30 minutes trying to remember if the thin washer went on the inside or outside of the spacer. Organize as you go. Your future self will thank you.
Wrangling Brakes and Chains
Look closely at what's still connected to the wheel. If it’s the front wheel, you'll need to gently wiggle the brake rotor out from between the brake pads. If it's the rear wheel, you've likely got a brake caliper and either a drive chain or a belt to think about.
To get the chain off, just push the wheel forward a little to create some slack, then lift the chain right off the sprocket. With everything disconnected, you can go ahead and unscrew the axle nuts the rest of the way and slide the axle completely out. The wheel is now free!
Breaking the Bead The Right Way
With the wheel on the ground, your next opponent is the bead. This is the super-tight seal where the tire's edge is locked onto the rim. If that tire has been on there for a few years, that seal can feel like it's welded in place.
But don't worry, you don't need a giant shop press. A few DIY methods work great:
- The Squeeze: Lay the wheel flat and use a couple of big C-clamps on opposite sides of the tire. As you tighten them down, the even pressure will usually pop the bead right off the rim.
- The Stomp: It sounds crude, but it works. Put a piece of cardboard down to protect your rim, then carefully stand on the tire's sidewall with your heels as close to the rim as you can get. Your body weight is often all it takes to push the bead down into the rim's center channel.
- The Levers: You can use your tire levers, but go easy. Wedge the spoon end between the tire and the rim, then lever it down and away from the wheel. Work your way around the tire in small increments. This takes patience, but it prevents you from scratching or gouging your rim.
Once you've broken the bead on both sides, the tire will feel loose and floppy on the rim. That's exactly what you want. This prep work makes the next step—actually prying the old tire off—so much easier.
Mounting Your New Tire Like a Pro
Alright, you've wrestled the old tire off the rim, which is usually the grimiest part of the job. Now for the satisfying part: putting it all back together. Getting the new tire mounted correctly is more than just finishing the project—it's absolutely critical for a safe ride.
The process is a little different depending on whether you’re working with an inner tube or a tubeless setup. I'll walk you through both and share a few tricks I've picked up over the years to make things go a whole lot smoother.
Handling a Tube-Type Tire
If you've got an inner tube, your number one enemy is the dreaded "pinch flat." That's when you accidentally clamp the new tube between the tire and the metal rim while putting it on. It’s beyond frustrating to create a brand new hole before you’ve even put the wheel back on the scooter.
Luckily, it's easy to avoid.
Before you do anything else, inflate the new tube just enough to give it some shape. Seriously, just a puff of air. It shouldn't be firm at all, just enough so it’s not a floppy, twisted mess. This tiny bit of pressure does two things: it helps the tube settle into the tire cavity correctly and, more importantly, it makes it much harder to pinch with your tire levers.
Here's the approach I always take:
- Give the new inner tube just a little puff of air.
- Work the tube into the new tire, starting by pushing the valve stem through its hole in the rim.
- Mount one side of the tire onto the rim. Use your hands as much as you can here.
- Now, carefully work the second side on with your levers. Go in small sections, and always push the bead down and away from where the tube is sitting. That’s the key to avoiding a pinch.
Mastering the Tubeless Tire Installation
Tubeless tires are fantastic for puncture resistance, and it's no surprise they now make up 60% of replacements, a huge jump from just 35% back in 2015. This tech cuts down how often you need to change a scooter tire by about 20%. It’s a fast-growing market, with the scooter tire sector expected to climb from USD 1.95 billion to USD 2.61 billion by 2025. For more deep-dive data on these trends, Cognitive Market Research has some great insights.
With a tubeless tire, the entire game is creating a perfect, airtight seal between the tire and the rim. Any speck of dirt, old rubber, or grime left on the rim will ruin that seal and cause a slow, annoying leak.
So, before you even think about mounting, grab a clean rag and wipe down the inside of the rim. Pay extra close attention to the channels where the tire bead sits. This surface has to be spotless. It's non-negotiable.
A Little Trick I've Learned: A bit of lubricant is your best friend here. I mix a few drops of dish soap with water in a spray bottle and give both beads of the new tire a light spritz. This helps the rubber slide right over the rim's edge instead of fighting you, which also means you're less likely to damage the bead with your levers.
Once the rim is clean and the tire is lubed up, use your levers to work it onto the rim, one side at a time. It’ll be a tight fit, but that soapy water makes all the difference.
Don't Forget the Directional Arrow
This is probably the easiest mistake to make, and it’s a big one. Nearly all modern scooter tires are directional—they're designed to roll in only one direction for optimal performance. Look on the sidewall of the tire and you'll find a small arrow, usually with "ROTATION" or "DIRECTION" printed next to it.
This arrow must point in the direction the wheel spins when you're riding forward.
Why is this so important? The tread pattern is engineered to channel water away from the tire, giving you grip when the roads are wet. Mount it backward, and you've just sabotaged your scooter's wet-weather handling.
On top of poor grip, a backward tire can cause weird handling issues and will wear out much, much faster.
Before you start inflating anything, do one final check. Hold the wheel up to your scooter and imagine it spinning forward. Is the arrow pointing the right way? If not, flip it now. Taking five seconds to double-check this simple detail is what separates a frustrating amateur job from a pro-quality repair you can actually trust.
Reinstalling the Wheel and Final Safety Checks
Alright, you're on the home stretch. The new tire is on the rim, and it's time to get that wheel back on your scooter. Don't rush this part. A sloppy reinstallation can be downright dangerous, so take your time and make sure everything goes back exactly where it came from.
If you were smart and laid out all your spacers, washers, and the axle nut in the order you removed them, this part is a breeze. You’re basically just working backward. Slide the wheel back into the forks or swingarm, being careful to guide the brake rotor back into its slot between the brake pads.
This diagram is a great reminder of the core process for getting the new tire onto the rim itself.
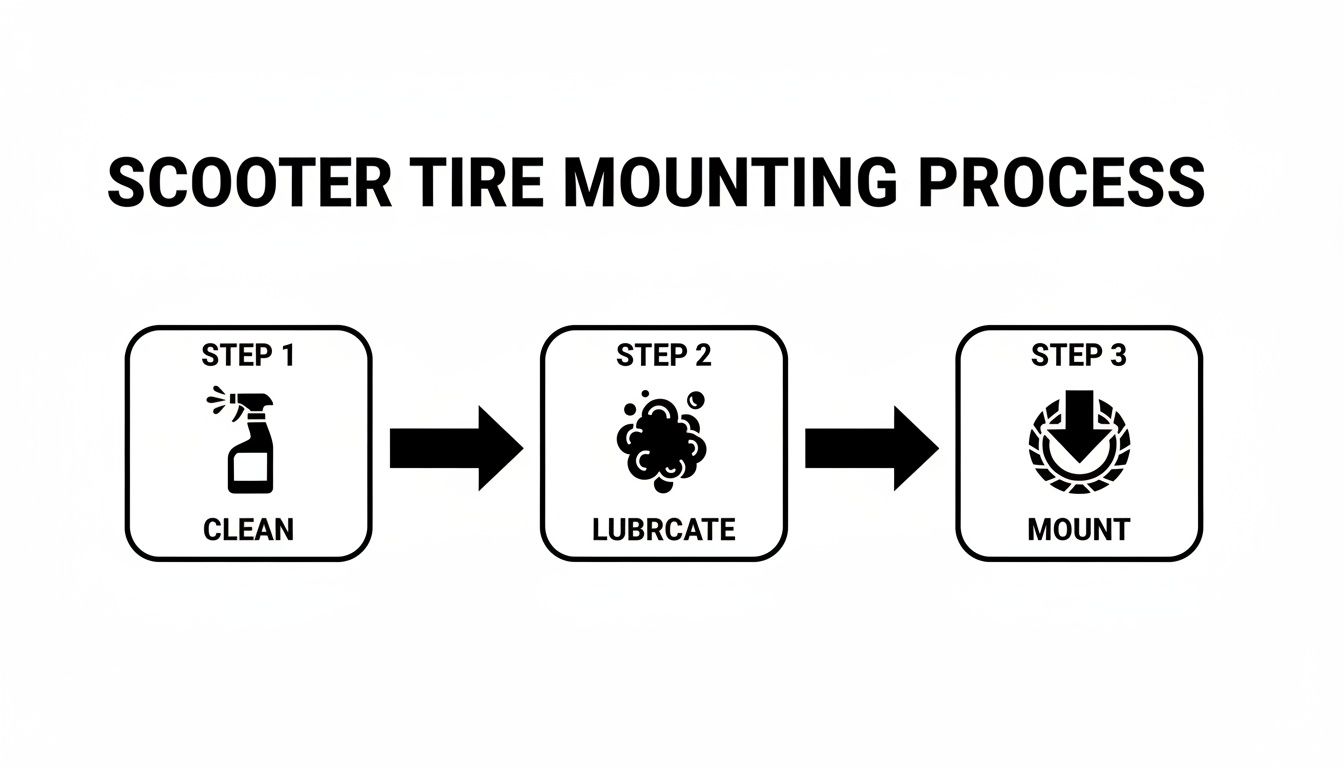
As you can see, it really boils down to three simple but critical actions: making sure the rim is clean, lubing up the tire bead, and then carefully mounting it.
Torque It Right Every Time
Once the wheel is seated and you've got the hardware back in place, it's time to tighten the axle nuts. Now, listen up, because this is probably the most important piece of advice I can give you: do not just guess how tight to make it. "Good and tight" is not a torque spec, and getting it wrong can lead to a really bad day.
An under-tightened nut can wiggle loose while you're riding—and I don't need to explain why that's a catastrophic failure waiting to happen. On the other hand, over-tightening can wreck your wheel bearings or even strip the axle threads.
The only way to do this job properly is with a torque wrench. Find your scooter's specific torque value for the axle nuts—it'll be in your owner's manual, listed in Newton-meters (Nm) or foot-pounds (ft-lbs). Professionals use torque wrenches for a reason. It’s all about safety and precision.
Remember, before you even think about lifting your scooter or taking off a wheel, make sure it’s completely stable. Using quality safety gear, like some of the best RV wheel chocks, is non-negotiable to keep it from rolling away while you work.
Your Final Pre-Flight Checklist
With the wheel torqued down, you're so close to being done. But before you go for a victory lap, you need to run through a few final checks. Think of it as your own personal quality control. Spending a few minutes on this now can save you a world of hurt later.
Here's what you absolutely have to check:
- The Spin Test: Give the wheel a good, solid spin with your hand. It should turn freely and smoothly, without any weird grinding sounds or resistance. Keep a close eye on it to make sure the tire isn't rubbing on the frame, fender, or any part of the brake assembly.
- The Brake Check: Pump your brake lever a few times. It should feel firm, not mushy or spongy. Now, spin the wheel again and hit the brake. It needs to engage cleanly and bring the wheel to a prompt stop.
- The Final Pressure Check: With the tire fully seated and the wheel back on the scooter, grab your gauge and check the tire pressure one last time. Top it up to the recommended PSI, which you can find on the tire's sidewall or in your scooter's manual. The principles are nearly identical to bicycles, so for more detail on getting it just right, check out our guide on how to properly inflate tires.
Once you've cleared all three of these checks, you can confidently lower your scooter off its stand. Give yourself a pat on the back—you just learned how to change a scooter tire yourself, saving some cash and picking up a genuinely useful skill.
Got Questions About Changing Your Scooter Tires? We've Got Answers
Even with the best guide, you're bound to have a few questions, especially when you're elbow-deep in your first tire change. I've been there. To help you out, here are some of the most common questions we get from riders just like you.
So, How Often Do I Actually Need to Change My Tires?
Honestly, there's no single "magic number" for this. It really boils down to how you ride, the roads you're on, and the tires themselves. If you're commuting daily through a city like Sydney or Los Angeles, you'll want to give your tires a good look-over every few months. A safe bet for replacement is somewhere in the 3,000 to 6,000 mile range.
But more than just mileage, you need to learn to spot the warning signs. Your tires will tell you when they're done.
- Check the Tread Wear Bars: Look inside the main grooves of your tire for little raised rubber bars. Once your tread wears down to be level with those bars, it's game over. Time for a new tire.
- Look for a "Squared-Off" Shape: If you do a lot of straight-line riding, the center of your tire can wear flat. This "squared-off" profile messes with your handling and makes cornering feel sketchy and unpredictable.
- Watch for Old Age: Rubber doesn't last forever. Check for tiny cracks in the sidewalls or any weird bulges. If a tire is over five years old, you should replace it, even if the tread looks fine. The rubber gets brittle and just isn't safe anymore.
Puncture! Do I Repair It or Replace the Whole Thing?
Great question, and the answer is... it depends. It really comes down to what kind of tire you have and where the hole is. Getting this right can save you a lot of grief (and money). We've got a whole separate guide on this, so for a deep dive, check out our article on how to repair a scooter tire.
If you're running tubeless tires, a small, clean puncture right in the main tread area is usually fixable with a simple plug kit. A well-done plug is a permanent, safe fix. But—and this is a big but—if the puncture is on or even near the sidewall, the tire is toast. It must be replaced, no exceptions.
For tires with an inner tube, you almost never replace the whole tire for a simple flat. You just swap out the inner tube for a new one. The key here is to carefully run your fingers along the inside of the tire to find and remove whatever sharp object caused the flat to begin with. Don't skip this step!
My Personal Rule: On a tubeless tire, if the hole is too big for a standard plug to seal it easily, I don't mess around. I just replace the tire. It's not worth the risk of a shoddy repair failing when I'm miles from anywhere.
What's This Going to Cost Me? DIY vs. a Mechanic
This is where you can save some serious cash. If you tackle the job yourself, your only real cost is the new tire. A decent scooter tire will set you back anywhere from $30 to over $80, depending on the brand, size, and whether it's a high-performance model.
Take your scooter to a shop, and you're paying for that same tire plus their time. Labor rates for this kind of job typically run from $40 to $90 per wheel. That cost can jump up if your scooter has a tricky design, like a single-sided swingarm, which makes getting the wheel off a bigger pain for the mechanic.
By putting in a little time to learn this skill, you can easily save yourself a hundred bucks or more on a single tire change and, bonus, get back on the road way faster.
At Punk Ride, we're all about giving riders the knowledge and gear to stay on the move. Whether you're a hardcore daily commuter or just love cruising on weekends, we've got the high-performance electric ride for you. Check out our curated collection at https://www.punkride.com.
Share:
Moped vs Ebike Choosing Your Perfect Urban Ride
E Scooter Comparison: A Practical Guide for US and Australian Riders