
O pană la anvelopa scuterului tău electric este mai mult decât un inconvenient; poate deraia complet ziua ta. Dar înainte să începi să cauți cel mai apropiat service, respiră adânc. Poți face asta. Repararea unei anvelope de scuter este o treabă complet gestionabilă, atâta timp cât știi ce faci.
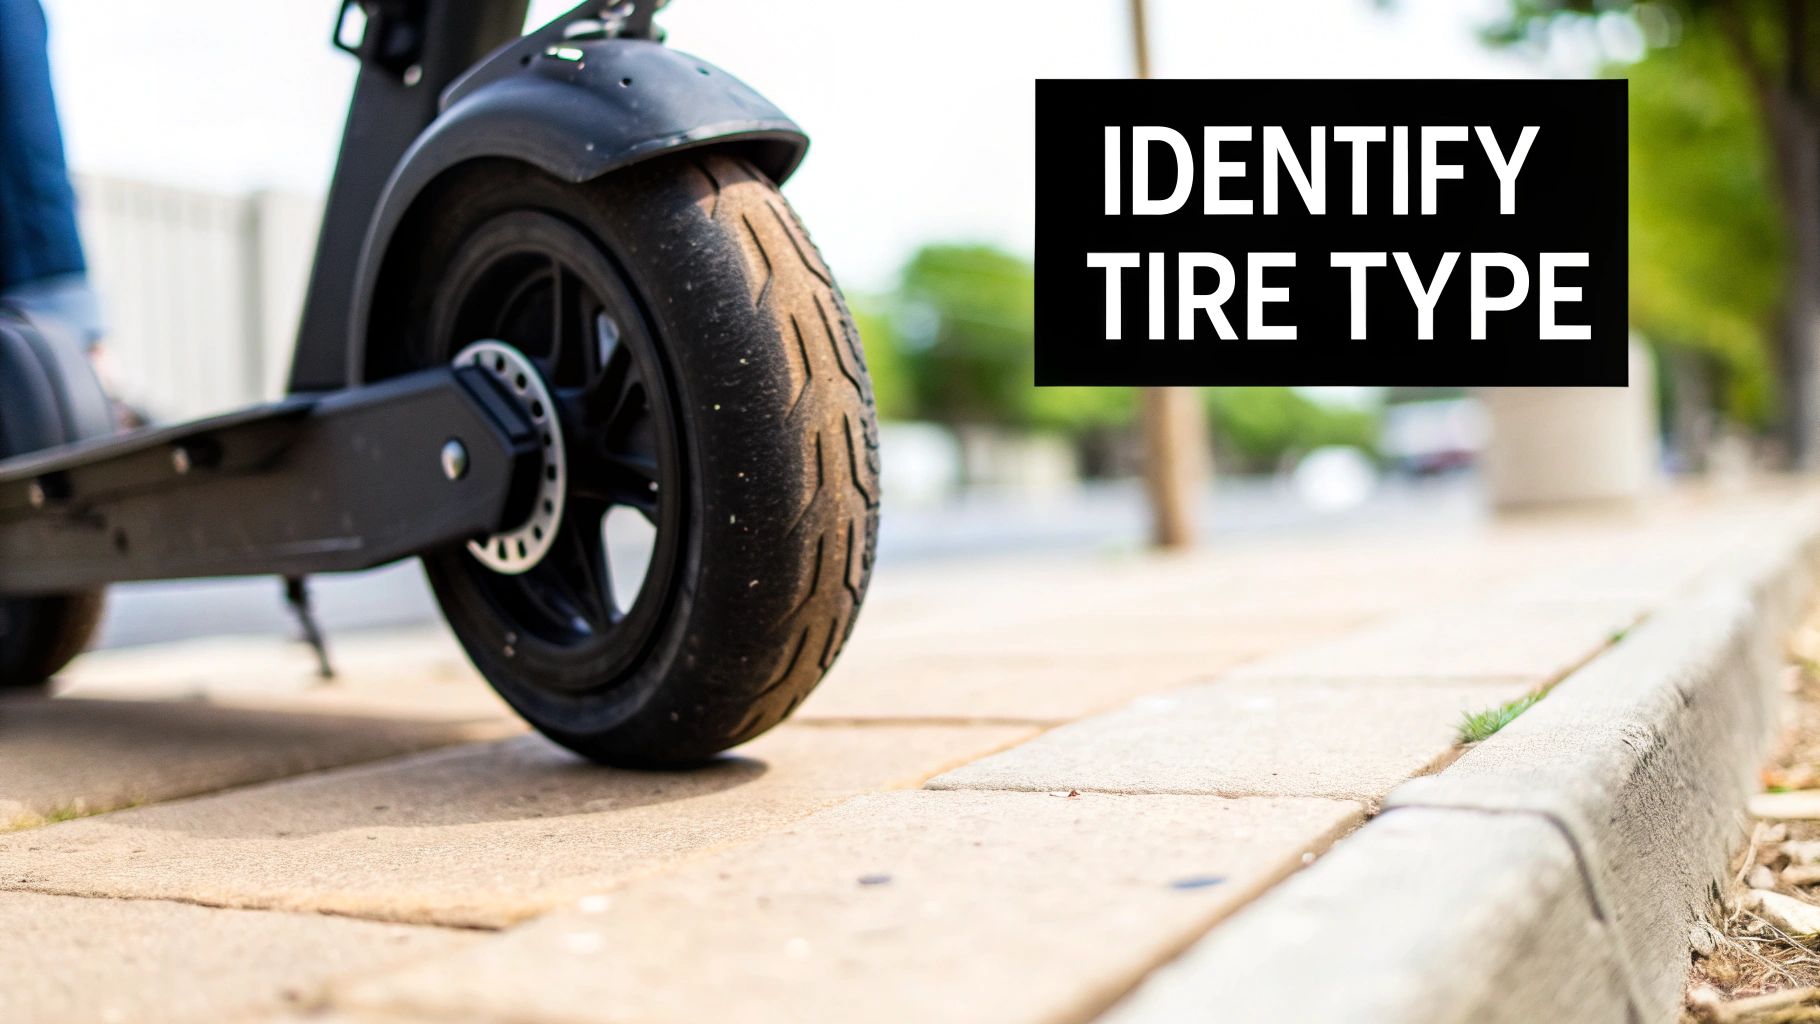
Primul lucru absolut pe care trebuie să-l afli este ce tip de anvelopă ai. Acest detaliu schimbă totul în modul în care vei aborda reparația.
Primul tău pas pentru o pană la anvelopa scuterului
Să vezi anvelopa dezumflată e o adevărată supărare, fie că navighezi pe străzile aglomerate din New York sau te plimbi prin Melbourne. Dar sincer, majoritatea panărilor sunt surprinzător de simple de reparat cu uneltele potrivite și puțină răbdare.
Gândește-te la asta ca la foaia ta personală de trucuri pentru a te întoarce pe drum. Cel mai important pas este să identifici dacă lucrezi cu o anvelopă cu cameră (pneumatică) sau fără cameră.
Cu cameră vs. fără cameră: Diferența critică
Deci, cum le poți deosebi? De fapt, este destul de simplu.
Privește cu atenție valva — micuța duză pe care o folosești să umfli anvelopa. Dacă vezi o piuliță înfiletată pe janta roții care ține valva fixă, ai o anvelopă fără cameră. Dacă valva este doar cauciuc neted și se mișcă puțin, ai de-a face cu o anvelopă cu cameră clasică.
Să știi asta este crucial pentru că procesul de reparație este complet diferit pentru fiecare.
- Anvelope cu cameră: La fel ca la o bicicletă, acestea au o cameră interioară separată în anvelopă care reține aerul. Când faci pană, trebuie să scoți roata, să dai jos anvelopa de pe jantă și apoi să repari camera sau, mai des, să o înlocuiești.
- Anvelope fără cameră: Acestea creează o etanșare ermetică direct pe janta roții. Pentru perforații mai mici, poți adesea să astupi gaura din exterior fără să scoți roata de pe scuter. Este o reparație mult mai rapidă.
Sfat de expert: Dacă încă nu ești sigur, o verificare rapidă a manualului scuterului tău sau a site-ului producătorului îți va spune sigur. Să știi tipul anvelopei înainte să faci pană îți salvează multă frustrare când ești blocat pe marginea drumului.
Aceasta este răscrucea pentru reparația ta. O reparație fără cameră poate fi o treabă rapidă de 15 minute, în timp ce înlocuirea unei anvelope cu cameră necesită mai multă demontare și efort. Pentru a fi și mai clar, să descompunem diferențele cheie.
Reparare cu cameră vs. fără cameră pe scurt
Iată o comparație rapidă pentru a vedea diferitele unelte, metode și provocările tipice cu care te vei confrunta în funcție de tipul anvelopei scuterului tău.
| Caracteristică | Anvelope cu cameră | Anvelope tubeless |
|---|---|---|
| Metoda de reparare | Aplicarea plasturelui sau înlocuirea camerei | Doparea găurii din exterior |
| Unelte comune | Leviere pentru anvelope, kit de plasturi, pompă | Instrument de găurire, unealtă pentru dopuri, dopuri de cauciuc, pompă |
| Provocarea principală | Evitarea „penelelor prin prindere” în timpul reinstalării | Asigurarea că dopul creează o etanșare perfectă |
Practic, la anvelopele cu cameră, cea mai mare problemă este să pui anvelopa înapoi fără să prinzi accidental camera nouă. La tubeless, tot jocul este să te asiguri că acel mic dop de cauciuc sigilează complet gaura. Acum că știi cu ce te confrunți, poți aduna uneltele potrivite și să te apuci de treabă.
Pregătirea trusei tale de reparare a anvelopelor
Înainte să te gândești să repari o pană, trebuie să ai echipamentul potrivit. Serios, am văzut oameni încercând să scoată o anvelopă cu o șurubelniță de bucătărie, și nu se termină niciodată bine. Vei rămâne doar cu o jantă zgâriată și multă frustrare. Să-ți pregătești trusa de scule câteva minute înainte schimbă totul.
Vestea bună este că nu ai nevoie de un atelier complet în garajul tău. Câteva obiecte cheie te vor ajuta să faci față aproape oricărei pene pe care o poți întâlni pe drumurile din SUA și Australia. Având aceste lucruri pregătite înseamnă că ești mereu pregătit.
Elementele absolut esențiale
Gândește-te la acestea ca la elementele tale de bază fără de care nu poți negocia. Fără ele, ești practic blocat.
- Leviere pentru anvelope: Acestea sunt cei mai buni prieteni ai tăi pentru a scoate anvelopa de pe jantă. Ia un set de două sau trei făcute din plastic dur sau metal—doar asigură-te că au margini rotunjite ca să nu zgârii vopseaua jantei.
- Pompă de aer: O pompă mică, portabilă de mână sau o pompă mai mare de podea cu manometru este indispensabilă. Ai nevoie de ea pentru a găsi scurgerea în primul rând și, evident, pentru a umfla anvelopa la presiunea corectă după ce ai terminat.
- Kit de reparare (plasture sau dop): Ce ai nevoie aici depinde în totalitate de tipul anvelopei tale. Dacă ai camere, un kit standard de plasturi pentru bicicletă cu ciment cauciucat și plasturi este tot ce-ți trebuie. Pentru anvelopele tubeless, vei dori un kit cu dopuri, care vine cu un instrument de găurire, un instrument de inserție și câteva dopuri de cauciuc lipicioase.
Cererea pentru aceste soluții simple DIY explodează. Piața globală a kiturilor de reparare a anvelopelor a fost evaluată la aproximativ 2,5 miliarde de dolari în 2023 și este pe cale să atingă o estimare de 4,2 miliarde de dolari până în 2033. Această creștere se datorează în totalitate riderilor ca noi, care preferă reparații rapide și ieftine în locul unei vizite la service. Poți citi mai multe despre piața în creștere pentru aceste kituri esențiale dacă ești curios.
Unelte utile care fac viața mai ușoară
Deși prima listă acoperă strictul necesar, câteva unelte suplimentare pot face toată treaba mult mai ușoară.
Un pulverizator umplut cu apă săpunată este arma mea secretă. Este cea mai rapidă și sigură metodă de a găsi o scurgere lentă la o roată tubeless—doar pulverizează și urmărește bulele caracteristice.
Iată câteva alte lucruri pe care le am mereu la îndemână:
- Chei Allen sau chei fixe: Piulițele axului trotinetei tale nu vor ceda doar cu voință. Ai nevoie de o cheie de dimensiunea potrivită sau de o cheie Allen pentru a scoate roata. Află ce folosește modelul tău și pune-o în trusa ta.
- Extractor de miez de valve: Această unealtă mică și ieftină îți permite să dezumfli complet o roată în câteva secunde prin scoaterea miezului valvei. Este un adevărat salvator când te confrunți cu o margine tubeless încăpățânată.
- Mănuși: O pereche simplă de mănuși de mecanic îți va ține mâinile curate de toată murdăria și grăsimea de pe drum.
Investind puțin acum în aceste unelte îți va economisi mult timp, bani și o durere de cap uriașă mai târziu. Cu o trusă bine echipată, o pană devine o oprire minoră, nu un dezastru care-ți strică ziua.
Scoate roata (fără luptă)
Bine, aici mulți se înspăimântă, dar promit că nu e atât de înfricoșător pe cât pare. Să scoți roata de pe trotineta ta este complet realizabil. Secretul este să fii metodic, să-ți iei timp și să nu forțezi nimic—mai ales dacă lucrezi la roata din spate, unde se află motorul la majoritatea trotinetelor.
Mai întâi de toate, să ne ocupăm de cablurile motorului. Vei vedea un mănunchi de fire care leagă motorul roții de cadrul trotinetei. Uneori au un conector rapid simplu, dar alteori poate fi nevoie să desfaci o mică capacă pentru a ajunge la ele. Orice ai face, fii delicat. Ultimul lucru pe care îl vrei este să îndoi sau să rupi unul dintre pini conectori.
Pro Tip pe care l-am învățat pe pielea mea: Înainte să atingi vreun șurub, scoate telefonul. Fă o poză rapidă și clară cu modul în care sunt conectate cablurile, ordinea exactă a șaibelor și distanțierelor de pe ax și traseul firelor. Serios, acest mic pas îți va salva o durere de cap imensă când va veni timpul să reasamblezi totul.
Eliberarea roții din cadru
Odată ce motorul este deconectat în siguranță, poți să-ți îndrepți atenția către piulițele axului. Acestea sunt piulițele mari de pe fiecare parte a roții care o fixează în cadru. Ia cheia potrivită din trusa ta de unelte și pregătește-te să le slăbești. De obicei, sunt strânse destul de tare din fabrică, așa că s-ar putea să fie nevoie să aplici o forță constantă și puternică.
După ce ai slăbit ambele piulițe, vei simți că roata începe să aibă puțin joc. Acesta este semnalul să o aluneci cu grijă în jos și afară din dropout-uri (sloturile în formă de U din cadru). Fii atent la etrierul de frână și la rotor pe măsură ce faci asta—va trebui să ghidezi discul de frână afară fără să-l îndoi. Și iată că roata este liberă.
Acest flux vizual arată procesul de bază al oricărei reușite repară anvelopa trotinetei job: folosirea uneltelor potrivite în ordinea corectă.
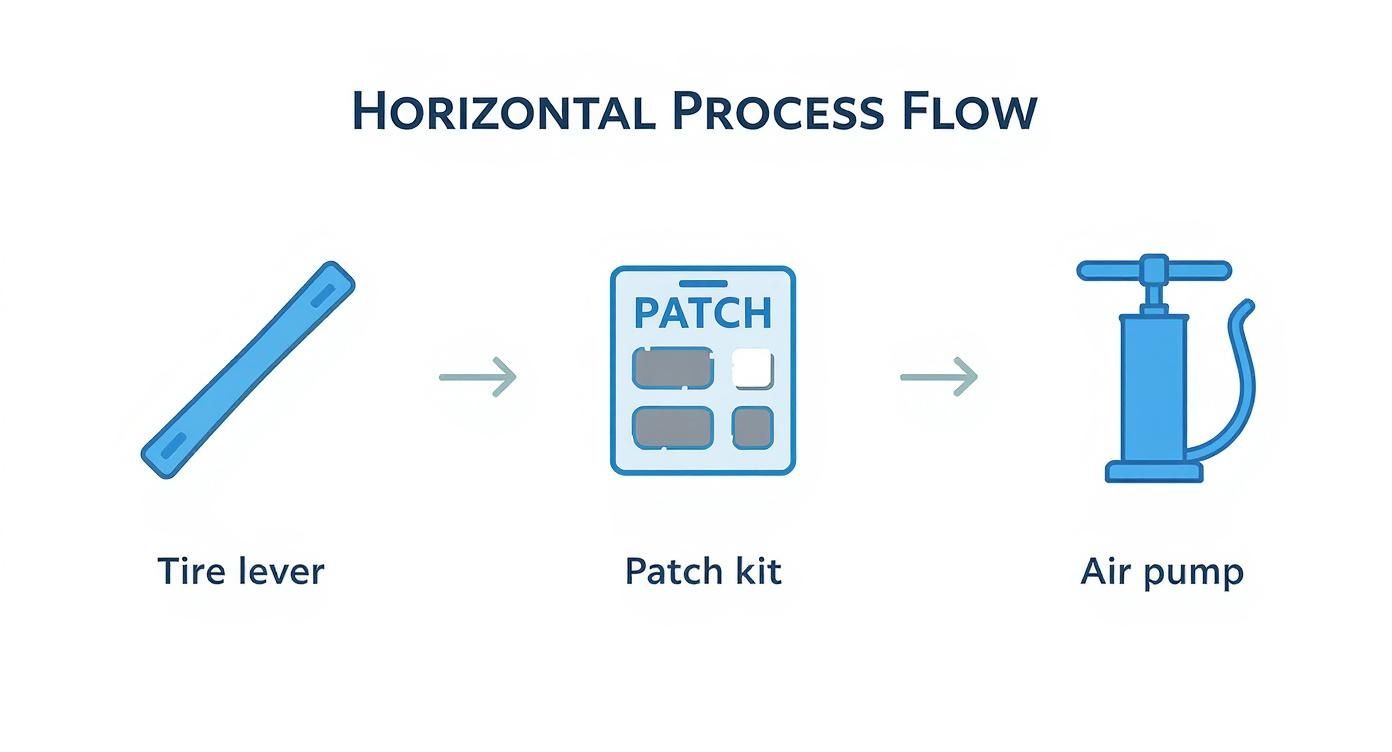
După cum vezi, odată ce ai scos anvelopa cu levierele, poți trece la repararea propriu-zisă (lipirea), apoi să o pregătești pentru reasamblare cu pompa.
Scoate anvelopa de pe jantă
Acum urmează evenimentul principal—lupta dintre tine și anvelopă. Marginea anvelopei, numită bead, este fixată strâns pe jantă pentru a crea o etanșare ermetică și nu vrea să se desprindă.
Înainte să începi, asigură-te că ai scos tot aerul din anvelopă. Dacă valva ta are un miez detașabil, scoate-l. Apoi, mergi în jurul întregii anvelope, strângând și împingând marginea departe de jantă și în canalul adânc din centrul roții. Acest pas este crucial deoarece îți oferă jocul necesar pentru a introduce levierele de anvelopă.
Odată ce ai făcut asta, ești gata să forțezi.
- Introdu primul levier. Împinge capătul curbat al unui levier de anvelopă între anvelopă și jantă.
- Ridică marginea peste. Trage mânerul levierului în jos și în afară, folosind janta ca punct de sprijin pentru a ridica o mică secțiune a marginii anvelopei peste margine.
- Adaugă al doilea levier. La câțiva centimetri de primul, introdu al doilea levier și fă exact același lucru. De obicei, acesta este momentul în care anvelopa începe în sfârșit să coopereze.
- Alunecă spre victorie. Cu două leviere ținând o secțiune a marginii ridicată, poți adesea să aluneci unul dintre ele în jurul restului jantei, iar toată partea se va desprinde imediat.
Întoarce roata și repetă totul pentru cealaltă parte. Un prieten de-al meu jură că folosirea unor cleme rezistente de plastic pentru a strânge anvelopa în timp ce lucrează ajută, deoarece împiedică marginea să alunece înapoi la loc. Necesită ceva efort, dar înainte să-ți dai seama, anvelopa va fi complet separată de jantă.
Găsirea penei și realizarea unei reparații solide
https://www.youtube.com/embed/nCwWPlaghfs
Bine, cu anvelopa și tubul în sfârșit scoase de pe roată, e timpul să joci detectivul. Vinovatul poate fi orice, de la o gaură mică și ascunsă lăsată de o ciob de sticlă până la o tăietură mai evidentă de la un cui peste care ai trecut săptămâna trecută. Găsirea ei este cea mai importantă parte pentru a face această reparație a anvelopei scuterului corect.
Testul cu bule clasic
Dacă ai de-a face cu un tub interior clasic, cea mai bună metodă este încă cea mai simplă. Umflă tubul doar cât să-și păstreze forma, apoi scufundă-l într-o găleată cu apă, secțiune cu secțiune. Fii răbdător aici. Cauți un mic șir de bule care ies din gaură. Odată ce le vezi, ai găsit scurgerea.
Pentru anvelopele tubeless, este și mai ușor. Amestecă puțin detergent de vase cu apă într-un pulverizator și dă anvelopa cu un spray bun. Aerul care scapă din pană va crea o zonă spumoasă, cu bule chiar acolo unde trebuie să lucrezi.
Pregătirea zonei pentru o reparație durabilă
De îndată ce găsești gaura, marcheaz-o! Ia o bucată de cretă, un marker argintiu, orice ai la îndemână. Nu crede că îți vei aminti unde este, pentru că nu o vei face. Odată marcată, poți lăsa tot aerul să iasă și să te pregătești să repari.
Pentru un tub interior, pregătirea corectă face diferența între o reparație permanentă și o frustrare temporară. Nu doar lipești un autocolant; creezi o legătură vulcanizată care face tubul întreg din nou.
- Zgârie suprafața: Kitul tău de plasturi ar trebui să aibă o răzătoare mică de metal sau o bucată de șmirghel. Folosește-o pentru a asprii cauciucul din jurul găurii. Vrei să creezi o textură mată, abrazivă, eliminând orice finisaj neted sau lucios.
- Aplică lichidul de vulcanizare: Stoarce un strat subțire și uniform de ciment de cauciuc peste zona zgâriată. Asigură-te că zona acoperită este puțin mai mare decât plasturele pe care urmează să-l folosești.
- Lasă-l să se usuce (serios): Aici greșesc majoritatea oamenilor. Devin nerăbdători. Trebuie să lași lichidul să se usuce complet. Ar trebui să treacă de la lucios și umed la un aspect mat, tern. Dacă îl atingi, ar trebui să se simtă lipicios, nu umed.
Aplicarea Plasturelui sau Dopului
Odată ce lichidul de vulcanizare este gata, dezlipește suportul de pe plasture și apasă-l ferm peste gaură. Adică, apasă cu adevărat. Folosește-ți degetul mare și aplică o presiune constantă și puternică timp de cel puțin un minut întreg. Acest lucru asigură că reacția chimică creează o legătură la fel de puternică ca tubul original.
Dacă ai o anvelopă tubeless, procesul este puțin diferit. Kitul tău va include două unelte cu mâner în T: un reamer și un instalator de dopuri. Mai întâi, introdu reamer-ul în gaură și rotește-l pentru a curăța orice resturi și a crea un canal uniform. Apoi, treci unul dintre acele dopuri de cauciuc lipicioase prin ochiul uneltei de instalare, împinge-l în gaură până când aproximativ jumătate de inch iese afară, apoi trage unealta direct înapoi. Dopul rămâne fix, sigilând scurgerea instantaneu.
Un patch sau un dop aplicat corect nu este doar o soluție temporară—este una permanentă. Secretul este să acorzi timp pregătirii. O lucrare făcută în grabă acum te va face să repeți tot procesul peste o săptămână.
Tehnologia din spatele acestor kituri simple se îmbunătățește mereu. Piața de patch-uri pentru repararea anvelopelor este estimată să crească de la 648,3 milioane USD în 2025 la aproape 950,4 milioane USD în 2035. Această creștere este alimentată de materiale mai bune și adezivi mai puternici care fac reparațiile pe marginea drumului mai ușoare ca niciodată. Poți vedea prognoza completă a pieței pe Future Market Insights pentru o analiză mai detaliată.
Principiile de bază sunt aceleași, fie că lucrezi la o trotinetă sau la un alt set de roți. De fapt, poți consulta ghidul nostru despre cum să repari anvelopele de e-bike pentru mai multe sfaturi aplicabile în general.
Asamblarea completă pentru o plimbare în siguranță

Bine, ai scos anvelopa veche și acum e timpul pentru boss-ul final: montarea celei noi. Această parte poate fi la fel de încăpățânată ca demontarea, dar câteva trucuri din meserie o fac mult mai ușoară. Doar amintește-ți, răbdarea este cheia aici.
Practic faci totul invers. Începe prin a așeza o parte a marginii anvelopei pe jantă. Puțină apă săpunată aplicată pe interiorul anvelopei și pe marginea jantei va fi cel mai bun aliat, ajutând totul să alunece ușor la loc fără probleme.
Montarea corectă a anvelopei și a camerei
Cu o parte a anvelopei montată, e timpul să introduci camera (dacă folosești una). Fii foarte atent aici—este momentul critic pentru un „pinch flat”, adică atunci când înțepi accidental camera nou-nouță înainte să te dai cu ea. Este extrem de frustrant.
Iată cum să eviți acea greșeală de începător: umflă noua cameră doar atât cât să-i dai o formă. Țintești spre o „cârnaț” moale, nu spre un balon rigid. Acea cantitate mică de aer o ajută să stea corect în interiorul anvelopei și o împiedică să se prindă sub marginea anvelopei în timp ce montezi a doua parte.
Acum poți începe să lucrezi partea cealaltă a marginii anvelopei peste jantă. Mergi încet, folosește cu grijă levierele pentru anvelope și lucrează pe secțiuni mici. Încearcă să împingi marginea în canalul central al jantei pe măsură ce avansezi; asta îți va da suficientă libertate pentru a trece ultima secțiune încăpățânată peste margine.
Umflare și verificări finale de siguranță
Odată ce anvelopa este complet pe jantă, poți în sfârșit să o umfli. Ia pompa și caută PSI-ul (lire pe inch pătrat) recomandat, tipărit chiar pe peretele lateral al anvelopei. Nu te ghida după ochi! Subumflarea este o cauză majoră a panărilor și poate face ca trotineta să se manevreze prost.
Acum poți monta roata înapoi pe trotinetă. Aici poza pe care ai făcut-o mai devreme este de mare ajutor. Pune fiecare șaibă și distanțier în exact aceeași ordine în care le-ai scos. Introdu roata la loc, reconectează cablurile motorului dacă le ai și strânge bine piulițele axului.
Nu te urca încă. Parcurge mai întâi aceste verificări finale:
- Rotește roata. Se mișcă liber? Ascultă dacă se aud zgomote de frecare de la discul de frână care atinge plăcuțele. Dacă auzi frecare, probabil va trebui să reajustezi etrierul frânei.
- Verifică din nou piulițele. Serios. Mai dă o tură piulițelor axului cu cheia pentru a te asigura că sunt bine strânse. O roată slăbită este o rețetă pentru dezastru.
- Curăță. Șterge anvelopa și janta pentru a elimina orice urmă de apă săpunată sau grăsime.
O reparație solidă a anvelopei trotinetei se încheie întotdeauna cu un test de condus rapid și atent. Pentru mai multe metode de a păstra fiecare plimbare în siguranță, consultă ghidul nostru cu sfaturi esențiale de siguranță pentru trotinetele electrice.
Acum, bucură-te de o plimbare lină. Ai meritat-o.
Repar sau înlocuiesc? Cum să decizi în privința anvelopei trotinetei tale
Deci ai o pană. Înainte să iei trusa de reparat, trebuie să decizi dacă o reparație DIY este chiar soluția potrivită. Nu orice pană poate sau ar trebui reparată. Să iei decizia corectă aici nu ține atât de economisirea banilor, ci mai mult de siguranța ta pe drum.
O pană mică și curată, de genul celei cauzate de un cui sau o ciob de sticlă chiar în mijlocul benzii de rulare? Acesta este candidatul perfect pentru un petic sau un dop. Este o reparație simplă care te va pune din nou pe drum în cel mai scurt timp. Pentru majoritatea celor care doresc să repare anvelopa trotinetei singuri, acesta este cel mai bun scenariu.
Semnale de alarmă: Când înlocuirea este obligatorie
Pe de altă parte, unele daune sunt un motiv de renunțare. Dacă observi oricare dintre următoarele, nici măcar nu te gândi să le repari. E timpul pentru o anvelopă nouă, punct.
Cel mai mare interzis absolut este orice deteriorare a peretelui lateral. Peretele lateral al unei anvelope se flexează constant și nu este conceput să țină un plasture. O reparație acolo este o invitație la explozie, care probabil se va întâmpla în cel mai nepotrivit moment.
Iată câteva alte semne care strigă „înlocuiește-mă”:
- Tăieturi sau rupturi mari: Dacă gaura este mai mare de 6 mm (un sfert de inch), în general este prea mare pentru a fi reparată în siguranță.
- Se văd cablurile: Vezi fire de material textil sau metalice care ies prin cauciuc? Integritatea structurală a anvelopei este compromisă.
- Profil uzat: Verifică barele indicator de uzură de pe anvelopa ta. Dacă profilul este uzat până la acel nivel, anvelopa este cheală și nu-ți va oferi aderența necesară, mai ales când este ud.
- Multiple pene: O anvelopă care arată ca și cum ar fi trecut printr-o zonă de război cu găuri multiple este prea compromisă pentru a fi de încredere.
Anvelopele tale sunt singurul lucru care te leagă de sol. Să riști cu o reparație dubioasă pentru a economisi câțiva bani nu merită niciodată siguranța ta.
Oferindu-i anvelopei tale o evaluare sinceră
Îmi place să mă gândesc la asta ca la o pereche de pantofi de alergare vechi. Poți înlocui ușor un șiret rupt (o pană mică), dar nu te-ai chinui să lipești talpa când este complet uzată. Aceeași logică se aplică. O anvelopă cu un profil subțire și uzat nu poate oferi tracțiunea necesară pentru a rămâne în echilibru, mai ales dacă folosești o trotinetă electrică all-terrain care circulă pe mai mult decât asfalt neted.
Este o piață uriașă. Întreaga industrie a anvelopelor pentru vehicule cu două roți a fost evaluată la aproximativ 14,2 miliarde USD în 2023, iar segmentul anvelopelor pentru trotinete a fost valorat la aproximativ 1,9 miliarde USD încă din 2021. Asta îți arată câți oameni se bazează zilnic pe anvelopele lor. Dacă ești curios, poți descoperi mai multe informații despre piața sigilanților pentru anvelope pe industryresearch.biz. La finalul zilei, să știi când să renunți și să iei o anvelopă nouă este partea cea mai importantă a muncii.
Când vine timpul pentru un upgrade sau o nouă plimbare, Punk Ride oferă o selecție atentă de trotinete și biciclete electrice performante de la cele mai bune branduri. Găsește-ți partenerul perfect pentru o călătorie urbană fără efort și ecologică la https://www.punkride.com.
Distribuie:
Cum să Alegi o Bicicletă Electrică: Un Ghid Clar despre Motoare și Baterii
Care este costul asigurării pentru biciclete electrice în Australia și SUA?