Sooner or later, every electric scooter rider experiences it: the dreaded flat tire. It's practically a rite of passage, but it doesn't have to ruin your day. The good news? You can absolutely replace a scooter tire yourself. It’s all about having the right tools, a bit of patience, and a solid game plan.
That Dreaded Flat Tire: A Realistic Look at the Job Ahead
Let's be real for a second. Your first time swapping a scooter tire will probably feel a little awkward, and that's okay. This isn't a job about brute strength; it's a test of patience and technique. Our goal here is to walk you through the entire process, from start to finish, without any of the fluff.
We'll cover everything from getting the wheel off to that final, satisfying pump of air. Forget confusing jargon. We’re here to talk about the real challenges you'll face—like those ridiculously stubborn tires—and how to overcome them. With the right guidance, this is a skill you can definitely add to your toolkit.
Setting the Right Expectations
Before you even think about picking up a wrench, it's important to set some realistic expectations. You've probably seen a YouTube video where someone changes a tire in five minutes flat. For your first attempt, that's... unlikely. Those small, stiff scooter tires can put up a serious fight.
The toughest part for most people isn't loosening bolts or nuts. It's the physical struggle of prying the old tire off the rim and then wrestling the new one back on. It's a workout for your hands and your patience.
Knowing this ahead of time is half the battle. Don't get frustrated if you’re struggling. Just give yourself plenty of time, make sure you have the right tools laid out, and take a break if you need to.
What You Are Signing Up For
So, what does this process actually look like? Here’s a quick snapshot of the time, tools, and cost involved when you decide to replace a scooter tire on your own.
| Aspect | What to Expect |
|---|---|
| Estimated Time | 45 to 90 minutes for your first try. It gets much faster with practice. |
| Difficulty Level | Medium. Requires some physical effort and mechanical common sense. |
| Essential Tools | Tire levers, wrench/socket set, and a good pump are non-negotiable. |
| Typical Cost | $20 to $50 for a new tire and inner tube. Way cheaper than a shop. |
Tackling this job yourself not only saves you a trip to the repair shop but also gives you a much better understanding of how your scooter is put together. It's a great way to build confidence and become a more self-reliant rider.
Getting Your Toolkit Ready for a Hassle-Free Tire Swap
Before you even think about touching a wrench to a nut, let's get your gear sorted. Trust me, trying to wrestle a new tire onto a scooter rim with the wrong tools is a one-way ticket to frustration, scratched-up wheels, and busted knuckles. Taking a few minutes to lay everything out first makes this a clean, simple job instead of an afternoon-long battle.
It’s like cooking. You wouldn’t start dicing an onion without a sharp knife and a cutting board, would you? Same deal here. A little prep work goes a long way and saves you from that mid-job scramble for a tool you forgot.
The Tools You Can't Do Without
Look, you can improvise on a lot of things in life, but this isn't one of them. Skimping on the basics will make this job ten times harder than it needs to be. You're dealing with small, tough wheels, and you need the right leverage.
Here's the rundown of your must-haves:
- Tire Levers: Please, don't use screwdrivers—you'll just chew up your rim. You need a couple of sturdy, metal tire levers built for small wheels. Good ones have a hook on one end and a smooth, rounded tip on the other to avoid pinching the new inner tube.
- Wrench or Socket Set: Most scooter axle nuts are a specific size, usually somewhere between 15mm and 19mm. An adjustable wrench can get you by, but a proper socket gives you a much better grip and seriously lowers the risk of rounding off the nut.
- A Good Pump: You need a pump with a pressure gauge to get the inflation just right. A floor pump is your best friend here; it makes hitting the right PSI way easier than fiddling with a tiny hand pump.
- Soapy Water or Tire Lube: This is the game-changer. A spray bottle with a bit of dish soap and water is all you need. It makes slipping the old tire off and the new one on almost effortless.
For a lot of the general stuff, having a solid basic kit like a Stanley Essential Toolkit is a great starting point, covering your wrench needs and other bits and bobs for general scooter care.
Picking the Right Replacement Tire
Alright, now for the star of the show: the new tire. You can't just pick any random one. It has to match your scooter's specific size and type to be safe and perform correctly.
All the info you need is stamped right on the sidewall of your current tire. You'll see a set of numbers that looks something like 10x2.5 or 8.5x2.
Here's the breakdown:
- The first number (10 or 8.5) is the tire's outer diameter in inches.
- The second number (2.5 or 2) is the tire's width in inches.
It's absolutely critical to get a replacement with the exact same dimensions. The wrong size can rub against the scooter's frame, mess up the handling, and create a really dangerous riding situation.
Pro Tip: Do yourself a huge favor and just order a new inner tube at the same time. They're cheap, and there's nothing more soul-crushing than getting the tire back on only to find you've got a slow leak from a tired, old tube.
You've also got a few different types of tires to choose from. Most scooters ship with standard pneumatic (air-filled) tires because they give the most comfortable ride. But it's good to know your options.
| Tire Type | The Good | The Bad |
|---|---|---|
| Tubed Pneumatic | Super comfortable ride, easy to find, and cheap. | Can get punctures and pinch flats. |
| Tubeless Pneumatic | More puncture-resistant (can often be plugged), usually higher quality. | Tougher to seat on the rim, and your wheel has to be compatible. |
| Solid (Airless) | You will never get a flat. Ever. | The ride is incredibly harsh, they're a nightmare to install, and grip is worse. |
For most of us riding on varied city streets in Australia or the US, a quality pneumatic tire is still the best balance of comfort and performance. The thought of a puncture-proof solid tire is tempting, I get it, but the bone-rattling ride is a serious trade-off. Always put safety first—if you want to dig deeper, our guide on electric scooter safety tips is a great resource.
Getting the Wheel Off and Wrestling with the Old Tire
Alright, this is where you earn your stripes. Roll up your sleeves, because safely getting the wheel off is the first real challenge. Whether it's a simple front wheel or a tricky rear hub motor, the idea is the same, but the little details can make or break the job.
Don't rush this part. A stripped nut or a yanked wire can turn a 30-minute fix into a weekend-long headache. Getting the wheel off cleanly is half the battle when you need to replace a scooter tire.
This little diagram sums up the whole game plan. Get your stuff in order, and the whole process will be a lot less painful.
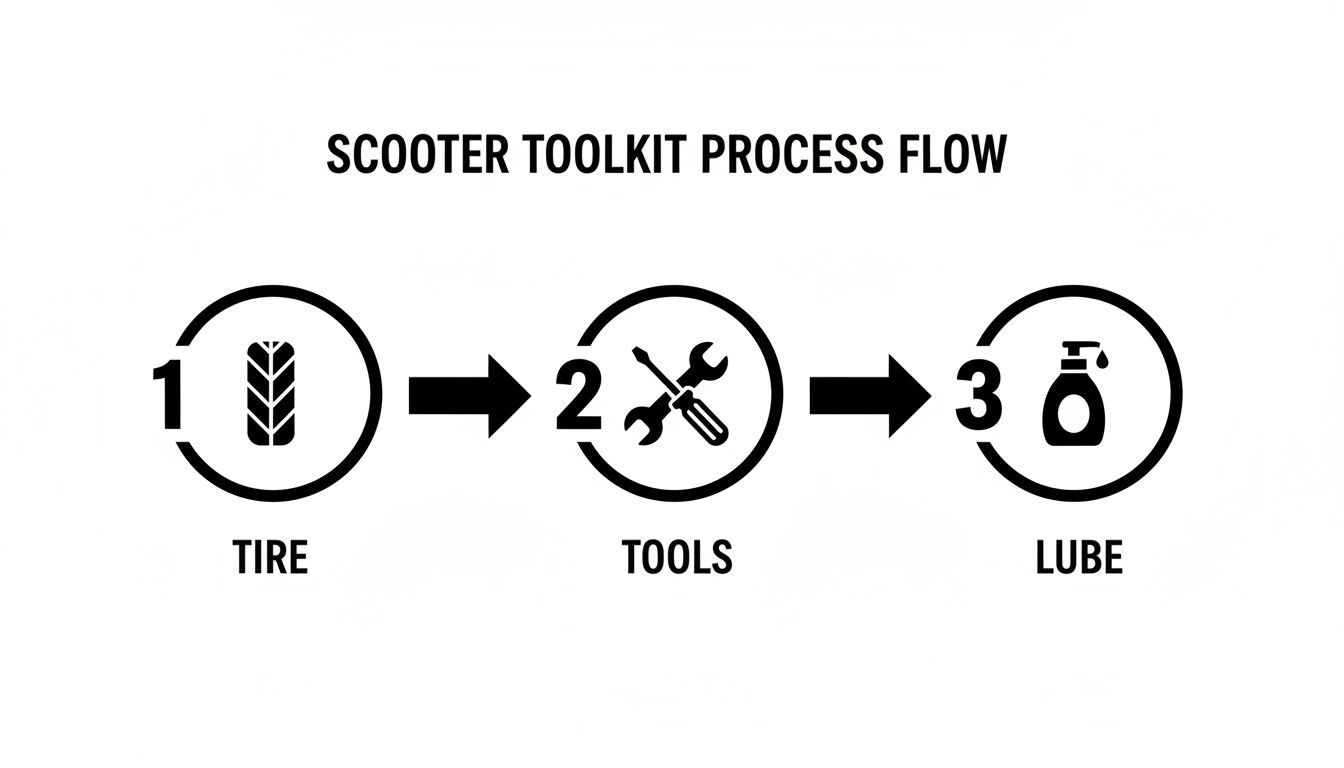
Seriously, having the new tire, the right tools, and some kind of lubricant ready to go before you start is the secret to not throwing a wrench across the garage.
Freeing the Wheel From the Scooter
First things first, power down the scooter completely. You’ll want to get it stable, either on a stand or flipped upside down on something soft like a blanket or a piece of cardboard to save your grips and display from getting scuffed up.
The front wheel is usually the easy one. You'll probably have to get the brake caliper out of the way first. It’s typically held on by two Allen bolts. Just undo them and gently swing the caliper aside—be careful not to put any strain on the brake line.
Now, the rear wheel is where things get more interesting, thanks to the hub motor. You'll see a thick motor wire running from the wheel into the scooter's deck. You need to carefully trace this back to its connector and unplug it. These plugs often have a little clip or a screw-on collar, so be gentle. Whatever you do, don't just pull on the wire itself.
With the brakes and wires out of the way, you can go after the big axle nuts on each side. They're on there tight for a good reason, so expect to use some muscle with your wrench or socket set.
Pro Tip: If an axle nut is giving you a hard time, hit it with a little penetrating oil (like WD-40) and give it five minutes to work its magic. It can be the difference between the nut coming loose and you stripping it completely.
The First Real Fight: Breaking the Bead
With the wheel finally off the scooter, you’ve arrived at the main event: prying that stubborn old tire off the rim. The first step is "breaking the bead," which is just the term for breaking the airtight seal where the tire's edge locks into the rim. It can feel like it's been super-glued on, especially with tubeless tires.
This is a battle of strategy, not just brute force.
- Get All the Air Out: And I mean all of it. Push the pin in the valve core to let every last wisp of air escape.
- Use Your Weight: Put the wheel flat on the ground and use your heels to stomp down hard on the tire's sidewall, working your way around the whole circle.
- Bring in the Clamps: If the bead absolutely refuses to budge, a big C-clamp or a bench vise is your best friend. Squeeze the sidewalls together until you hear a satisfying pop. That’s the sound of victory.
This is often the most physically draining part of the whole job. And there's a reason for it. The electric two-wheeler market is pushing tire tech forward, with projections showing growth from $14.9 billion in 2025 to $26.4 billion by 2032. A whopping 75% of that market is tubeless tires, prized for better puncture resistance—a must-have since e-scooters face twice as many flats from city debris. These tougher tires also manage heat better, cutting blowout risks by 40%, but that rugged construction is exactly why they fight you so hard coming off the rim. You can dig into more on these market shifts and what they mean for riders.
Prying the Old Tire Off the Rim
Once you’ve broken the bead on both sides, it's time to bring out the tire levers. Grab them and that spray bottle of soapy water you mixed up earlier.
Don't be shy with the soapy water—spray it all around the gap between the tire and the rim. This stuff is non-negotiable. It makes the job ten times easier and helps prevent you from gouging your rim with the levers.
- Start Away From the Valve: Stick your first tire lever under the tire’s edge, directly opposite the valve stem.
- Hook and Pry: Latch the lever onto the rim and pry a section of the tire up and over the rim's lip.
- Bring in Backup: Wedge your second lever in a few inches away from the first and do the exact same thing.
Once you get a decent section of the tire over the rim, you can usually just slide one of the levers around the rest of the wheel to pop the whole side off. Flip it over, spray more soapy water, and do the same thing for the other side.
And that's it. The old tire is off, and you're ready to get that rim cleaned up for its new rubber.
Getting the New Tire on Without Pinching the Tube

Getting the old tire off was the messy part; putting the new one on is all about precision. This is the moment where most first-timers make a simple but incredibly frustrating mistake: the dreaded pinch flat. You do all that hard work just to puncture your brand-new inner tube with a tire lever.
But don't sweat it. We’ll walk through exactly how to avoid that common pitfall. A little patience here saves you from having to do this all over again tomorrow.
A Quick Check and One Pro Tip
Before you even think about the new tire, give the rim a quick once-over. Run your finger along the inside channel to feel for any sharp burrs or leftover debris that could wreck the new tube. A quick wipe with a clean rag is always a good idea.
Now, grab the new tire and look for a small arrow on the sidewall. That arrow shows the tire's rotational direction, and you need to make sure it points forward when the wheel is back on the scooter. This ensures the tread pattern does its job, giving you the best grip and water-clearing ability.
The Single Most Important Tip: Partially inflate the new inner tube before you put it anywhere near the rim. Just a couple of pumps—enough to give it some shape and get rid of the creases from the box—is all you need. This tiny step makes the tube far less likely to get twisted or caught under the tire’s edge, dramatically reducing your risk of a pinch flat.
Working the New Tire onto the Rim
With your prep work done, it's time to get the new rubber on. Grab that spray bottle of soapy water again; it’s your best friend for installation, just like it was for removal. Lightly spray the inside edges (the beads) of the new tire and the rim itself to make things slippery.
Mounting the tire is basically the reverse of taking it off, but with a lot more care.
- Get One Side On: Start by pushing one side of the tire onto the rim. The soapy water should let you work most of it on with just your hands.
- Insert the Tube: With one side of the tire in place, feed the valve of your slightly inflated inner tube through the valve hole in the rim. Gently tuck the rest of the tube inside the tire, making sure it’s sitting flat and isn't twisted.
- Work the Second Side On: This is the critical part. Start opposite the valve stem and use your hands to press the second bead of the tire into the rim. Work your way around both sides at the same time, inch by inch.
The Final Push: Seating the Last Bit
You’ll eventually hit a point where a small, very tight section of the tire just won’t go on by hand. This is where the tire levers come back into play, but you have to be extremely careful.
- Hook the Tire, Not the Tube: Gently hook the lever under the tire's edge, making absolutely certain you aren't grabbing the inner tube along with it.
- Use Smart Pressure: Pry the final section of the tire up and over the rim's lip. You might need two levers, working them in small increments toward each other.
- Listen to the Tire: If you feel a ton of resistance, stop! Something is binding up. Let a little air out of the tube, push the tire bead down into the center channel of the rim (where the diameter is smallest), and try again.
The demand for rider-friendly tires is a big deal in the global two-wheeler market, which is on track to hit USD 33.11 billion by 2032. As urban commuters ride more, many need fresh rubber every 6,000 to 10,000 miles. It's no surprise, then, that tubeless tires now own over 70% of the replacement market, as they offer better puncture resistance and less downtime. You can read more about the growth of the two-wheeler tire industry to see where things are headed.
The Tubeless Twist: Seating the Bead
If you're going tubeless, the process is mostly the same but with one extra, crucial step: seating the bead. You need a sudden, powerful blast of air to force the tire's beads outward so they form an airtight seal against the rim.
- Remove the Valve Core: To get maximum airflow, temporarily unscrew the tiny valve core from your tubeless valve stem.
- Bring Out the Big Guns: A standard floor pump usually can't move enough air fast enough. An air compressor or a CO2 inflator is what you need for this job.
- Listen for the Pops: As you hit it with air, you should hear one or two loud "POPS!" That's the satisfying sound of the beads snapping into place.
Once you hear the pops, you can put the valve core back in and inflate the tire to the recommended pressure. A successful, pinch-free installation means you're ready to get that wheel back on your scooter.
The Final Assembly and Pre-Ride Safety Checks
You’ve done the hard part—the new tire is on the rim, and victory is within sight. Now it's time to put everything back together with the same care you used to take it apart. This isn't a step to rush; a loose bolt or a misaligned brake can undo all your good work in an instant.
Getting the final assembly right is just as important as the tire swap itself. Think of it as the final quality check before you get back on the road.
Reattaching the Wheel Securely
Alright, let's get that wheel back on. Gently slide it back into the scooter's dropouts. Pay close attention to any spacers or washers—they need to go back in the exact order and orientation they came out. These little pieces are crucial for proper spacing and bearing alignment, so don't just toss them on.
If you were working on the motor wheel, now's the time to reconnect the motor cable. Be gentle and make sure the pins are lined up perfectly before pushing it together. You should feel a firm, satisfying click. Forcing it can bend a pin, and that's a headache you don't want.
Now for the axle nuts. Snug them down by hand first, then grab your wrench. The goal here is proper torque, not tightening it as hard as humanly possible. Overtightening can actually crush your wheel bearings, which leads to premature failure and a wobbly, unsafe ride. If you don't have a torque wrench, aim for "firm and snug," then give it a final quarter-turn.
This isn't just a suggestion; it's a critical safety step. A loose axle nut can cause the wheel to wobble or even come off during a ride. A correctly torqued nut ensures the wheel spins freely and safely.
Brake Adjustments and Final Connections
With the wheel locked in, it's time to deal with the brake caliper. Bolt it back on, but leave the bolts just a little bit loose for now. Here’s a pro tip: squeeze the brake lever hard. This action automatically centers the caliper perfectly over the brake rotor. While still holding that lever down, go ahead and tighten the caliper bolts securely.
This little trick usually gets the alignment spot on, but you always want to double-check. Spin the wheel by hand. You should hear nothing but a gentle whirring. If you hear that annoying "shing-shing-shing" sound, a brake pad is rubbing. You'll need to slightly loosen the bolts and wiggle the caliper until the rubbing stops.
Getting the Inflation Pressure Just Right
Proper inflation is arguably the most critical factor for tire life, ride quality, and even your scooter's battery range. Seriously. Underinflated tires are the number one cause of pinch flats and they put a ton of extra strain on your motor.
Look for the recommended PSI (pounds per square inch) printed right on the sidewall of your new tire. It will usually give a range, like "40-50 PSI." As a rule of thumb, heavier riders or those who tackle rougher roads should aim for the higher end of that range.
Use a pump with a reliable gauge to hit your target number precisely. It's also a good idea to re-check the pressure after your first ride, as new tires and tubes can stretch and settle a bit. For more tips, check out our guide on the art of inflating bike and scooter tires.
Your Non-Negotiable Pre-Ride Checklist
You’ve done the work, and I know you’re itching to ride. But before you take off, run through this quick but essential safety checklist. It only takes a minute and it’s the final confirmation that you did the job right.
- The Spin Test: Lift the wheel off the ground and give it a good, hard spin. It should rotate smoothly and quietly for several seconds without any grinding noises or obvious wobbling.
- The Brake Check: While that wheel is still spinning, give the brake lever a firm squeeze. The wheel should stop immediately and decisively. No mushiness.
- The Slow Roll: Hop on and ride slowly around a safe, flat area like your driveway. Listen for any weird noises and feel for any vibrations. Test the brakes one last time at low speed.
The demand to replace scooter tire components has skyrocketed. Aftermarket parts now make up 60% of sales as urban riders are putting 3,000-5,000 miles on their scooters annually, often on punishing city streets. The North American electric scooter tire market, valued at $620 million in 2025, is projected to hit $1.52 billion by 2031. This is partly because the extra weight and braking force of e-scooters can wear out tires 30% faster than on a regular kick scooter.
Once you’ve run through these checks, you can ride with confidence, knowing your scooter is safe and ready for your next adventure.
Got Questions? We've Got Answers
Staring down a flat tire brings a flood of questions. Am I doing this right? Is there an easier way? Don't worry, that's completely normal. Let's walk through some of the most common things people ask when dealing with a scooter tire change.
How Often Should I Be Replacing These Things?
There’s no one-size-fits-all answer here. Your tire's lifespan is a mix of how you ride, what your local streets are like, and the quality of the tire itself. A solid routine is to give your tires a quick once-over every month. Look for the obvious stuff: worn-down, squared-off tread, cracks starting to form on the sidewalls, or a history of frequent flats.
If you're a daily commuter, especially in American or Australian cities with their sprawling layouts and varied road quality, you might find yourself needing a new set every 12-18 months. The instant power from an electric motor is surprisingly tough on rubber, wearing it down faster than you'd expect.
Can I Just Switch to Solid Tires and Be Done With Flats?
Ah, the dream of a puncture-proof life. It's tempting, but solid tires come with some serious downsides. Yes, solid (airless) tires mean you'll never get a flat again. The trade-off? A much, much harsher ride. They have zero give, so you'll feel every single crack, pebble, and bump in the road right through your handlebars.
They can also be a nightmare to install, sometimes demanding special equipment and a whole lot of muscle. For many, the hit to ride quality just isn't worth it. That said, if your commute is short and sweet on well-paved surfaces, they can be a decent "fit and forget" solution, provided they're compatible with your scooter's rims.
What's the Toughest Part of Changing a Scooter Tire?
Let's be real: it’s the wrestling match. The hardest part for most people is physically prying the old tire off the rim and then getting the new one on without losing your mind. Scooter wheels are tiny and the rubber is incredibly stiff, which doesn't give you much room to work with your tire levers.
This is where your patience will be tested more than your strength.
The secret isn't brute force; it's all about technique. A generous amount of soapy water for lubricant and working the tire in small, patient sections will save you a world of frustration. Seriously, if you feel yourself getting angry, just walk away and take a five-minute break.
Should I Just Patch It Instead of Replacing It?
Patching can be a solid temporary solution, but it really depends on the damage. A small, clean puncture in a tubeless tire? A plug kit can have you rolling again in minutes. But for inner tubes, patches are often a less reliable, long-term fix, especially when put under the daily grind of commuting.
- When to Replace: Always replace the tire if you see a large gash, any damage at all to the sidewall, or if the tread is already heavily worn. It’s a safety issue.
- When to Repair: A tiny hole from a nail or a thorn in a tire that’s still in good shape is the perfect candidate for a repair.
If you're on the fence, our guide on how to properly repair a scooter tire breaks it down even further. And remember, if you're not comfortable with the job or run into a tricky situation, there's no shame in taking it to a professional certified tire shop. It’s always the safest bet.
Ready to upgrade your ride or need top-quality replacement parts? Punk Ride has you covered with a huge selection of electric scooters, bikes, and accessories from leading brands. Find your perfect match and keep rolling smoothly.
Share:
Everything You Need to Know About Your Electric Bike Chain
Your Guide to Ebike Pedal Assist Systems