Knowing when you need a scooter tyre replacement isn't rocket science, but it does require a bit of attention. The big giveaways are pretty obvious once you know what you're looking for: worn-out tread, cracks starting to show on the sidewall, or any weird bulges. If you feel a strange wobble when you ride, that's another dead giveaway.
Honestly, catching these things early is one of the most important parts of keeping your scooter safe and reliable.
Is It Time for a New Scooter Tyre?
Figuring out if your scooter needs fresh rubber is all about safety and performance. A worn-down tyre just doesn't have the grip it needs, which is a big deal, especially on slick city streets after a sudden downpour, a common occurrence from Sydney to Seattle. Riding on a dodgy tyre isn't just a gamble—it makes your whole ride feel sluggish and unstable.
It’s no surprise that more and more people are needing replacements. With the explosion of city scooters and delivery riders across the US and Australia, the demand has shot up. The global market for two-wheeler tyres is expected to hit around USD 17.98 billion by 2034. Even more telling, the scooter-specific slice of that pie was valued at USD 2.61 billion back in 2025, which shows just how many of us are out there riding. So, if you're thinking about a scooter tyre replacement, you're definitely not the only one.
Key Warning Signs to Watch For
The easiest thing to spot is a bald or balding tread. Your tyres have little raised bars tucked into the grooves called tread wear indicators. Once your tread wears down and becomes flush with those bars, it’s a non-negotiable sign that you need a new tyre. Don't push it until it's completely smooth; your grip will be practically non-existent by then.
You also need to give the tyre a good visual once-over for any physical damage. Keep an eye out for:
- Cracks: Look closely at the sidewalls for any tiny, spiderweb-like cracks. This is often called "dry rot," and it means the rubber is breaking down and could fail without warning, especially in the harsh sun of an Australian summer or a hot US climate.
- Bulges or Blisters: If you see a bubble or bulge on the tyre's surface, that's a serious red flag. It points to internal damage and a weak spot that could easily lead to a blowout.
- Cuts and Punctures: A small puncture can sometimes be patched, but if you've got deep gashes or you're getting flats all the time, the tyre is telling you it's had enough.
Pro Tip: Your scooter's handling is often the first thing to tell you something's wrong. If it suddenly feels wobbly, unstable, or seems to slip in corners where it used to feel solid, your tyres are almost always the cause.
Performance and Age Considerations
Even a tyre that looks perfectly fine can be a liability if it's too old. Rubber gets hard and brittle over time, losing its grip. As a rule of thumb, you should probably replace your tyres after about five years, no matter how much tread is left. An old, hardened tyre just can't grab the road like it should, which can seriously increase your braking distance.
It’s also worth getting familiar with the different types of tires for electric scooters before you buy a new set. Some are designed for long-lasting durability, while others are softer and offer better grip. Picking a tyre that suits your riding style and local road conditions is a smart move.
Here's a quick checklist to run through when you're inspecting your tyres.
Scooter Tyre Wear Checklist
Use this quick-reference guide to give your scooter tyres a visual health check. It covers the most common signs of wear that tell you a replacement is on the horizon.
| Symptom | What to Look For | Action Required |
|---|---|---|
| Worn Tread | The main tread is level with the small raised "wear indicator" bars inside the grooves. | Immediate Replacement. The tyre has reached its legal and safe limit. |
| Cracking | Fine, web-like cracks appearing on the sidewalls or between the tread blocks. | Replace Soon. This is "dry rot." The rubber is degrading and could fail. |
| Bulges/Blisters | A noticeable lump or bubble on the sidewall or tread surface. | Immediate Replacement. This indicates internal structural damage. Do not ride. |
| Uneven Wear | One side of the tyre is significantly more worn than the other, or there are flat spots. | Inspect and Replace. Check alignment and suspension, then replace the tyre. |
| Frequent Punctures | Getting repeated flats in the same tyre, even after patching. | Replace. The tyre's casing is likely too weak to continue using safely. |
| Old Age | The tyre is more than 5 years old, even if the tread looks good. | Replace. Rubber hardens over time, drastically reducing grip and safety. |
Making these simple checks a regular part of your routine is the best way to stay on top of tyre wear. It turns a potential crisis into a simple, manageable bit of maintenance.
Getting Your Workspace Sorted
Before you even touch a wrench, let's talk about setting up your space. Trust me, getting this right from the start is the difference between a smooth job and a frustrating afternoon of scraped knuckles and lost nuts. This isn't just about being neat; it's about making the whole scooter tyre replacement safer and way more efficient.
The idea is simple: get everything you need within arm's reach before you start. There's nothing worse than having your scooter half-disassembled and realizing the one socket you need is missing. If you want a solid, dedicated area for jobs like this, a sturdy workbench is an absolute game-changer.
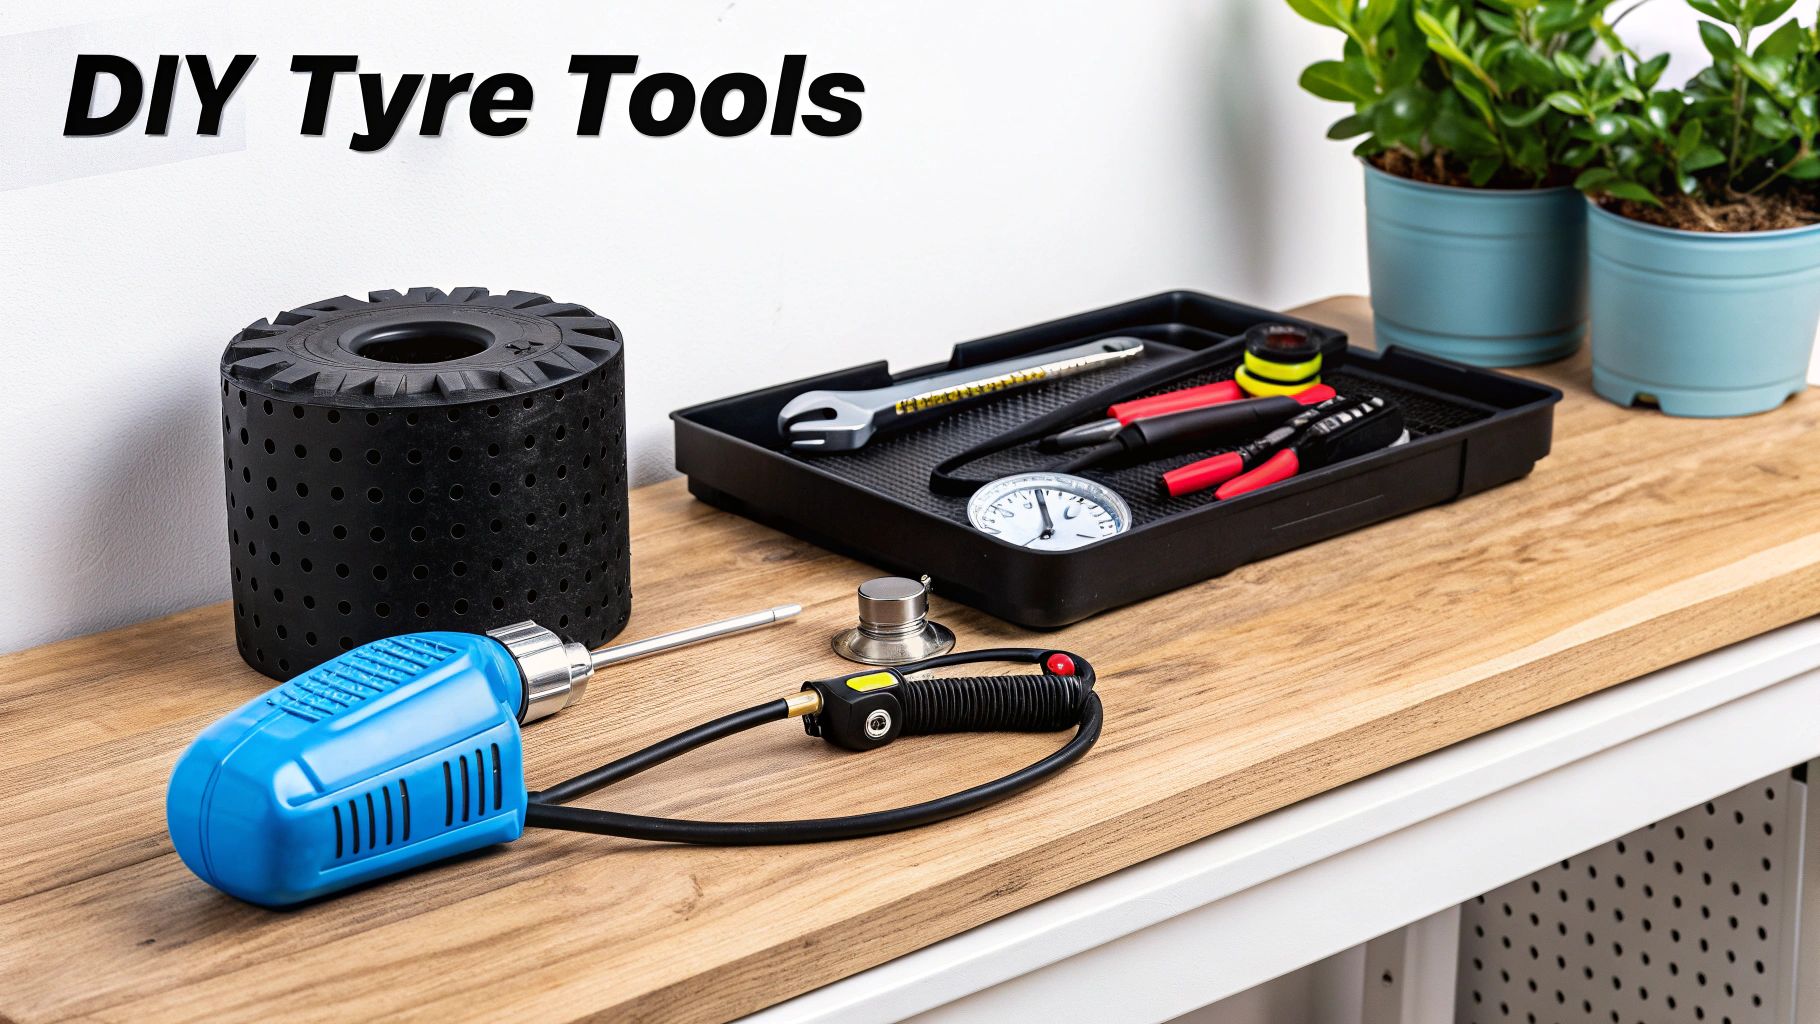
Your Go-To Toolkit
You don’t need to raid a professional workshop, but a few key tools are non-negotiable. Trying to bodge this with whatever’s in your kitchen drawer is a surefire way to scratch your rims and lose your cool.
Here’s what you’ll actually need:
- Proper Tyre Levers: Seriously, don't skip these. They’re designed with smooth, rounded edges that won't gouge your wheel rim. Get a set of at least two—three is even better.
- Wrenches and Sockets: Your scooter's manual will tell you the exact sizes for the axle nuts. While an adjustable wrench might do the job, a perfectly sized socket gives you a much better grip and prevents stripping the nut.
- Air Pump with a Pressure Gauge: This is a must. You need to inflate the new tyre to the exact pressure recommended by the manufacturer for safety and good handling. The gauge is what makes this possible.
I see it all the time: people try to save a few bucks using screwdrivers as levers. A decent set of metal tyre levers costs less than $20 in Australia or about $15 in the US—that’s a whole lot cheaper than a new wheel rim.
Tubed vs. Tubeless: What Have You Got?
Okay, before you even think about buying a replacement, you have to know what you're working with. Scooters run on either tubed or tubeless tyres, and the process for changing them is totally different.
So, how do you figure it out? It's easier than you think.
- Check the Valve Stem: This is the dead giveaway. On a tubeless tyre, the valve is short, rubbery, and fixed directly to the wheel rim. For a tubed tyre, the valve is part of the inner tube poking through a hole in the rim. You'll notice it has a bit more wiggle to it.
- Read the Sidewall: Look closely at the side of your tyre. You’re searching for tiny letters. "TL" means Tubeless, and "TT" means Tube-Type. If you can't find anything, just go by the valve stem—it's the most reliable method.
Knowing this upfront is critical. It determines whether you're buying a new tyre or a tyre and an inner tube. Taking a minute to check now will save you the headache of ordering the wrong parts and having to do this all over again.
Getting the Old Wheel and Tyre Off
Alright, with your workspace ready and tools laid out, it's time to get your hands dirty. This is where the real work begins, but don't sweat it. The trick to a smooth scooter tyre replacement is to be methodical. Just focus on one step at a time, and you'll be golden.
First up, you need to get the scooter propped up and stable. You can't just flip it over like a kid's bike—you'll wreck the handlebars, throttle, and brake levers. A proper scooter stand is the best tool for the job, but a sturdy box or a couple of old milk crates can work just fine. The goal is simple: get the wheel you're working on off the ground so it can spin freely, without the scooter wobbling or taking a dive.
Safely Popping Off the Wheel
Once your scooter is secure, you can zero in on the wheel itself. Before you touch a single nut, pull out your phone and take a few clear pictures of how everything is put together. Pay close attention to the order of washers, spacers, and any brake parts. Trust me on this one—this little step is a lifesaver when it's time to put it all back together.
Most scooter wheels are held on by a big axle nut on each side. Grab your socket wrench or spanner and get ready to loosen them. Remember the old mantra: "righty-tighty, lefty-loosey." These nuts are usually on there pretty good for safety, so you might need to give it some real oomph to get them started.
- Front Wheels: These are usually pretty straightforward. Once the axle nuts are off, you might just need to gently spread the forks a bit to slide the wheel out. Keep an eye on the disc brake caliper—the last thing you want to do is bend the rotor on the way out.
- Rear Wheels: Here’s where it gets a little more interesting. The rear wheel is often a hub motor, which means you've got a thick power cable running right into the axle. Whatever you do, don't just pull on this cable. You have to find its connector and unplug it first. You'll usually find it tucked away under a plastic cover on the deck or near the rear suspension arm.
A Word of Warning: That motor cable is your scooter's lifeline. Be incredibly gentle with it. Damaging this wire is probably the most common—and most expensive—mistake people make. A snapped wire can mean buying a whole new motor, which turns a cheap tyre swap into a massive headache.
Breaking the Bead and Prying the Tyre Off
With the wheel finally free from the scooter, you've reached what is often the most physical part of the job: separating the tyre from the rim. First things first, let all the air out. You can use a valve core tool or just press the little pin inside the valve stem with a small Allen key until it stops hissing.
Now for the fun part: breaking the bead. The bead is the stiff edge of the tyre that locks into the rim to create an airtight seal. On scooter tyres, this seal can be ridiculously stubborn.
You can start by trying to muscle it with your hands, pushing the sidewall down and away from the rim. Work your way around the whole tyre. If it’s not budging, place the wheel on something soft (like a piece of old carpet so you don't scratch the rim) and carefully stand on the tyre’s sidewall with your heel. A bit of steady pressure, moving around the tyre, should eventually cause it to pop free.
Once the bead is broken on both sides, it’s time to bring in the tyre levers.
- Wedge the spoon end of your first lever between the tyre bead and the rim.
- Hook it under the bead and pull it up and over the edge of the rim.
- You need to keep this lever in place. Some people use a zip tie or even tape it to a spoke to stop it from slipping back in.
- Now, take your second lever and stick it in a few inches away.
- Pry another section of the tyre bead over the rim.
Keep repeating this, working in small bites. Before you know it, enough of the bead will be free that the rest just gives way. Flip the wheel over and do the exact same thing on the other side. And just like that, you've got a bare rim, ready for some fresh rubber.
Getting Your New Scooter Tyre On The Rim
Alright, the old, worn-out tyre is gone. Now for the fun part: fitting the new one. This is where your scooter tyre replacement really comes together, but it's also where a little bit of technique goes a long way. It's not about brute strength; it's about being smart, especially since tubed and tubeless tyres each have their own quirks.
Don't rush this stage. Trying to force things will only lead to pinched inner tubes or a tubeless tyre that just won't seal. Trust me, taking an extra five minutes here saves an hour of frustration later.
This quick infographic sums up the removal steps we just covered.
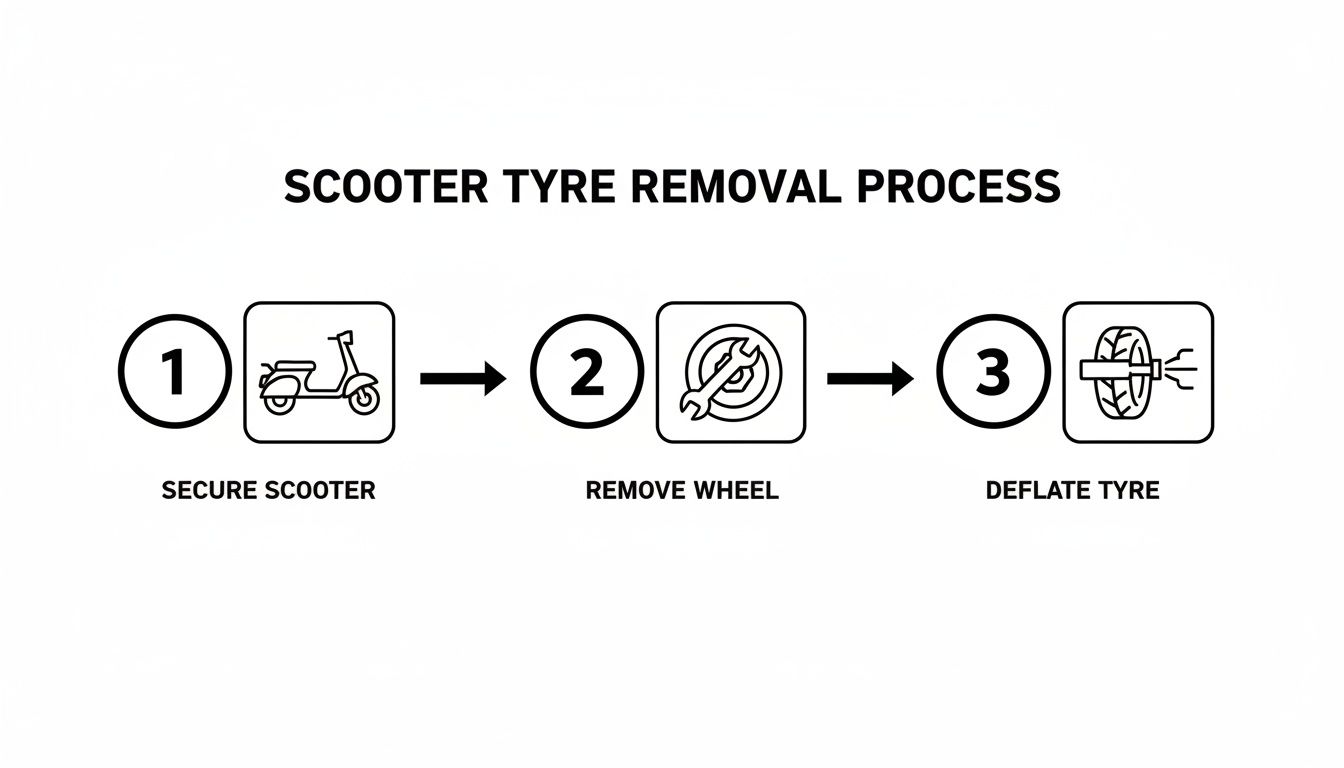
As you can see, the process is logical. Securing the scooter first, then getting the wheel off, and only then deflating the tyre keeps everything stable and safe.
Tips for Handling Tubed Tyres
If you’re fitting a tyre with an inner tube, your number one enemy is the dreaded pinch flat. This happens when you accidentally trap the tube between the tyre bead and the rim with your lever, creating a hole before you've even inflated it. It’s a classic rookie mistake.
Here’s how you can avoid it:
- Give the Tube Some Shape: Before putting the new inner tube in, pump just a tiny bit of air into it. You're not inflating it, just giving it enough form to stop it from being a floppy, twisted mess inside the tyre.
- Lube it Up: A bit of soapy water or proper tyre lubricant makes a world of difference. A thin film on the tyre beads and the rim helps everything slide into place without a fight.
- Work in Small Bites: Push one side of the tyre onto the rim. Then, slip the slightly inflated tube inside, carefully feeding the valve through its hole. Now, using your tyre levers, work the second bead over the rim edge, taking small, manageable sections at a time.
Seating a Tubeless Tyre for a Perfect Seal
With a tubeless tyre, the game is all about creating that perfect, airtight seal. The make-or-break moment is getting the bead to "pop" into its seat on the rim. This can be the trickiest part of the whole job.
First, get that rim perfectly clean. Any leftover sealant, dirt, or grime will ruin your chances of getting a good seal. Once it's spotless, apply your soapy water lubricant to both tyre beads and the rim.
Work one side of the tyre on, then the other. It’s meant to be a snug fit. The real action happens when you inflate it. You’ll need a sudden, powerful blast of air to force the beads outwards and lock them into the rim. Your trusty floor pump might not cut it; an air compressor is often the best tool for this initial blast.
Listen for the Pop! As you inflate a tubeless tyre, you're listening for one or two loud pops. That's the sound of the bead snapping securely into place. If you don't hear it, the tyre isn't seated right. Deflate, add more lube, and give it another go. A bad seal means a slow, annoying leak.
Don't Forget The Directional Arrow
This is a tiny detail that makes a huge difference to your safety and the scooter's performance. Most scooter tyres are directional—they're designed to roll in only one direction.
Look closely on the sidewall of the new tyre. You’ll see a small arrow, usually with the word "ROTATION" or "DIRECTION" printed next to it. This arrow absolutely must point in the direction the wheel turns when you're riding forward.
- Front wheel: The arrow points forward.
- Rear wheel: The arrow also points forward.
Putting a tyre on backwards is a serious mistake. It completely messes up the tread's ability to clear water on wet roads. This increases your risk of hydroplaning and means you won't get the grip the tyre was designed for.
For more tips on getting pressures right, our guide on inflating bike tires has some great advice, and many of the same principles apply to scooter tyres too.
Avoiding Common DIY Tyre Replacement Mistakes
You’ve done it. You wrestled the old tyre off and managed to coax the new one onto the rim. It feels like the hard part is over, but this final stretch is what separates a decent DIY job from a great one. Getting these last few details right is what makes sure your scooter is safe, reliable, and won’t have you doing this all over again next weekend.
It's tempting to rush through the reinstallation after all that work, but that’s exactly where the most frustrating mistakes happen. Trust me, I’ve seen them all, and learning from them now will save you a world of grief.
Getting The Wheel Back On Right
The first challenge is getting the wheel reinstalled correctly. It's not just a matter of slotting it back in; you have to get the alignment spot-on. The wheel needs to sit perfectly centered between the forks or in the swingarm. If it's crooked, even by a little bit, you're signing up for uneven tyre wear, sketchy handling, and potential damage to your brakes.
Once you’re sure it's straight, it’s time to tighten the axle nuts. This is definitely not a "make it as tight as humanly possible" moment. Cranking down too hard can wreck your wheel bearings. But leaving it too loose is a massive safety risk—the wheel could shift or, in a worst-case scenario, come off while you're riding.
Crucial Safety Check: Always, and I mean always, use a torque wrench to tighten your axle nuts. Look up the manufacturer's spec for your scooter and stick to it. This one step, so often skipped by amateurs, is the single most important thing you can do to ensure your wheel is secure. It's a small investment for huge peace of mind.
The Definitive "What Not To Do" List
After seeing countless DIY tyre changes, I can tell you that the same mistakes pop up over and over again. Think of this as your cheat sheet for sidestepping the most common traps.
- Pinching the Inner Tube: I know we talked about this, but it’s worth saying again. Using too much muscle or the wrong tools (like a flathead screwdriver) to pop that last bit of the tyre bead over the rim is the #1 cause of pinch flats. Be patient and use proper tyre levers.
- Forgetting to Check for a Smooth Spin: Before you drop the scooter off its stand, give the reinstalled wheel a good, solid spin. Does it rotate freely and quietly? Any weird grinding or scraping noises probably mean a brake pad is out of line or you put a spacer back in the wrong spot.
- Ignoring Tyre Pressure: Don't just pump up the tyre until it feels "hard." Grab a reliable pressure gauge and inflate it to the specific PSI recommended on the tyre's sidewall. The wrong pressure kills your ride quality and chews through your new tyre in no time.
Understanding Your Replacement Cycle
It’s also good to remember that everyone wears out tyres at a different pace. How often you need to replace your scooter tyres really depends on how you ride. Commercial and fleet scooters, like the ones used for food and parcel delivery, rack up insane mileage and need durable, puncture-resistant tyres far more frequently.
On the other hand, a daily commuter in a developed market might go longer between changes and choose a premium, energy-efficient tyre for a smoother ride. Knowing your own usage patterns helps you anticipate when maintenance is due. You can discover more insights about the two-wheeler tyre market and its different segments.
In the end, a successful tyre change is all about being methodical. Take your time with these final checks, learn from the common blunders, and you’ll ensure your work isn't just done, but done right. That attention to detail guarantees a safer ride and the deep satisfaction of a job well done.
Got Questions? We've Got Answers
Even with the best guide, you're bound to have a few questions pop up when you're wrestling with a new scooter tyre. It happens. Let's tackle some of the most common ones I hear so you can finish the job and get back to riding.
One of the big ones is about swapping tyre types. People often ask if they can "upgrade" from a tubed tyre to a tubeless one. The short answer is almost always no. Tubeless tyres need a special rim that creates an airtight seal. Your standard tube-type rim just isn't built for it. It's best to stick with what your scooter was designed for.
Can I Just Patch It Instead?
That's the million-dollar question. For a small, clean puncture in a tubeless tyre, a plug kit can be a lifesaver and a perfectly good fix to get you back on the road. If you're running inner tubes, patching the tube itself is the way to go.
But here's the reality check: a patch or plug is never as good as new. If you've got a nasty gash, any damage on the sidewall, or it feels like you're getting flats every other week, it's time for a full replacement. Don't risk it. We've got a whole guide on this if you want to dive deeper into how to repair a scooter tire.
Another thing people forget is tyre pressure. Do you need to check it after a replacement? Absolutely, yes. Once you've got the tyre seated, inflate it to the PSI printed on the sidewall. But don't stop there. Check it again in a few hours, and then one more time right before you ride. You're looking for slow leaks that signal a bad seal.
Pro Tip: Don't skip that final pressure check. A slow leak can turn into a sudden flat when you're on the move, and that's a recipe for losing control. Taking an extra minute to double-check your work is always worth it.
Why Is Changing a Scooter Tyre So Unbelievably Hard?
If you've ever felt like you were in a wrestling match with a tiny piece of rubber, you're not alone. Scooter tyres, especially the smaller 8- to 10-inch ones, are notoriously tough. Their sidewalls are incredibly stiff and they fit onto the rim with very little wiggle room. This makes it a real battle to get your tyre levers in there and apply enough force. Soapy water and a healthy dose of patience are your best friends here.
Changing tyres is just part of scooter ownership, and it’s a cost that adds up. It's interesting to see how the market is changing, though. Riders are becoming more safety-conscious and are willing to spend a bit more on quality replacement tyres. For a peek into the commercial side of things, this Vidir tire carousel buyer's guide shows how the big shops handle massive inventories. This trend toward better aftermarket parts is also fueled by online stores making it way easier to find exactly what you need for your specific scooter.
Ready to find the perfect new shoes for your ride? At Punk Ride, we carry a huge selection of top-notch tyres for all the best e-scooter and e-bike brands. Get the grip and peace of mind you deserve. https://www.punkride.com
Share:
Your Guide to the Class 1 Electric Bike
Electric scooters top speed: electric scooters top speed explained for riders