Μια επιτυχημένη αλλαγή λάστιχου σκούτερ ξεκινά πολύ πριν πιάσετε το κλειδί. Ξεκινάει πραγματικά με την προετοιμασία του χώρου και των εργαλείων σας. Μια μικρή προεργασία μετατρέπει μια εργασία που μπορεί να φανεί πολύ απογοητευτική σε μια απολύτως διαχειρίσιμη δουλειά. Σκεφτείτε το σαν το mise en place ενός σεφ—βάλτε τα πάντα στη σωστή θέση και τα υπόλοιπα είναι εύκολα.
Προετοιμασία για Επιτυχημένη Αλλαγή Λάστιχου
Ειλικρινά, το να έχετε όλα τα πράγματα έτοιμα και στη θέση τους κάνει όλη τη διαδικασία πολύ λιγότερο τρομακτική. Η σωστή αρχική προετοιμασία είναι πιθανώς το καλύτερο που μπορείτε να κάνετε για να αποφύγετε τα κοινά, ενοχλητικά εμπόδια αργότερα. Ας κάνουμε τον έλεγχο πριν την πτήση.
Γνωρίστε τον Τύπο του Λάστιχου σας
Πρώτα απ’ όλα, πρέπει να ξέρετε τι αντιμετωπίζετε. Πριν αρχίσετε να παλεύετε με το καουτσούκ, βρείτε ποιο είδος λάστιχου έχει το σκούτερ σας. Τα περισσότερα αστικά σκούτερ στις ΗΠΑ και την Αυστραλία χρησιμοποιούν ένα από τα τρία είδη, και το καθένα έχει τις δικές του ιδιαιτερότητες.
- Λάστιχα με Εσωτερικό Σωλήνα: Αυτή είναι η παλιά σχολή—ένας ξεχωριστός εσωτερικός σωλήνας βρίσκεται μέσα στο λάστιχο. Είναι πολύ συνηθισμένα αλλά φημίζονται για τρυπήματα από σφίξιμο αν δεν είστε προσεκτικοί με τους μοχλούς λάστιχου κατά την τοποθέτηση.
- Λάστιχα χωρίς Εσωτερικό Σωλήνα: Όπως το λάστιχο αυτοκινήτου, σχηματίζουν αεροστεγές σφράγισμα ακριβώς στη ζάντα του τροχού. Είναι εξαιρετικά στο να αντιμετωπίζουν μικρές τρυπήματα αλλά μπορεί να είναι πραγματικά δύσκολα στην σωστή τοποθέτηση στο χείλος.
- Στερεά Λάστιχα: Αυτά είναι οι πρωταθλητές που δεν τρυπούν, φτιαγμένα από συμπαγές καουτσούκ ή μείγμα πολυμερούς. Το μειονέκτημα; Σας δίνουν μια πολύ πιο σκληρή διαδρομή και είναι, μακράν, τα πιο δύσκολα στην τοποθέτηση. Μιλάμε για σοβαρή γυμναστική.
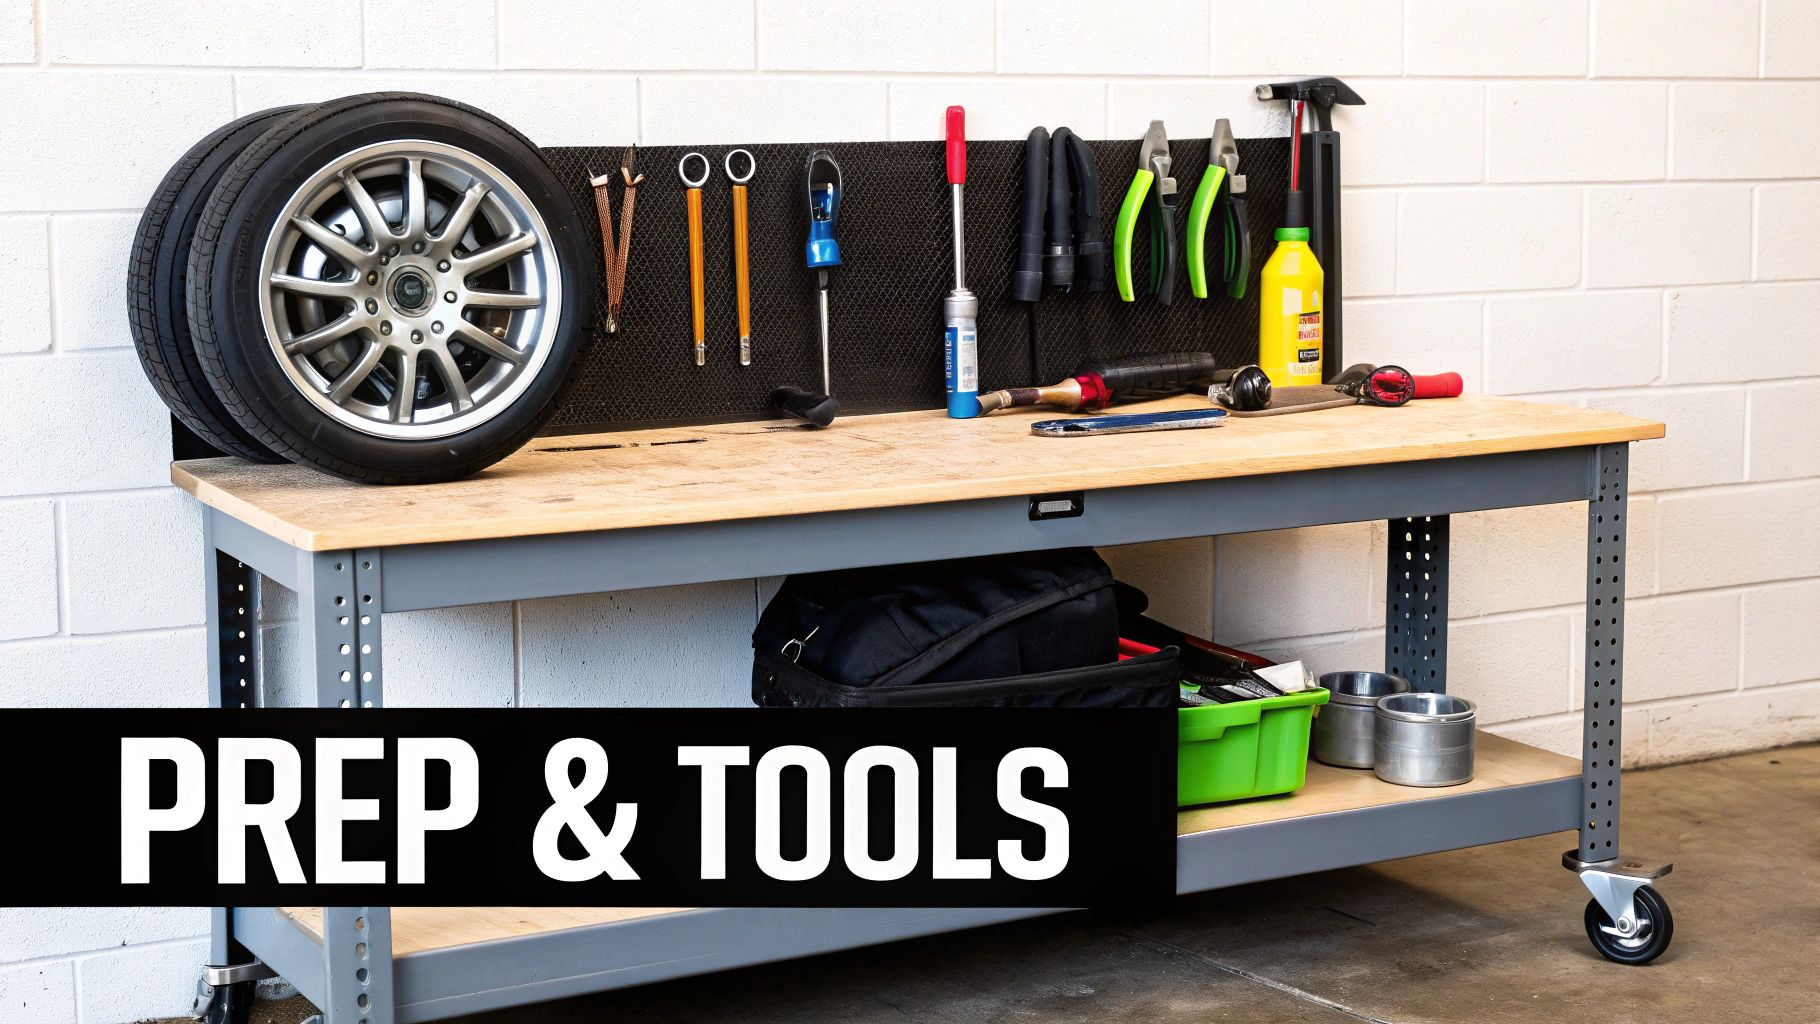
Συγκεντρώστε τον Εξοπλισμό σας
Δεν χρειάζεστε ένα πλήρες μηχανουργείο, αλλά υπάρχουν μερικά εργαλεία που είναι απολύτως απαραίτητα. Πιστέψτε με, το να προσπαθήσετε να αυτοσχεδιάσετε με λάθος εξοπλισμό είναι εισιτήριο μονής κατεύθυνσης για γρατζουνισμένες ζάντες και γρατζουνισμένα δάχτυλα.
Εδώ είναι μια γρήγορη ματιά στα απαραίτητα που πρέπει να έχετε πριν καν σκεφτείτε να ξεκινήσετε.
Απαραίτητο Σετ Εργαλείων για Αλλαγή Λάστιχου Σκούτερ
| Εργαλείο | Γιατί το Χρειάζεστε | Επαγγελματική Συμβουλή |
|---|---|---|
| Μοχλοί Λάστιχου | Τα χρειάζεστε για να αφαιρέσετε και να τοποθετήσετε το λάστιχο στη ζάντα. Πάρτε τουλάχιστον δύο, αλλά ένα σετ τριών κάνει τη διαφορά. | Τα μεταλλικά μοχλοί είναι δυνατά, αλλά αυτά με πλαστική επικάλυψη θα σώσουν τις ζάντες σας από το να καταστραφούν. Αξίζει να έχετε και τα δύο. |
| Κλειδιά/Σετ Καστάνιας | Για την αφαίρεση των παξιμαδιών του άξονα που κρατούν τον τροχό στη θέση του. | Ένα ρυθμιζόμενο κλειδί μπορεί να λειτουργήσει, αλλά μια κατάλληλη καστάνια πιάνει το παξιμάδι πολύ καλύτερα και αποτρέπει το ξεγύμνωμά του. |
| Αεραντλία | Απαραίτητο για λάστιχα με σωλήνα και χωρίς σωλήνα. Πρέπει να ρυθμίσεις σωστά την πίεση. | Μια αντλία δαπέδου με ενσωματωμένο μετρητή πίεσης είναι ο καλύτερος σου φίλος εδώ. Μην μαντεύεις την πίεση PSI. |
| Εργαλείο αφαίρεσης πυρήνα βαλβίδας | Αυτό το μικρό εργαλείο σου επιτρέπει να αδειάσεις εντελώς το λάστιχο σε δευτερόλεπτα. | Κάνει την αφαίρεση του παλιού λάστιχου πολύ πιο εύκολη. Κάποια καπάκια βαλβίδας έχουν ακόμη και ένα βασικό τέτοιο ενσωματωμένο στην κορυφή. |
| Διάλυμα σαπουνόνερου | Ένα απλό μείγμα υγρού πιάτων και νερού λειτουργεί ως λιπαντικό. | Αυτό είναι το μυστικό όπλο για να κάνεις τα επίμονα λάστιχα χωρίς σωλήνα και τα συμπαγή να γλιστρήσουν στη ζάντα χωρίς καβγά. |
| Πανευρωπαϊκός αντάπτορας ψαλιδιού γρύλου και κλειδί τροχού | Ένας γρύλος κάνει το σήκωμα του σκούτερ και το κράτημα σταθερό πολύ πιο ασφαλές και εύκολο από το να το ισορροπείς σε μπλοκ. | Κάποιοι αντάπτορες σου επιτρέπουν ακόμη και να χρησιμοποιήσεις ηλεκτρικό δράπανο για να σηκώσεις το γρύλο, κάτι που εξοικονομεί πολύ χρόνο. |
Το να έχεις αυτά τα εργαλεία απλωμένα σε μια καθαρή πετσέτα ή σε μαγνητικό δίσκο όχι μόνο εξοικονομεί χρόνο αλλά σε γλιτώνει από το να τρελαθείς ψάχνοντας για κάποιο χαμένο παξιμάδι κατά τη διάρκεια της επισκευής.
Δημιούργησε έναν ασφαλή και καθαρό χώρο εργασίας
Τέλος, βρες ένα καλό σημείο για να δουλέψεις. Θέλεις έναν καθαρό, καλά φωτισμένο χώρο με σταθερή, επίπεδη επιφάνεια για να βάλεις το σκούτερ. Το πάτωμα του γκαράζ ή ένας γερός πάγκος εργασίας είναι ιδανικά.
Αυτό δεν αφορά μόνο την άνεση· αφορά την ασφάλεια. Ένα σταθερό σκούτερ δεν θα ανατραπεί, και ένας καθαρός χώρος σημαίνει ότι δεν θα χάσεις μικρά αλλά κρίσιμα μέρη όπως ροδέλες και καπάκια βαλβίδας μέσα στη φασαρία.
Με την έκρηξη των ηλεκτρικών σκούτερ στις αμερικανικές πόλεις και τις αστικές περιοχές της Αυστραλίας, η ζήτηση για ανταλλακτικά είναι τεράστια. Η αγορά ελαστικών για δίτροχα αξίζει ήδη περίπου 15 δισεκατομμύρια δολάρια, και μεγάλο μέρος αυτής είναι η αγορά μετά την πώληση που καθοδηγείται από τη φθορά της καθημερινής αστικής οδήγησης. Αυτό δείχνει πόσοι άλλοι αναβάτες υπάρχουν εκεί έξω, κάνοντας ακριβώς αυτή τη δουλειά.
Πώς να αφαιρέσεις το παλιό λάστιχο χωρίς καβγά
Εντάξει, έχεις το σκούτερ σου στο πάγκο και τα εργαλεία σου απλωμένα. Τώρα για το κύριο γεγονός: να βγάλεις το παλιό, φθαρμένο λάστιχο από τη ζάντα. Ειλικρινά, εδώ οι περισσότεροι απογοητεύονται και θέλουν να τα παρατήσουν. Αλλά μείνε μαζί μου—θα τα καταφέρουμε.
Ο τρόπος που θα το προσεγγίσεις εξαρτάται πραγματικά από το είδος του λάστιχου που έχεις να αντιμετωπίσεις. Το να αφαιρέσεις ένα λάστιχο από συμπαγές καουτσούκ είναι εντελώς διαφορετικό από το να αφαιρέσεις ένα γεμάτο αέρα. Ας δούμε και τα δύο.
Για λάστιχα γεμάτα αέρα (αυτά με εσωτερικούς σωλήνες ή συστήματα χωρίς σωλήνες)
Πρώτα απ' όλα: πρέπει να αφήσεις όλο τον αέρα να βγει. Πάρε το εργαλείο αφαίρεσης του πυρήνα της βαλβίδας και αφαίρεσε εντελώς τον αέρα από το λάστιχο. Μην πατάς απλώς το καρφί—ξεβίδωσε και αφαίρεσε τον μικρό πυρήνα μέσα στον κορμό της βαλβίδας. Αυτό κάνει το λάστιχο πολύ πιο εύκαμπτο και πιο εύκολο στη δουλειά.
Με το λάστιχο εντελώς επίπεδο, είσαι έτοιμος για το πιο δύσκολο μέρος: το σπάσιμο του στεφανιού. Το στεφάνι είναι εκείνη η παχιά, ενισχυμένη άκρη του λάστιχου που κάθεται σφιχτά στο κανάλι της ζάντας, δημιουργώντας αεροστεγές σφράγισμα. Μετά από χιλιάδες χιλιόμετρα ή μίλια, μπορεί να νιώθεις σαν να είναι κολλημένο εκεί.
Το Κόλπο που Προτιμώ: Δεν χρειάζεσαι κάποιον εξεζητημένο μηχανισμό για αυτό. Απλώς άπλωσε τον τροχό επίπεδα στο πάτωμα του γκαράζ. Πίεσε προσεκτικά με τη φτέρνα σου το πλευρικό τοίχωμα του λάστιχου, όσο πιο κοντά στη ζάντα μπορείς. Σαν να περπατάς γύρω του μέχρι να ακούσεις ή να νιώσεις ένα ποπ. Αυτός είναι ο γλυκός ήχος του στεφανιού που ξεκολλάει.
Μόλις το στεφάνι είναι χαλαρό και από τις δύο πλευρές, πιάσε τα μοχλοκούτια σου. Εδώ μια μικρή τεχνική κάνει μεγάλη διαφορά.
- Ξεκίνα σφήνωνοντας το κουτάλι του πρώτου μοχλοκουτιού κάτω από το στεφάνι του λάστιχου.
- Ξεκόλλησέ το και σήκωσέ το πάνω από την άκρη της ζάντας. Αν μπορείς, άγκιστρωσε το άλλο άκρο του μοχλοκουτιού σε μία ακτίνα για να το κρατήσεις στη θέση του. Αυτό είναι το αγκύρωμά σου.
- Τώρα, πάρε το δεύτερο μοχλοκούτι σου και βάλτο λίγα εκατοστά μακριά από το πρώτο. Ξεκόλλησε και αυτό το τμήμα πάνω από τη ζάντα.
- Συνέχισε να επαναλαμβάνεις αυτό, κινούμενος σε μικρά κομμάτια γύρω από το λάστιχο. Πριν το καταλάβεις, ολόκληρη η μία πλευρά του λάστιχου θα έχει βγει. Γύρισε τον τροχό και κάνε το ίδιο ακριβώς για την άλλη πλευρά. Το κλειδί είναι η υπομονή—μην προσπαθήσεις να ξεκολλήσεις μεγάλα τμήματα μαζί, γιατί κινδυνεύεις να καταστρέψεις τη ζάντα.
Αντιμετωπίζοντας τα Στερεά Λάστιχα (Τα Χωρίς Αέρα)
Στερεά λάστιχα; Είναι εντελώς διαφορετικό ζώο. Δεν υπάρχει αέρας να βγει και δεν υπάρχει στεφάνι να "σπάσει" με τον ίδιο τρόπο. Το κλειδί εδώ είναι η θερμότητα.
Πρέπει οπωσδήποτε να ζεστάνεις το καουτσούκ. Ένα κρύο, σκληρό λάστιχο είναι απίστευτα άκαμπτο, και το να προσπαθήσεις να το ξεκολλήσεις με δύναμη είναι συνταγή για μια κακή μέρα. Η θέρμανση κάνει το καουτσούκ να διαστέλλεται και να γίνεται πολύ πιο ευέλικτο.
Εδώ είναι μερικές από τις αγαπημένες μου μεθόδους:
- Μούλιασμα σε Ζεστό Νερό: Πάρε έναν κουβά με ζεστό νερό—όχι βραστό, απλώς ζεστό από τη βρύση—και άφησε το λάστιχο να μουλιάσει για 10 έως 15 λεπτά. Λειτουργεί σαν μαγεία.
- Λίγη Δράση με Πιστόλι Θερμότητας: Αν έχεις πιστόλι θερμότητας ή ακόμα και ένα δυνατό σεσουάρ, μπορείς να το χρησιμοποιήσεις. Απλώς κράτα το σε συνεχή κίνηση ώστε να ζεσταθεί το λάστιχο ομοιόμορφα χωρίς να λιώσει κάποιο σημείο.
Μόλις το λάστιχο ζεσταθεί και γίνει ευέλικτο, χρησιμοποίησε δύο γερά μοχλοκούτια για να το ξεκολλήσεις από τη ζάντα, όπως θα έκανες με ένα λάστιχο γεμάτο αέρα. Θα χρειαστείς ακόμα λίγη δύναμη, αλλά η θερμότητα το κάνει χίλιες φορές πιο εύκολο.
Βάζοντας το Καινούργιο Λάστιχο σαν Επαγγελματίας
Εντάξει, το παλιό λάστιχο έχει φύγει. Τώρα για το διασκεδαστικό μέρος: να βάλουμε το καινούργιο λάστιχο στη ζάντα. Εδώ είναι που λίγη προσοχή και μερικά κόλπα της τέχνης κάνουν όλη τη διαφορά ανάμεσα σε ένα απογοητευτικό απόγευμα και μια δουλειά που μπορείς να είσαι περήφανος.
Πριν αρχίσεις να παλεύεις με το καινούργιο λάστιχο, ρίξε μια ματιά στο πλευρικό τοίχωμα του λάστιχου. Βλέπεις αυτό το μικρό βελάκι; Δείχνει τη κατεύθυνση περιστροφής. Θέλεις το βελάκι να δείχνει μπροστά όταν ο τροχός είναι ξανά στο σκούτερ. Είναι μια μικρή λεπτομέρεια, αλλά εξασφαλίζει ότι το πέλμα κάνει σωστά τη δουλειά του, ειδικά όσον αφορά την πρόσφυση και την απομάκρυνση νερού σε βρεγμένους δρόμους.
Το να βγάλεις το παλιό λάστιχο είναι συχνά η μεγαλύτερη μάχη. Αυτό το γραφικό καλύπτει τα τρία βασικά σημεία.
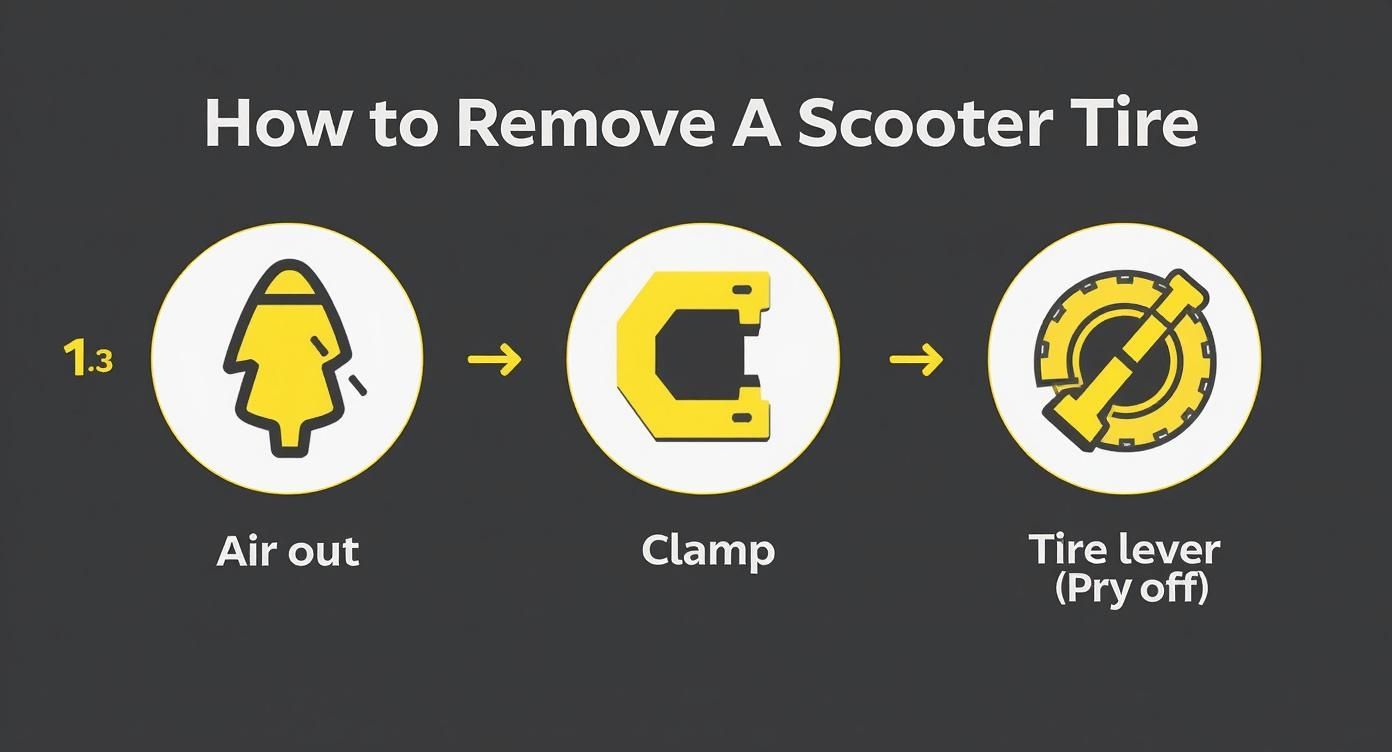
Στην ουσία, το θέμα είναι να το ξεφουσκώσεις, να σπάσεις το χείλος και μετά απλά να το ξεκολλήσεις. Απλό στη θεωρία, αλλά χρειάζεται δύναμη.
Τοποθέτηση Λάστιχων με Σαμπρέλα και Tubeless
Αν δουλεύεις με κλασικό λάστιχο με σαμπρέλα, εδώ είναι μια συμβουλή που εύχομαι να ήξερα νωρίτερα: φούσκωσε το νέο σαμπρέλα λίγο πριν το βάλεις μέσα στο λάστιχο. Μιλάω για τόσο αέρα ώστε να πάρει στρογγυλό σχήμα. Αυτό βοηθάει πολύ να μην στριμωχτεί ή πιαστεί ανάμεσα στο λάστιχο και τη ζάντα — η πρώτη αιτία για άμεσο λάστιχο μετά το φινίρισμα.
Για λάστιχα tubeless, το κλειδί είναι η δημιουργία ενός τέλειου αεροστεγούς σφραγίσματος. Το μυστικό σου όπλο εδώ είναι ένα μπουκάλι ψεκασμού γεμάτο σαπουνόνερο. Ψέκασε ελαφρά το εσωτερικό της ζάντας και τα δύο χείλη του λάστιχου. Αυτή η λίπανση αλλάζει τα δεδομένα, βοηθώντας το λάστιχο να γλιστρήσει πάνω στη ζάντα και να τοποθετηθεί χωρίς μεγάλη αντίσταση.
Έχω δει πολλούς να δυσκολεύονται προσπαθώντας να βάλουν με δύναμη ένα στεγνό λάστιχο tubeless στη ζάντα. Μην είσαι αυτό το άτομο. Το κόλπο με το σαπουνόνερο είναι μαγικό· θα ακούσεις ένα ικανοποιητικό «ποπ» καθώς το χείλος τοποθετείται όταν αρχίσεις να το φουσκώνεις.
Κατακτώντας την Εγκατάσταση Στερεού Λάστιχου
Τα στερεά λάστιχα είναι εντελώς διαφορετική υπόθεση. Θα χρειαστεί να χρησιμοποιήσεις την ίδια μέθοδο θέρμανσης που χρησιμοποίησες για να βγάλεις το παλιό. Βεβαιώσου ότι το λάστιχο είναι ακόμα ζεστό από το ζεστό μπάνιο νερού ή από μια γρήγορη συνεδρία με πιστόλι θερμότητας. Ευλύγιστο είναι η λέξη-κλειδί εδώ.
Ξεκίνα βάζοντας τη μία πλευρά του λάστιχου στο κανάλι της ζάντας. Εδώ θα χρειαστείς τους δυνατούς μοχλούς λάστιχου και, το προσωπικό μου αγαπημένο κόλπο, μερικούς βαρείς δεματικούς δεσμούς.
- Μόλις ένα τμήμα του λάστιχου είναι στη ζάντα, κλείδωσέ το στη θέση του. Περάστε μερικούς δεματικούς δεσμούς μέσα από τις ακτίνες του τροχού και γύρω από το λάστιχο. Αυτό λειτουργεί σαν τρίτο χέρι, εμποδίζοντας το μέρος που μόλις τοποθέτησες να ξεκολλήσει αμέσως.
- Τώρα, χρησιμοποίησε τους μοχλούς σου για να δουλέψεις αργά και προσεκτικά το υπόλοιπο λάστιχο πάνω στο χείλος της ζάντας. Πήγαινε σε μικρά τμήματα· μην προσπαθήσεις να κάνεις πολλά ταυτόχρονα.
- Είναι μια προπόνηση, σίγουρα. Αλλά η ζέστη κρατάει το λάστιχο αρκετά ευέλικτο για να συνεργαστεί.
Με τόσους πολλούς ανθρώπους να κινούνται στις πόλεις με σκούτερ, η ζήτηση για ανταλλακτικά έχει εκτοξευτεί. Η παγκόσμια αγορά για ελαστικά σκούτερ αυξήθηκε από περίπου 1,95 δισεκατομμύρια δολάρια το 2021 και αναμένεται να φτάσει τα 2,6 δισεκατομμύρια δολάρια έως το 2025. Αυτή η έκρηξη δεν αφορά μόνο περισσότερους αναβάτες· αντικατοπτρίζει το πώς η αστική οδήγηση φθείρει τα ελαστικά και πώς οι άνθρωποι γίνονται πιο έξυπνοι σχετικά με την ασφάλεια και τη συντήρηση. Μπορείτε να βρείτε περισσότερα δεδομένα στο Cognitive Market Research.
Επιλέγοντας το Σωστό Ελαστικό για την Οδήγησή σας
Όταν έρθει η ώρα για αλλαγή ελαστικού σκούτερ, αντιμετωπίζετε κάτι περισσότερο από μια απλή επισκευή. Είναι μια πραγματική ευκαιρία να βελτιώσετε την απόδοση του σκούτερ σας. Τα ελαστικά που θα επιλέξετε μπορούν να μεταμορφώσουν εντελώς το πώς νιώθετε το σκούτερ σας στο οδόστρωμα, οπότε αξίζει να το σκεφτείτε λίγο.
Η αγορά ουσιαστικά περιορίζεται σε τρεις βασικούς παίκτες: τα κλασικά ελαστικά με εσωτερικό σωλήνα, τις σύγχρονες ρυθμίσεις χωρίς σωλήνα και τα σχεδόν αλεξίσφαιρα στερεά ελαστικά. Κάθε ένα έχει τη δική του ξεχωριστή προσωπικότητα, με πλεονεκτήματα και μειονεκτήματα που μπορούν να κάνουν ή να χαλάσουν την καθημερινή σας μετακίνηση. Αυτό που λειτουργεί τέλεια σε μια φρεσκοστρωμένη ποδηλατική λωρίδα μπορεί απλώς να σας ταρακουνήσει τα δόντια σε έναν ανώμαλο δρόμο της πόλης.
Οι Τρεις Μεγάλες Κατηγορίες Ελαστικών Εξηγημένες
Λοιπόν, πώς επιλέγετε; Όλα εξαρτώνται από τις προτεραιότητές σας. Σκεφτείτε τη συνηθισμένη διαδρομή σας, την ποιότητα των δρόμων που οδηγείτε και, ειλικρινά, πόσο μισείτε να ασχολείστε με τη συντήρηση. Θέλετε μια οδήγηση σαν σύννεφο, μαλακή, ή ο βασικός σας στόχος είναι να μην πάθετε ποτέ ξανά σκασμένο λάστιχο;
-
Ελαστικά με Εσωτερικό Σωλήνα: Αυτή είναι η παλιά, κλασική ρύθμιση. Έχετε ένα εξωτερικό ελαστικό για πρόσφυση και έναν ξεχωριστό εσωτερικό σωλήνα που κρατάει τον αέρα. Είναι γνωστά για την άνετη οδήγηση και συνήθως είναι η πιο οικονομική επιλογή. Το μεγάλο μειονέκτημα; Είναι τα πιο επιρρεπή σε τρύπημα.
-
Ελαστικά χωρίς Εσωτερικό Σωλήνα: Όπως και στα αυτοκίνητα, αυτά τα ελαστικά σχηματίζουν αεροστεγές σφράγισμα απευθείας με τη στεφάνη του τροχού. Αντέχουν σε υψηλότερη πίεση αέρα για καλύτερη απόδοση και, όταν προσθέσετε σφραγιστικό ελαστικού, μπορούν συχνά να επιδιορθώσουν μικρές τρύπες μόνα τους καθώς οδηγείτε. Το μειονέκτημα είναι ότι η τοποθέτησή τους στη στεφάνη για πρώτη φορά μπορεί να είναι μια σοβαρή άσκηση.
-
Στερεά Ελαστικά: Αν είστε ο τύπος αναβάτη που θέλει μηδενική συντήρηση, αυτό είναι το εισιτήριό σας. Κατασκευασμένα από στερεό καουτσούκ ή προηγμένους πολυμερείς, είναι 100% ανθεκτικά σε τρύπημα. Αλλά αυτή η ηρεμία κοστίζει ακριβά: την άνεση στην οδήγηση. Θα νιώθετε κάθε ρωγμή και βότσαλο στο δρόμο, κάτι που μπορεί να είναι αρκετά σκληρό σε δρόμους πόλης που δεν είναι τέλειοι.
Το σωστό ελαστικό αλλάζει εντελώς την προσωπικότητα του σκούτερ σας. Τα συμπαγή ελαστικά σας δίνουν απόλυτη ηρεμία απέναντι στα σκασίματα, ενώ ένα καλό ελαστικό χωρίς σωλήνα προσφέρει μια φανταστική ισορροπία ανάμεσα στην άνεση και την ανθεκτικότητα. Είναι μια κλασική ανταλλαγή ανάμεσα στην αξιοπιστία και την ποιότητα της βόλτας.
Για μια πιο βαθιά ματιά στις λεπτομέρειες των διαφορετικών κατασκευών ελαστικών, η ανάγνωση ενός ολοκληρωμένου οδηγού για τα ελαστικά σκούτερ κινητικότητας μπορεί να προσφέρει επιπλέον διαύγεια.
Άμεση Σύγκριση Ελαστικών
Ας βάλουμε αυτές τις επιλογές δίπλα-δίπλα για να δούμε πώς πραγματικά συγκρίνονται στους τομείς που έχουν τη μεγαλύτερη σημασία.
Σύγκριση Τύπων Ελαστικών Σκούτερ
| Χαρακτηριστικό | Ελαστικά με σαμπρέλα (Tubed) | Ελαστικά χωρίς σαμπρέλα (Tubeless) | Στερεά Ελαστικά |
|---|---|---|---|
| Αντοχή σε Τρύπημα | Χαμηλό | Υψηλή (με σφραγιστικό) | Αδιάτρητο |
| Άνεση στη διαδρομή | Εξαιρετικό | Πολύ Καλό | Κακό |
| Ευκολία Αλλαγής | Μέτριο | Δύσκολο | Πολύ Δύσκολο |
| Βάρος | Ελαφρύτερο | Μέτριο | Βαρύτερο |
| Καλύτερο για | Ομαλές επιφάνειες, άνεση | Πολυδιάστατη απόδοση | Τραχύς αστικός μετακίνηση |
Στο τέλος της ημέρας, η επιλογή του σωστού ελαστικού έχει να κάνει με την επίλυση του μεγαλύτερου προβλήματός σας.
Αν έχετε κουραστεί να χαλάει η διαδρομή σας από συνεχόμενα σκασίματα, η επιλογή ενός συμπαγούς ελαστικού είναι μια απλή και αποτελεσματική λύση. Αλλά αν θέλετε μια ομαλή, με καλή πρόσφυση βόλτα και είστε διατεθειμένοι να βάλετε λίγη παραπάνω προσπάθεια κατά την εγκατάσταση, ένα σύστημα χωρίς σωλήνα είναι δύσκολο να το ξεπεράσει κανείς.
Επίλυση Συνηθισμένων Προβλημάτων και Τι να Προσέχετε
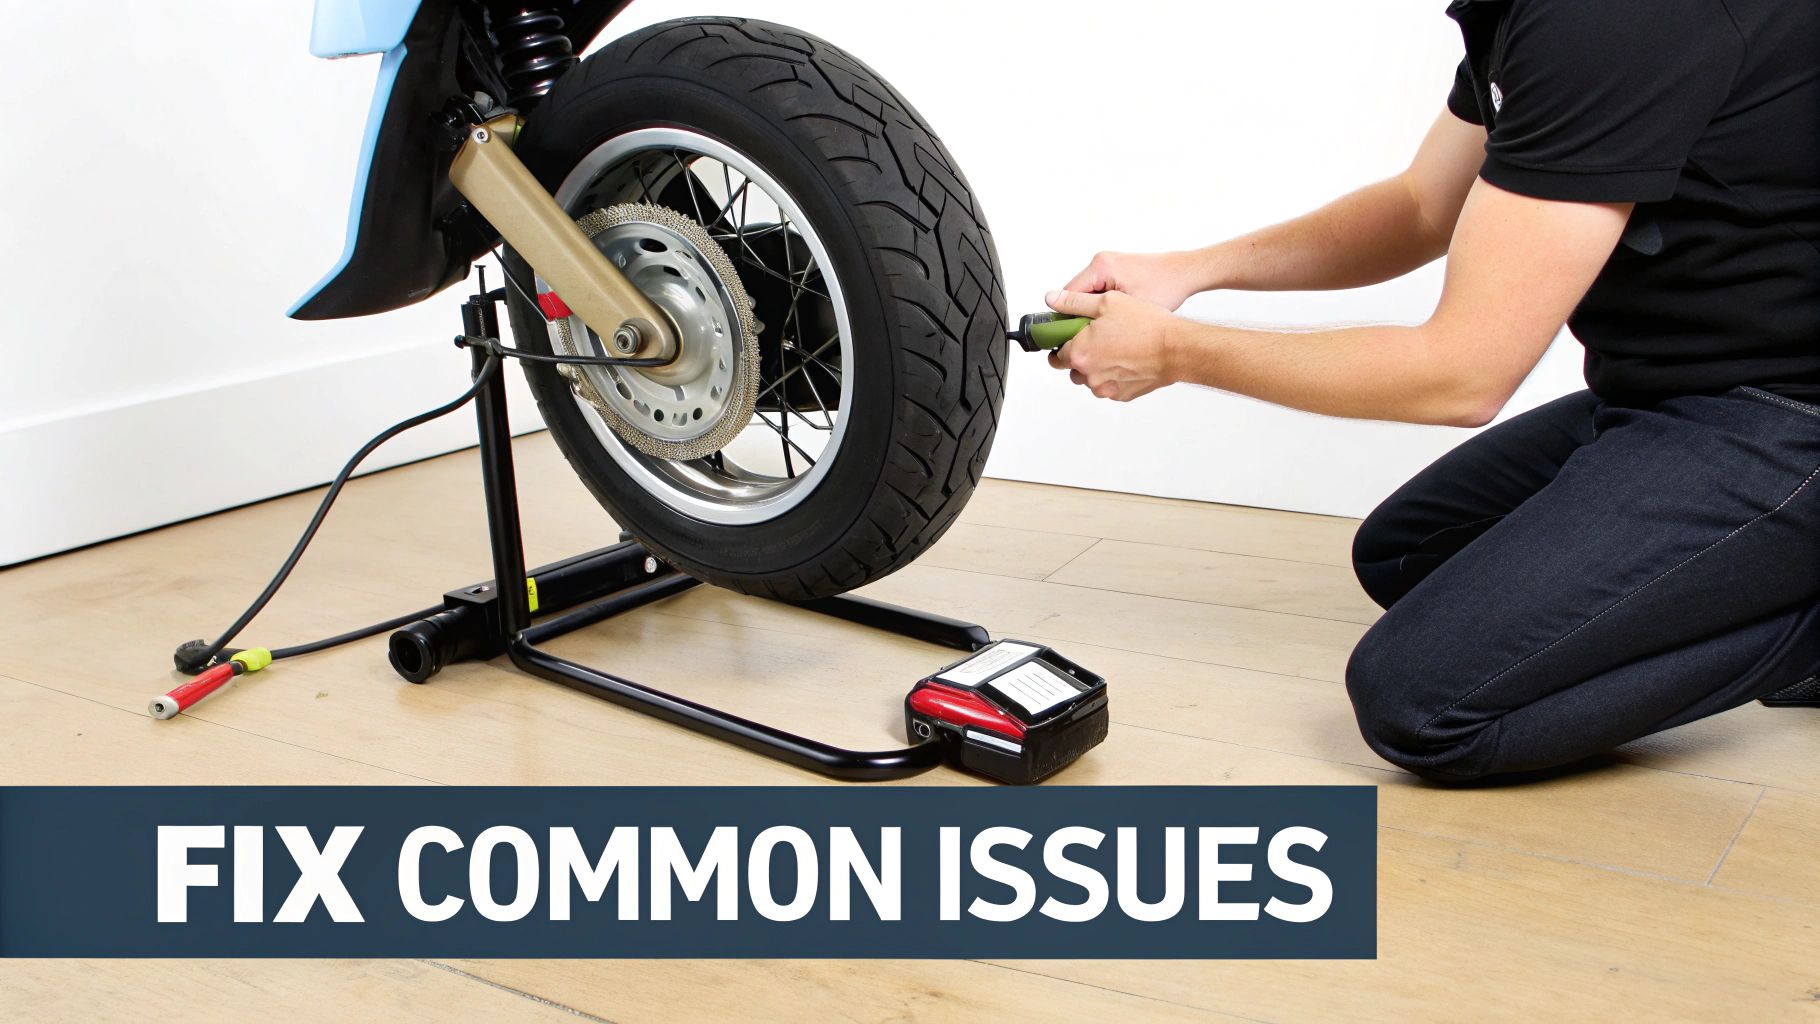
Ακόμα και όταν ακολουθείτε όλα τα βήματα τέλεια, μια αλλαγή ελαστικού σκούτερ μπορεί μερικές φορές να σας εκπλήξει. Συμβαίνει στους καλύτερους από εμάς. Το πραγματικό κόλπο είναι να ξέρετε πώς να διαχειριστείτε αυτές τις μικρές δυσκολίες ώστε να μην καταστρέψουν όλη σας τη μέρα.
Ένα από τα πιο εκνευριστικά πράγματα, ειδικά αν δουλεύετε με ελαστικό με σωλήνα, είναι το φοβερό τρύπημα από σφίξιμο. Έχετε κάνει όλη τη δύσκολη δουλειά, αρχίζετε να φουσκώνετε και ακούτε εκείνο το καταστροφικό σφύριγμα του αέρα που φεύγει. Ουφ. Αυτό σχεδόν πάντα σημαίνει ότι κατά λάθος σφίξατε τον εσωτερικό σωλήνα ανάμεσα στο μοχλό του ελαστικού και τη ζάντα.
Θα πρέπει να αφαιρέσετε ξανά το ελαστικό και να ψάξετε για ένα μικρό "δαγκωματιά φιδιού" — δύο μικρές παράλληλες τρύπες στον σωλήνα. Είναι ένα κλασικό λάθος, αλλά τώρα ξέρετε τι να ψάξετε.
Αναγνώριση και Επίλυση Τρεμουλιάσματος Μετά την Εγκατάσταση
Σας έχει τύχει να ξανασυναρμολογήσετε τα πάντα, να πάρετε το σκούτερ για μια βόλτα και να νιώσετε μια παράξενη κίνηση; Δεν είναι απλά ενοχλητικό· είναι πραγματικός κίνδυνος για την ασφάλεια.
Εννιά φορές στις δέκα, αυτή η κίνηση σημαίνει ότι το λάστιχο δεν έχει τοποθετηθεί ομοιόμορφα στη ζάντα. Η μία πλευρά έχει μπει στη θέση της, αλλά η άλλη είναι ακόμα κολλημένη στο κεντρικό κανάλι της ζάντας.
Να η λύση:
- Ξεφουσκώστε εντελώς το ελαστικό.
- Ψεκάστε αυτό το σαπουνάτο διάλυμα νερού γύρω από το λάστιχο και στις δύο πλευρές του ελαστικού. Μην διστάσετε να το χρησιμοποιήσετε άφθονα.
- Ξεκίνα να φουσκώνεις ξανά, αλλά αυτή τη φορά, κράτα προσεκτικά το μάτι σου στη γραμμή του χείλους στο πλευρικό τοίχωμα του ελαστικού.
- Παρακολουθείς να εμφανίζεται ομοιόμορφα σε όλη τη ζάντα. Μπορεί να ακούσεις και ένα δυνατό "ποπ" ή δύο καθώς κουμπώνει στη θέση του. Μερικές φορές πρέπει να πας λίγο πάνω από την προτεινόμενη πίεση (αλλά όχι πέρα από το μέγιστο PSI) για να το τοποθετήσεις πλήρως.
Το πιο παραμελημένο βήμα είναι ο τελικός έλεγχος πίεσης. Η σωστή πίεση PSI στα ελαστικά σου δεν είναι μόνο για απόδοση· είναι η πρώτη γραμμή άμυνας ενάντια σε μελλοντικά σκασίματα και άνιση φθορά. Η υποφούσκωση είναι ο εχθρός ενός ευτυχισμένου ελαστικού πατινιού.
Προβλήματα με tubeless και Συμβουλές Πίεσης
Αντιμετωπίζεις νέο ελαστικό tubeless με αργή διαρροή; Μην πανικοβάλλεσαι. Η σφράγιση στο χείλος ή γύρω από το βαλβίδα είναι πιθανό το πρόβλημα.
Πριν τα διαλύσεις όλα ξανά, δοκίμασε να προσθέσεις σφραγιστικό ελαστικού. Φούσκωσε το ελαστικό, μετά γύρισε καλά τον τροχό και χτύπα τον στο έδαφος για λίγα λεπτά. Αυτό ανακατεύει το σφραγιστικό μέσα, αναγκάζοντάς το να μπει σε οποιαδήποτε μικροσκοπικά κενά για να κλείσει τη διαρροή.
Η σωστή πίεση των ελαστικών είναι ο καλύτερός σου φίλος. Η οδήγηση με υποφουσκωμένα ελαστικά είναι απλώς πρόσκληση για προβλήματα—σε επιβραδύνει, αυξάνει την πιθανότητα σκασίματος από πρέσα και μπορεί ακόμη και να καταστρέψει τις ζάντες σου σε ανώμαλους δρόμους της πόλης. Κάνε συνήθεια να ελέγχεις την πίεση τουλάχιστον μία φορά την εβδομάδα με ένα καλό μετρητή.
Και, αν επίσης οδηγείς ηλεκτρικό ποδήλατο, πολλές από αυτές τις συμβουλές ισχύουν και εκεί. Οι αρχές είναι οι ίδιες για τα περισσότερα δίτροχα οχήματα. Αν ασχολείσαι με άλλο project, ο οδηγός μας για επισκευή ελαστικών ηλεκτρικού ποδηλάτου μπορεί να έχει επιπλέον συμβουλές για σένα. Η εκμάθηση να εντοπίζεις και να διορθώνεις αυτά τα κοινά προβλήματα θα σε κάνει πολύ πιο σίγουρο μηχανικό.
Οι Κορυφαίες Ερωτήσεις σου για τα Ελαστικά Πατινιών Απαντημένες
Έχουμε περάσει πολύ χρόνο σε φόρουμ πατινιών και σε συνομιλίες της κοινότητας, και οι ίδιες ερωτήσεις εμφανίζονται ξανά και ξανά. Έτσι, συγκεντρώσαμε τις πιο κοινές για να σου δώσουμε ξεκάθαρες, χωρίς φλυαρίες απαντήσεις.
Πόσο Συχνά Πραγματικά Χρειάζεται να Αλλάζω τα Ελαστικά του Ηλεκτρικού Πατινιού μου;
Δεν υπάρχει αυστηρός κανόνας εδώ. Όλα εξαρτώνται από το πόσο συχνά οδηγείς, το είδος του εδάφους που αντιμετωπίζεις και την ποιότητα των ελαστικών σου. Για έναν καθημερινό μετακινούμενο, ένας καλός κανόνας είναι να ελέγχεις τα ελαστικά σου κάθε μήνα και να περιμένεις να τα αντικαταστήσεις κάπου μεταξύ 1.500 έως 5.000 χιλιομέτρων (ή 1.000 έως 3.000 μιλίων).
Ειλικρινά, όμως, ξέχασε το οδόμετρο και απλώς χρησιμοποίησε τα μάτια σου. Τα πραγματικά σημάδια είναι αδύνατο να τα χάσεις: το πέλμα έχει φθαρεί τόσο που είναι λείο, εμφανίζονται ρωγμές στο πλευρικό τοίχωμα ή μια ξαφνική σειρά από σκασίματα. Τα χιλιόμετρα είναι απλώς ένας οδηγός· η ορατή φθορά είναι η τελική λέξη.
Μπορώ να Βάλω Ελαστικό Διαφορετικού Μεγέθους στο Πατίνι Μου;
Είναι δελεαστικό, αλλά πραγματικά πρέπει να τηρείτε το μέγεθος που προτείνει ο κατασκευαστής. Θα το βρείτε τυπωμένο στο πλευρικό τοίχωμα του τρέχοντος ελαστικού σας (θα μοιάζει με 10x2.5).
Η προσπάθεια να πάτε σε πιο φαρδιά ελαστικά είναι πρόσκληση για προβλήματα — μπορεί να τρίβονται στο πλαίσιο του πατινιού ή ακόμα και στα φρένα, κάτι που είναι σοβαρός κίνδυνος ασφάλειας. Το να πάτε σε πιο στενά μπορεί να κάνει το πατίνι να νιώθει ασταθές και να κουνιέται, αλλάζοντας εντελώς τον χειρισμό του. Αν αλλάζετε από ελαστικά με αέρα σε συμπαγή, απλώς ελέγξτε ότι το νέο ελαστικό είναι φτιαγμένο ειδικά για τη ζάντα του μοντέλου του πατινιού σας.
Αξίζει να Αναβαθμίσω σε Συμπαγή ή Ελαστικά Χωρίς Σωλήνα;
Όλα αυτά είναι θέμα συμβιβασμών. Η σωστή επιλογή εξαρτάται πλήρως από το τι προσπαθείτε να διορθώσετε. Αν έχετε κουραστεί να κάνετε τρύπες από γυαλί και αγκάθια στη διαδρομή σας, τότε ναι, η εγκατάλειψη των τυπικών ελαστικών με σωλήνα είναι μια αλλαγή παιχνιδιού.
Το συμπέρασμα: Τα συμπαγή ελαστικά εξαλείφουν εντελώς τις τρύπες, αλλά θυσιάζετε την άνεση και νιώθετε κάθε ανωμαλία. Τα ελαστικά χωρίς σωλήνα είναι μια φανταστική μέση λύση, προσφέροντας ομαλή βόλτα ενώ χρησιμοποιούν σφραγιστικό για να επιδιορθώνουν μικρές τρύπες εν κινήσει.
Αν οι τρύπες είναι ο κύριος εχθρός σας, αναβαθμίστε. Αν προτιμάτε μια απαλή και άνετη βόλτα πάνω απ’ όλα, μείνετε σε ελαστικά υψηλής ποιότητας με αέρα. Για πιο αναλυτική ενημέρωση, ο οδηγός μας με συμβουλές ασφάλειας για ηλεκτρικά πατίνια εξηγεί πώς ο σωστός εξοπλισμός κάνει τη βόλτα πιο ασφαλή.
Χρειάζομαι Πολλά Ειδικά Εργαλεία για Αυτή τη Δουλειά;
Δεν χρειάζεστε ένα πλήρες μηχανουργείο, αλλά το να έχετε μερικά συγκεκριμένα εργαλεία θα κάνει τη διαδικασία περίπου ένα εκατομμύριο φορές λιγότερο απογοητευτική. Τα απόλυτα απαραίτητα είναι ένα στιβαρό σετ μοχλών ελαστικών. Τα μεταλλικά προσφέρουν την καλύτερη ράβδο, αλλά οι μοχλοί με πλαστική επικάλυψη είναι ιδανικοί για να αποφεύγετε άσχημες γρατζουνιές στις ζάντες σας.
Θα χρειαστείτε επίσης τα κατάλληλα κλειδιά ή ένα σετ καρυδάκια για να αφαιρέσετε το παξιμάδι του άξονα του τροχού. Αν δουλεύετε με ελαστικά χωρίς σωλήνα, ένας αεροσυμπιεστής είναι σωτήρας για να τοποθετηθεί σωστά το πέλμα του ελαστικού, αλλά συνήθως μπορείτε να τα καταφέρετε με μια καλή αντλία δαπέδου και λίγη δύναμη. Μπορείτε να τα καταφέρετε χωρίς την τέλεια εξάρτηση, αλλά τα σωστά εργαλεία σας γλιτώνουν από πολλά προβλήματα.
Έτοιμοι να κάνετε τη βόλτα σας να κυλήσει ομαλά ξανά; Στο Punk Ride, διαθέτουμε μια επιλεγμένη συλλογή κορυφαίων ηλεκτρικών πατινιών και όλα τα ανταλλακτικά που χρειάζεστε για την επόμενη αλλαγή ελαστικού. Βρείτε την επόμενη αναβάθμισή σας στο https://www.punkride.com.
Μοιραστείτε:
Πώς να Επιλέξετε το Καλύτερο Κράνος για το Ηλεκτρικό Πατίνι σας
Εύρεση των Καλύτερων Κλειδαριών για Ηλεκτρικά Ποδήλατα