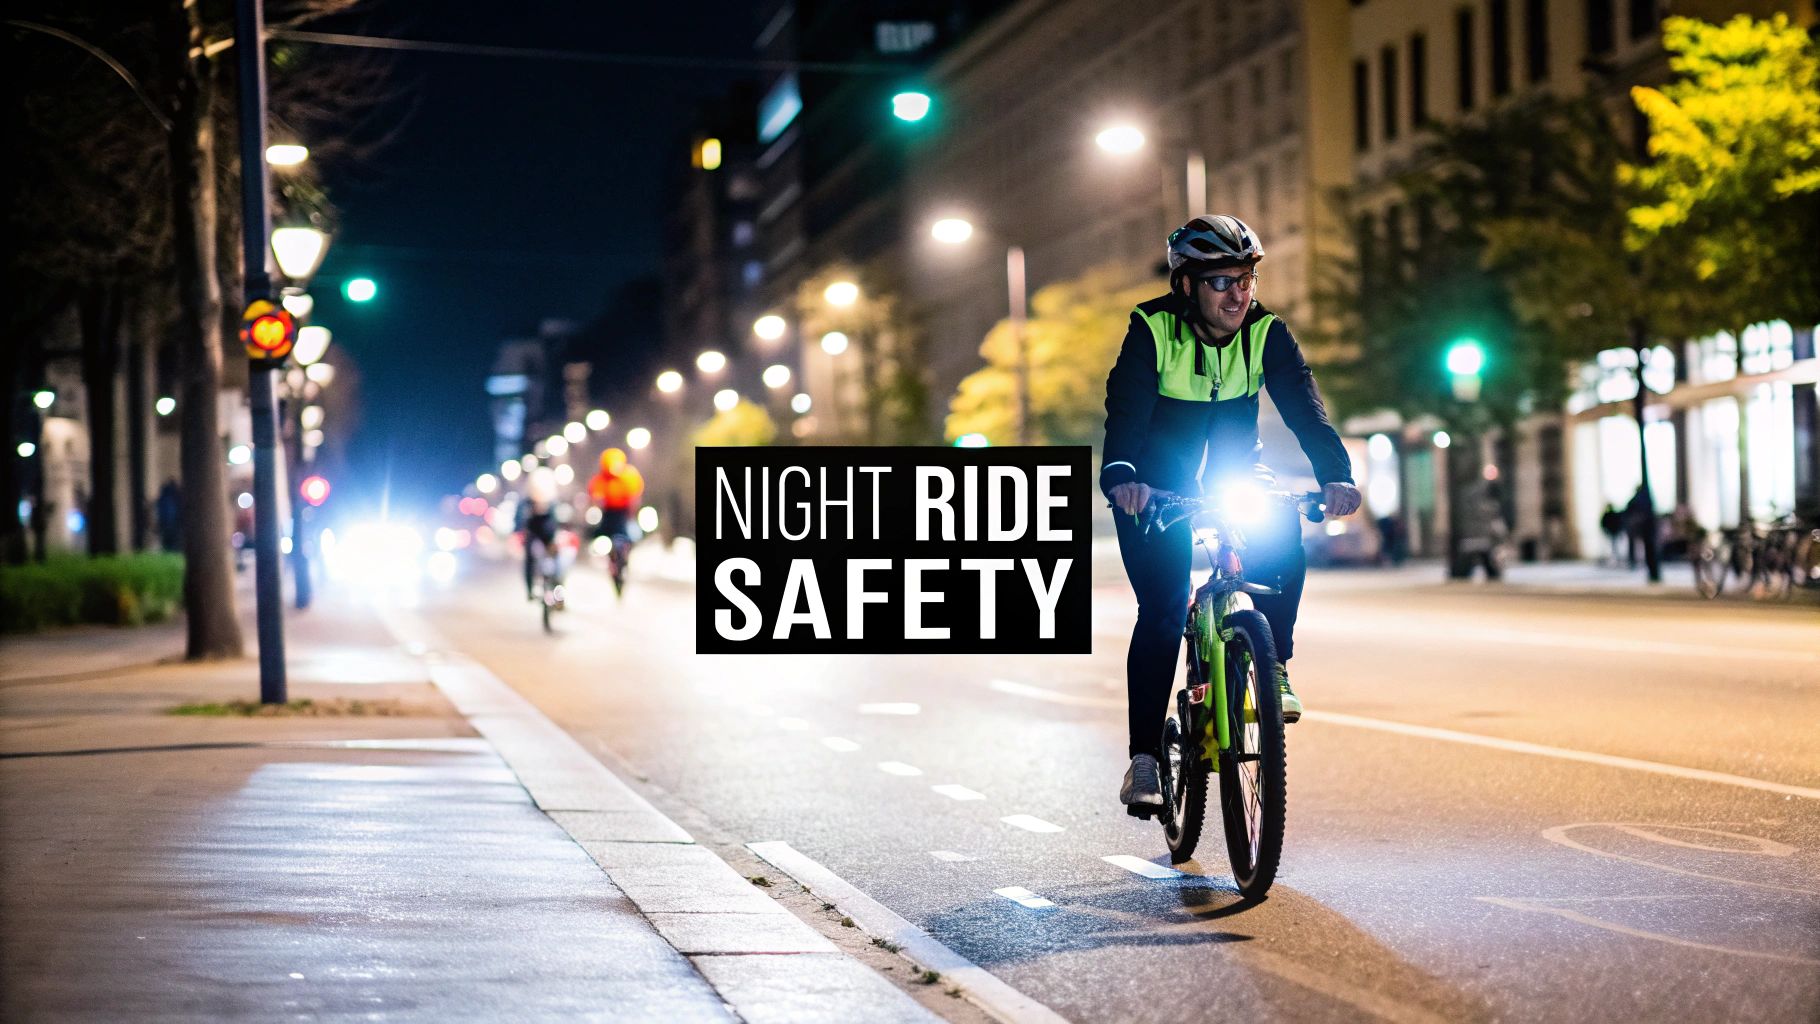
Jízda na kole v noci není jen jízda ve tmě. Je to úplně jiná hra. Abyste ji zvládli bezpečně, musíte úplně změnit své myšlení a přípravu. Jakmile zapadne slunce, vaše viditelnost – a samotná silnice – se mění způsoby, které možná nečekáte.
Proč jízda v noci vyžaduje jiný přístup
Existuje zvláštní druh svobody, kterou získáte, když jezdíte na svém elektrokole po západu slunce, ale není to nic jako vaše denní dojíždění. Ty známé městské ulice, ať už jste v rušném centru Sydney nebo v tiché americké předměstí, se proměňují v krajinu hlubokých stínů a oslňujících světel. Nejde jen o zapnutí světla; jde o přehodnocení celého přístupu k vnímání a bezpečnosti.
Největší a nejzřetelnější výzvou je viditelnost. Je to obousměrná ulice: vy nevidíte dobře a ostatní vás nevidí. Vaše schopnost rozpoznat nebezpečí jako jsou výmoly, kluzké mokré listí nebo rozbitý povrch silnice dramaticky klesá. Ta prasklina na silnici, které byste se přes den snadno vyhnuli, vás v noci může katapultovat. Zároveň pro řidiče, kteří jsou už tak rozptýlení, prakticky mizíte.
Skrytá nebezpečí tmy
Nejde jen o to, co vidíte a nevidíte. Tma totiž klame váš mozek. Snažit se odhadnout rychlost a vzdálenost blížícího se auta je mnohem těžší, když máte k dispozici jen dvě jasná světla. Tento zkreslený vjem hloubky znamená, že si musíte dát mnohem větší časový a prostorový odstup, zvlášť na křižovatce nebo při zařazování do provozu.
A to nejsou jen hypotetická rizika. Čísla jsou dost znepokojivá. Podle americké Národní správy bezpečnosti silničního provozu (NHTSA) se v roce 2022 stalo ohromujících 36 % všech smrtelných nehod cyklistů mezi 18:00 a 6:00. To je obrovské číslo, zvlášť když si uvědomíte, že tyto hodiny tvoří jen asi 10 % veškeré jízdy na kole. Pokud chcete jít do hloubky, najdete více informací o těchto trendech bezpečnosti cyklistiky a uvidíte, jak zásadní je skutečně viditelnost.
Podstata je taková, že jízda na kole v noci vyžaduje, abyste byli aktivní. Jde o to předvídat nebezpečí, která nevidíte, a zajistit, aby vás všichni ostatní na silnici viděli.
Než vůbec pomyslíte na vyjetí, musíte znát i místní pravidla. Stojí za to podívat se na náš průvodce o tom, zda jsou elektrická kola legální na silnici, abyste měli jistotu, že dodržujete zákony své oblasti pro jízdu po setmění.
Vytváření vašeho systému viditelnosti ve 360 stupních
Ujasněme si jednu věc: skutečná noční bezpečnost není o tom připevnit si na řídítka jedno levné světlo a tím to vyřídit. Jde o vytvoření ochranné "bubliny" viditelnosti kolem vás, která znemožní řidiči, aby vás přehlédl.
Abyste to opravdu zvládli, musíte myslet ve dvou různých kategoriích: světla, se kterými vidíte, a světla, se kterými jste viděni. Nejsou to totéž.
Světla pro vidění vs. světla pro být viděn
Vaše hlavní přední světlo je o vidění cesty před vámi. Musí vrhat silný, stálý paprsek, který dobře odhalí výmoly, sklo a další nečistoty ještě před tím, než na ně dojedete. To je naprosto klíčové na špatně osvětlené předměstské ulici nebo venkovské silnici. Pro tuto práci budete chtít světlo s pevnou hodnotou lumenů – počítejte alespoň s 400-800 lumeny pro městskou jízdu a ještě více pro tmavší trasy. Dobře tvarovaný paprsek, který osvětluje silnici, aniž by oslňoval protijedoucí dopravu, je zásadní.
Pak máte svá "být viděn" světla. Ta jsou o tom upoutat pozornost řidiče z dálky. Jsou to téměř vždy blikající světla, která můžete připevnit na helmu, batoh nebo zadní část kola. Jejich celým účelem je učinit vás viditelným, pohybujícím se majákem ze všech možných úhlů. Malé blikající červené světlo na sedlové trubce spolu s dalším na helmě může výrazně ovlivnit, jak rychle řidič zaregistruje vaši přítomnost zezadu.
Dva pilíře vašeho osvětlení
Jakmile pochopíte roli každého světla, je mnohem snazší sestavit efektivní nastavení. Opravdu potřebujete obě, abyste byli venku v bezpečí.
-
"Světla pro vidění" (vaše přední světlo): Toto je váš navigační nástroj. Hledáte jasný, stálý paprsek, který vrhá široký vzor, což vám dává dostatek času reagovat na nebezpečí. Městský dojíždějící může být spokojen s 500 lumeny, ale pokud jedete po neosvětlených cestách, důrazně doporučuji 1000 lumenů nebo více.
-
"Světla pro být viděn" (vaše blikající světla): Považujte je za svůj obranný štít. Červené blikající světlo vzadu je v většině míst zákonnou nutností, ale tím to nekončí. Přidání bílého blikajícího světla vpředu a dokonce oranžových světel na kolech nebo pedálech vás činí viditelným i ze stran – záchrana života na křižovatkách, kde se stává většina nehod.
Vidět, kam jedete, je jen polovina boje. Být viděn všemi ostatními je to, co vás udrží v bezpečí.
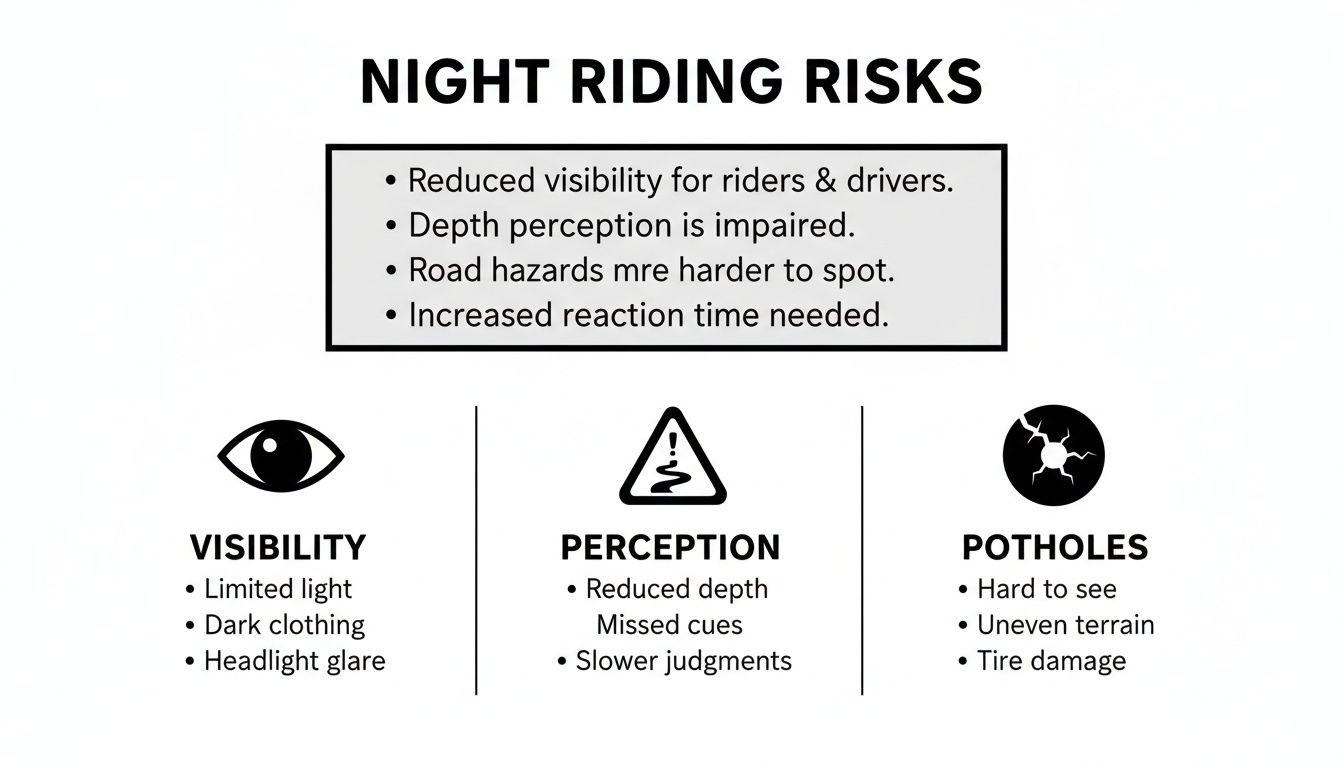
Jak vidíte, tato rizika jsou všechna propojená. Když je vaše viditelnost špatná, vaše schopnost zaznamenat a reagovat na věci jako výmoly výrazně klesá.
Aby to bylo opravdu praktické, tady je rychlý kontrolní seznam, který si projděte před odchodem.
Váš kontrolní seznam viditelnosti pro noční jízdu
Tato tabulka rozděluje výbavu, kterou považuji za nezbytnou, a co je jen hezký upgrade. Je to dobrý způsob, jak si stanovit priority, pokud si sestavujete výbavu od začátku.
| Typ výbavy | Nezbytné (Musíte mít) | Doporučeno (Hezké mít) | Profesionální tip |
|---|---|---|---|
| Přední světlo | Stálé bílé přední světlo (400+ lumenů) | Druhé bílé blikající světlo | Nastavte hlavní paprsek mírně dolů, abyste neoslňovali protijedoucí řidiče a cyklisty. |
| Zadní světlo | Jasné červené blikající světlo | Dvě červená světla pro zálohu | Jedno stálé a jedno blikající zadní světlo pomáhají řidičům lépe odhadnout vaši vzdálenost a rychlost. |
| Viditelnost ze stran | Reflexní bočnice pneumatik nebo nálepky | Světla na paprscích nebo pedálech | Pohyb upoutá pozornost. Světla na kolech nebo pedálech jsou neuvěřitelně účinná na křižovatkách. |
| Oblečení | Bunda/vesta s reflexními panely | Plně reflexní bunda nebo kryt na batoh | Retroreflexní materiál je váš nejlepší přítel. Odráží světlo přímo zpět ke zdroji, díky čemuž záříte. |
| Přilba | Reflexní nálepky | Světlo namontované na helmě (přední/zadní) | Světlo namontované vysoko na helmě je viditelné přes auta a jiné překážky. |
Tento kontrolní seznam by vám měl dát pevný základ pro sestavení výbavy, která vás udrží viditelné a v bezpečí, ať už jezdíte kdekoli.
Podívejte se dál než na kolo
Váš systém viditelnosti nekončí u hardwaru na vašem kole. To, co nosíte, hraje obrovskou roli.
Oblečení s vysokou viditelností a retroreflexními panely je naprostý průlom. Tyto věci nejsou jen jasné; jsou navrženy tak, aby světlo přímo odrážely zpět ke zdroji – jako světla auta – a díky tomu vyniknete. Na druhou stranu, vypořádat se s těmi jasnými světly, která na vás míří, je také opravdová výzva. Stojí za to podívat se na věci jako brýle proti oslnění pro noční jízdu, které pomáhají udržet váš zrak ostrý.
Častou chybou, kterou vidím, je spoléhání se na jedno přední světlo a továrně instalovaný zadní odrazový prvek. Skutečná 360stupňová viditelnost znamená být viděn zepředu, zezadu a – nejdůležitěji – ze stran.
Najít perfektní výbavu je trochu osobní cesta, ale skvělým místem pro začátek je náš průvodce nejlepšími doplňky pro elektrická kola. Je plný možností osvětlení a dalších nezbytností pro noční jezdce. Podívejte se na něj na: https://www.punkride.com/blogs/news-advice/best-electric-bike-accessories
Ovládnutí defenzivní jízdy ve tmě
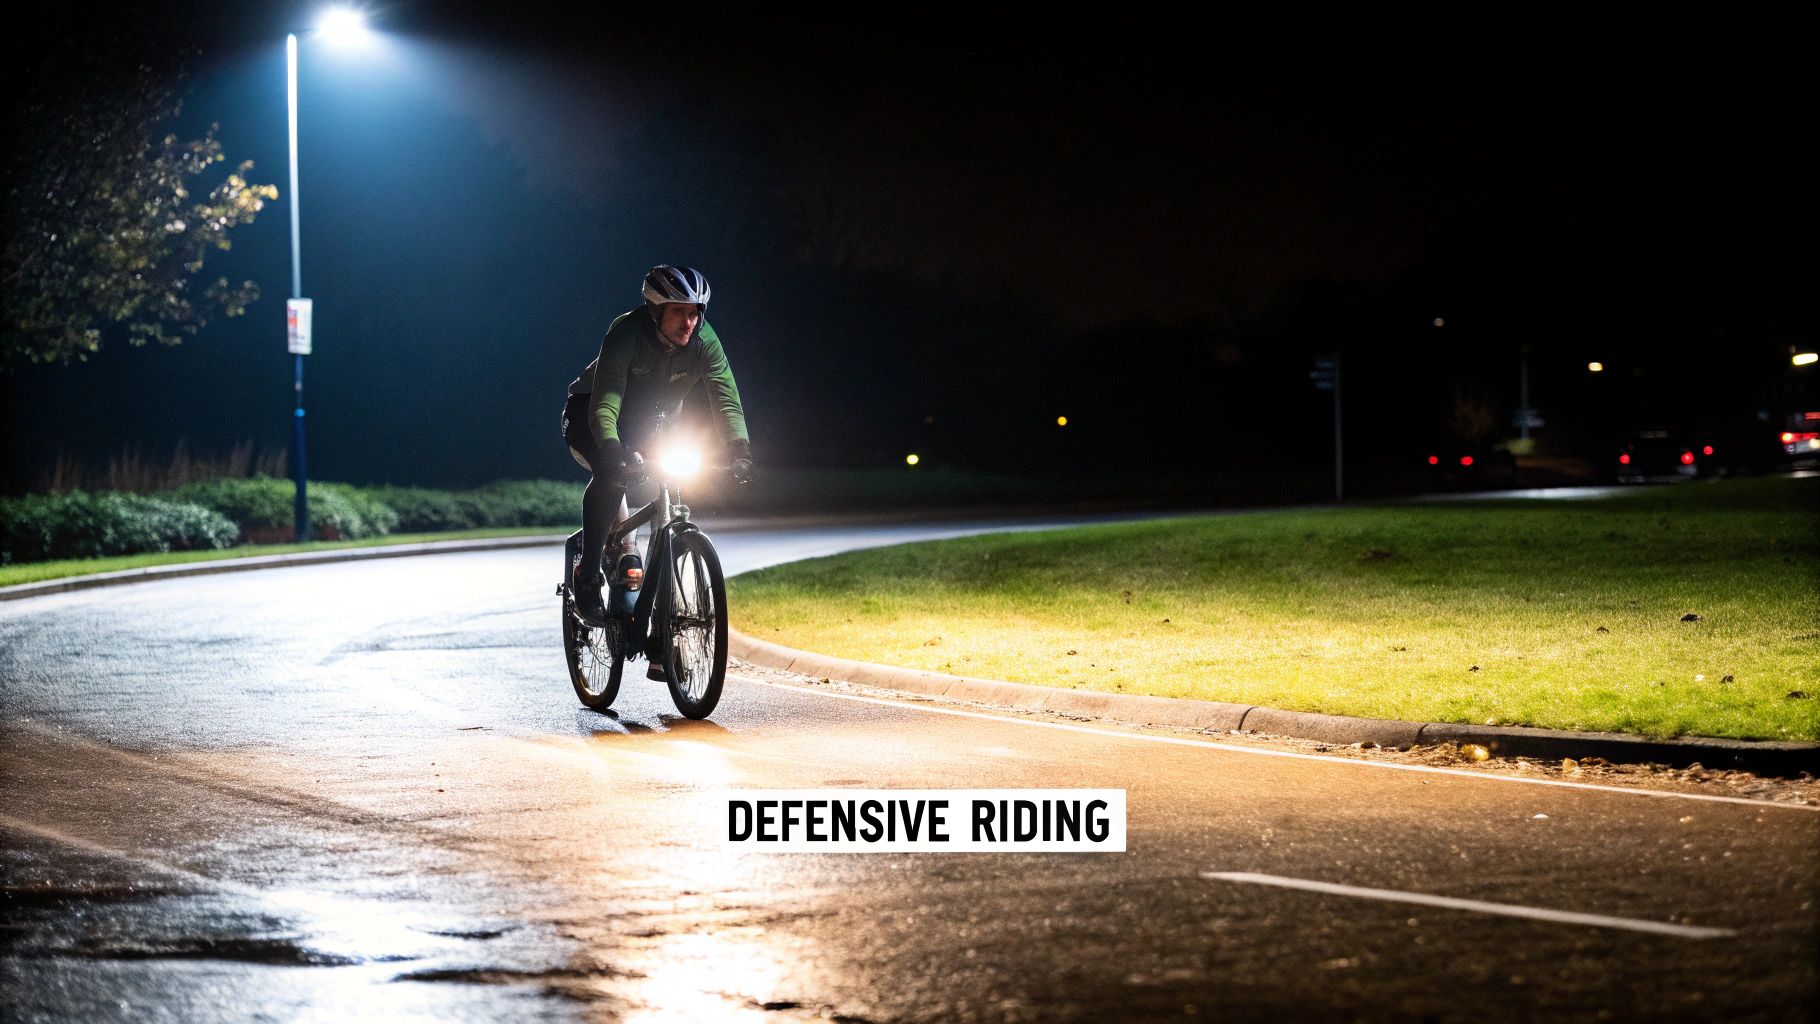
Mít nejlepší světla a reflexní výbavu je skvělý začátek, ale je to jen polovina boje. To, jak skutečně jezdíte po západu slunce, je to, co vás opravdu udrží v bezpečí. Defenzivní jízda v noci není o bázlivosti; je to o chytrosti, předvídatelnosti a neustálém přemýšlení o dalším kroku.
Největší změna, kterou musíte udělat? Zpomalte. Vážně. Vaše světlo osvětluje jen omezenou část silnice před vámi, což výrazně zkracuje váš čas na reakci. Ta díra v silnici, které byste se přes den snadno vyhnuli, se může náhle objevit z tmy a nedat vám čas zareagovat. Trochu ubrat na rychlosti vám koupí drahocenné sekundy, které potřebujete k rozpoznání nebezpečí, jeho zpracování a bezpečnému objetí.
Buďte vidět, buďte asertivní
To, kde se v jízdním pruhu umístíte, je jeden z vašich nejsilnějších nástrojů pro komunikaci s řidiči. Je lákavé držet se u obrubníku, protože si myslíte, že je to nejbezpečnější místo, ale často vás to schová do stínů, díky čemuž jste prakticky neviditelní. To je obzvlášť nebezpečné na křižovatkách a příjezdových cestách.
Nebojte se „vzít si pruh“, když to situace vyžaduje. To znamená přesunout se do středu jízdního pruhu, čímž se dostanete přímo do zorného pole řidiče, když se blížíte a projíždíte křižovatkou. Zjistil jsem, že je to nezbytná taktika v předměstských oblastech v USA a Austrálii, kde auta mohou nečekaně vyjet z málo osvětlených příjezdových cest. Tím, že se stanete nevynechatelným, nutíte řidiče, aby si vás všimli.
Nikdy nepředpokládejte, že vás řidič vidí jen proto, že máte zapnutá světla. Vždy jezdím, jako bych byl neviditelný, a snažím se navázat oční kontakt, abych potvrdil, že mě zaznamenali. Je to zvyk, který mi už několikrát zachránil kůži.
Aktivně skenujte své okolí
Jízda v noci z vás dělá neustále skenujícího jezdce. Musíte být neustále ve střehu a sledovat mnohem víc než jen auta, využívat jemné náznaky k čtení silnice před sebou.
Vaše oči by se měly neustále pohybovat.
- Povrch vozovky: Dávejte pozor na odrazivý lesk na vozovce. Ten kluzký vzhled může být voda, náledí nebo olejová skvrna – to jsou věci, kterým se chcete vyhnout.
- Stíny: Věnujte pozornost tomu, jak stíny tančí a pohybují se pod pouličními lampami. Stín, který náhle změní tvar, může být chodcem, který sjíždí z obrubníku, nebo zvířetem, které vbíhá do vaší cesty.
- Periferní vidění: Nenechte se omezit úzkým zorným polem jen na to, co osvětluje vaše světlo. Používejte periferní vidění, abyste zachytili pohyb z bočních ulic, uliček a příjezdových cest.
Přemýšlejte o průjezdu kruhovým objezdem nebo křižovatkou se stopkou za špatného osvětlení. Nehledáte jen auta; také sledujete povrch vozovky kvůli štěrku nebo nečistotám a ujistíte se, že řidiči, kteří právě vjíždějí, vás skutečně vidí přicházet. Ovládnutí těchto technik promění stresující noční jízdu v sebevědomý a dokonce klidný zážitek.
Naplánujte si trasu a pojedete bezpečněji
Ta trasa, kterou máte rádi přes den? Po setmění může působit jako úplně jiný svět. Dobrá a bezpečná noční jízda závisí především na jedné věci: chytrém plánování trasy. Nejde jen o nejkratší cestu; jde o výběr takové, která vás udrží v bezpečí.
Vaší nejvyšší prioritou by mělo být světlo. Než vůbec začnete přemýšlet, kterým směrem jet, naplánujte si ulice ve vaší oblasti, které jsou skutečně dobře osvětlené. Rušné hlavní silnice obvykle mají lepší pouliční osvětlení než tiché sousedské ulice, což je bezpečnější volba i přes větší provoz. Držet se dobře osvětlených cest je nejlepší způsob, jak se vyhnout překvapením v podobě výmolů nebo nepořádku na silnici.
Použijte technologie k malému průzkumu
Nemusíte hádat, jestli je trasa bezpečná. Trocha digitálního průzkumu může udělat obrovský rozdíl a dodat vám skutečný klid na duši.
- Google Street View: To je váš nejlepší přítel při plánování noční jízdy. Proveďte virtuální předjížďku, abyste odhalili potenciální nebezpečí, jako jsou dlouhé, tmavé úseky mezi pouličními lampami, matoucí křižovatky nebo silnice, které náhle ztrácejí krajnici či cyklopruh.
- Cyklistické aplikace: Aplikace jako Komoot nebo Ride with GPS jsou skvělými zdroji. Často zvýrazňují trasy oblíbené u ostatních cyklistů, což obvykle znamená, že jsou bezpečnější a příjemnější. Některé mají dokonce mapové vrstvy nebo noční režimy, které vám pomohou lépe si představit cestu.
Přemýšlejte o tom takto: pokud dojíždíte domů ve velkém městě, rychlý pohled na Street View může odhalit, že o něco delší trasa přes dobře osvětlený park je mnohem lepší volbou než přímá zkratka přes temnou průmyslovou oblast.
Místní silnice, globální pravidla
Ať už jste kdekoli na světě, základní principy bezpečné noční jízdy jsou stejné, ale místní detaily jsou důležité.
- USA a Austrálie: V rozlehlejších předměstských oblastech můžete zjistit, že silnice, která je v 17:00 chaotickým nepořádkem, je v 21:00 prakticky prázdná. V těchto případech hledejte trasy s nižšími rychlostními limity a jednoduchými čtyřcestnými zastávkami místo obrovských, vícepásmových křižovatek.
- UK a EU: Mnoho měst po celé Evropě má nyní vyhrazené, dobře osvětlené „cyklistické superdálnice“. Pokud máte přístup k jedné z nich, použijte ji. Přidání pár minut k jízdě je malá cena za mnohem bezpečnější cestu.
Na konci dne je o něco delší, ale bezpečnější trasa vždy správnou volbou. Je to kompromis, který zvýší vaši důvěru a udrží vás v bezpečí.
A 2023 Průzkum Adventure Cycling zjistil, že ultra-vytrvalostní cyklisté, kteří jezdí v noci, snižují denní rizika v dopravě o 31%. Ale tato výhoda závisí na silných světlech a pevném plánu. Podívejte se na kompletní výzkum těchto zjištění o vytrvalostní cyklistice, abyste viděli, jak kritické jsou vybavení a plánování.
Váš předjízdní bezpečnostní rituál
Několik minut přípravy před vyjetím do tmy může znamenat rozdíl mezi hladkou jízdou a vážnou bolestí hlavy. Nemohu to dostatečně zdůraznit: udělat z rychlé bezpečnostní kontroly nezpochybnitelný zvyk je to nejlepší, co můžete pro svou bezpečnost udělat. Nejedná se o kompletní mechanický rozbor; je to jednoduchý, rychlý rituál, který byste měli provádět pokaždé.
Přemýšlejte o tom jako o předletové kontrole pilota. Cílem je odhalit malé problémy dřív, než se promění ve velké potíže na tmavé silnici.
Základní kontrolní seznam pro noční jízdu
Jakmile si to osvojíte, celý proces zabere možná dvě až tři minuty, ale je to čas velmi dobře investovaný.
- Kontrola baterie a světel: To je priorita číslo jedna, tečka. Ujistěte se, že všechna vaše světla – přední, zadní i případné doplňky – jsou plně nabitá a fungují správně. A nezapomeňte na baterii vašeho elektrokola. Vybitá světla nebo motor po setmění jsou receptem na nepříjemnosti.
- Test brzd: Stiskněte oba brzdové páky. Jsou pevné? Fungují správně? Přejeďte s kolem trochu vpřed a znovu je otestujte, abyste se ujistili, že máte skutečnou brzdnou sílu.
- Kontrola pneumatik: Rychle a pevně zmáčkněte pneumatiky, abyste zkontrolovali tlak. Také hledejte zjevné známky poškození, jako jsou malé střepy skla nebo ostré kameny zabodnuté v gumě.
Pravidelná předjízdní kontrola není o paranoii; je to o připravenosti. Když berete svou bezpečnost vážně, můžete jezdit s jistotou, nikoli s neustálým strachem, že vás vybavení zklame.
Připravenost vybavení a počasí
Poté, co kolo dostane palec nahoru, rychle zkontrolujte i své vlastní vybavení.
Je ta reflexní bunda nebo vesta čistá? Může to znít hloupě, ale zaschlá bláto a špína mohou vážně ztlumit jas reflexních materiálů, díky čemuž budete pro řidiče mnohem méně viditelní.
Nakonec vytáhněte telefon a věnujte pět sekund kontrole počasí. Nečekaná přeháňka může udělat povrch silnice nebezpečně kluzkým a okamžitě zhoršit viditelnost. Když víte, co přijde, můžete se na to obléct a upravit způsob jízdy ještě před tím, než zamknete přední dveře.
Zatímco jste u toho, zařaďte pravidelnou údržbu řetězu kola do své rutiny. Věřte mi, přetržený řetěz v úplné tmě je situace, které se rozhodně chcete vyhnout. Když tyto malé kroky začleníte do svého předjízdního rituálu, bezpečnost přestane být otravnou povinností a stane se přirozenou součástí.
Jak řešit problémy na kraji silnice po setmění
Jednoduchý defekt nebo vybitá svítilna působí desetkrát hůř, když stojíte na kraji tmavé silnice. Ale trochu přípravy může proměnit potenciální nouzovou situaci v pouhé malé zdržení.
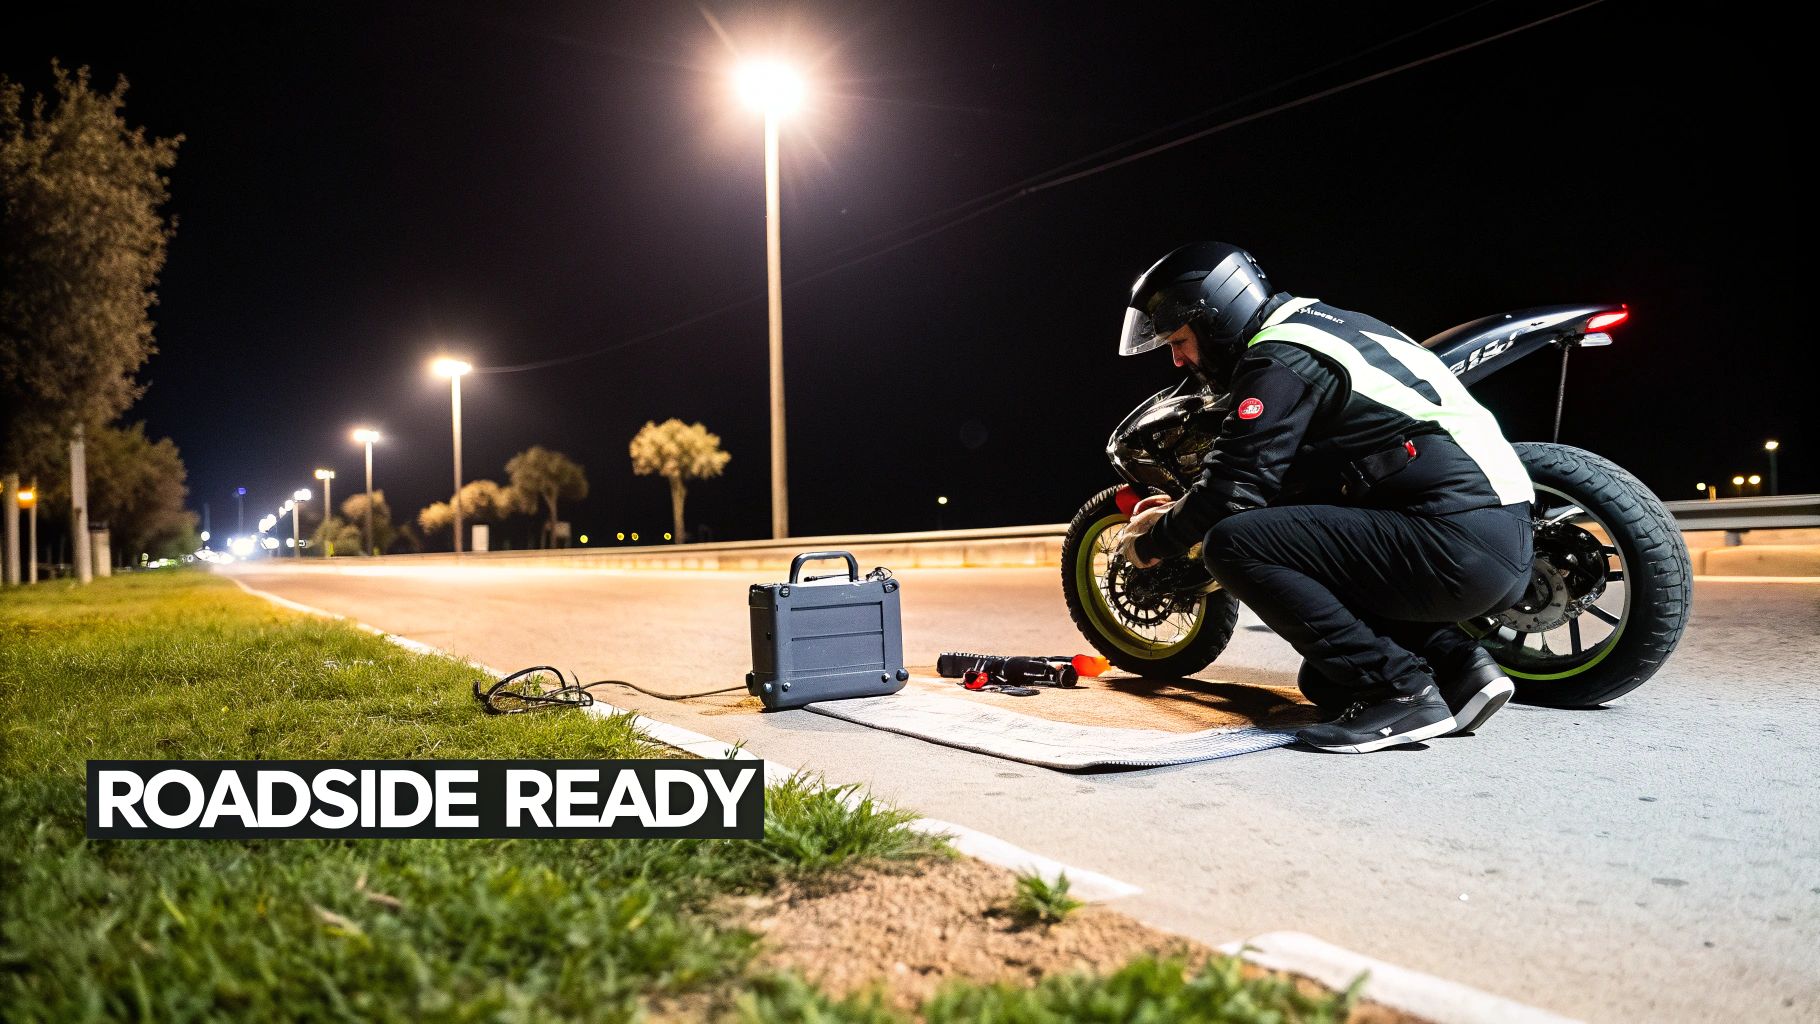
Než cokoli uděláte, dostaňte se na bezpečné místo. Zajet co nejdál od silnice, ideálně pod pouliční lampu, aby vás bylo vidět. Nechte světla blikat, aby blížící se doprava věděla, že tam jste.
Váš minimalistický opravný kit na noční jízdu
Nemusíte tahat celou svou dílnu. Několik nezbytností schovaných v malé brašně pod sedlem nebo batohu vás provede většinou běžných potíží, které potkáte při jízdě v noci.
- Multinářadí s děrovačem řetězu: Považujte to za svůj záchranný švýcarský nůž na cestě. Slušné nářadí utáhne uvolněné šrouby a zvládne většinu rychlých úprav.
- Páčky na pláště a sada na opravu: Defekt je zdaleka nejčastější problém na kraji silnice. Umět rychle zalepit duši je dovednost, kterou by měl mít každý jezdec. Pro kompletní osvěžení si přečtěte náš průvodce nafukováním cyklistických plášťů a řešením defektů.
- Mini pumpička nebo CO2 nafukovač: CO2 nafukovač vás dostane zpět na cestu během vteřin, ale mini pumpička je spolehlivá volba, protože nikdy nedojde vzduch.
- Přenosná powerbanka: I malá má dost energie na oživení vybitého telefonu nebo na dobití USB dobíjecího světla, aby vás dostalo domů.
Cílem není být na kraji silnice mistrem mechaniky. Jde o to mít právě tolik, abyste opravili jednoduché věci a mohli pokračovat v jízdě, proměnit chvíli paniky v pětiminutovou opravu.
Rychlé opravy běžných problémů
Pokud vám náhle zhasne světlo, nejprve zkontrolujte spojení. Hrbolatá cesta může snadno uvolnit drát. Pokud máte model dobíjený přes USB, powerbanka, kterou jste si vzali, se stane vaším nejlepším přítelem.
Řešíte defekt ve tmě? Právě tady se vaše čelovka nebo svítilna v telefonu stává nepostradatelnou pro nalezení té malé dírky. Jakmile jste bezpečně mimo silnici, nechte si čas. Spěchání s výměnou duše ve tmě je jistá cesta k tomu, že novou duši poškodíte a skončíte tam, kde jste začali.
Jednoduchá sada a chladná hlava vás provedou téměř čímkoli, co vám noc přichystá.
Stále máte otázky ohledně jízdy v noci?
Pokud uvažujete o jízdě po setmění, pravděpodobně máte pár otázek v hlavě. To je naprosto normální. Pojďme si projít některé z nejčastějších, které slyším od jezdců.
"Je to vůbec legální?"
Tohle je bezpochyby ta největší otázka. Krátká odpověď je ano, ale potřebujete správné vybavení.
Téměř všude – ať už jste v USA, Austrálii, Velké Británii nebo EU – platí zákony vyžadující bílé přední světlo a červené zadní světlo od západu do východu slunce. Odrazky jsou skvělé a často také povinné, ale nenahrazují aktivní světla.
Nejlepší je rychle vyhledat webové stránky místního státního dopravního úřadu nebo radnice. Stačí zadat „pravidla pro světla na kole [vaše město/stát]“ a získáte konkrétní informace.
"Mohu použít jen své denní vybavení?"
Přál bych si, aby to bylo tak jednoduché, ale není. Helma je samozřejmě v pořádku, ale všechno ostatní je potřeba přehodnotit.
Standardní odrazky, které jsou na kolech, jsou pasivní, což znamená, že fungují jen když na ně správně dopadnou světla auta. To nestačí. Potřebujete bateriová světla, která oznámí vaši přítomnost všem na silnici.
A taky ta cool černá nebo tmavě modrá jezdecká bunda, kterou máte rádi? V noci z vás dělá ninju – a to v tom špatném smyslu. Stáváte se prakticky neviditelnými. Budete muset přidat nějaké jasné, reflexní vrstvy, abyste vynikli.
"Co s baterií mého elektrokola?"
Tohle je velká věc pro jezdce na elektrokolech a elektrických skútrech. Jasná světla rozhodně spotřebují více baterie, tomu se nevyhnete.
Trik je být chytrý v používání energie. Pokud jedete na dlouhou trasu, možná přepněte světla do úsporného blikacího režimu na dobře osvětlených ulicích. Můžete také snížit úroveň asistence šlapání o stupeň, abyste měli dostatek energie na bezpečný návrat domů.
Jde o nalezení rovnováhy mezi tím, být viděn, a šetřením energie.
"Jsou skupinové jízdy dobrý nápad?"
Rozhodně! Jízda ve skupině v noci je fantastický zážitek. Celá skupina jezdců s blikajícími světly je mnohem viditelnější než jeden člověk sám. Je to obrovský bezpečnostní přínos.
Navíc je síla v počtu. Když někdo dostane defekt nebo má mechanický problém, máte hned po ruce přátele, kteří pomohou. Jen se ujistěte, že všichni ve skupině jsou správně osvětleni, aby nedošlo k nárazům. Dobře osvětlená skupinová jízda může úplně změnit, jak po setmění vnímáte své město.
Připraveni vyrazit na další dobrodružství, ve dne i v noci? Ve Punk Ride LLC nabízíme obrovský výběr vysoce výkonných elektrických kol a skútrů, které jsou ideální pro jakoukoli jízdu. Najděte si svého ideálního společníka a rozjasněte noc. Prozkoumejte naši kolekci.
Sdílet:
Nejlepší doplňky pro elektrokolo pro vaši dokonalou jízdu
Hledání elektrických kol poblíž mě: Průvodce pro jezdce v USA a Austrálii