You usually find out how awkward this job is when the wheel is already off, the old tyre is half-peeled back, and the new one looks like it was made for a different machine. That's especially true on UK and EU e-scooters and commuter e-bikes, where small-diameter wheels, stiff sidewalls, and hub motors turn a basic tyre swap into a proper workshop task.
Installing tires on rims on a car wheel is one thing. Doing it on a 10-inch scooter tyre with a stubborn bead and not much room to work is another. The job isn't hard because the idea is complicated. It's hard because the parts are tight, the margin for sloppiness is small, and the usual bicycle shortcuts often don't work.
A clean install comes down to three things. Use the right tools, match the tyre to the rim properly, and stop forcing parts that should be guided into place. That's the difference between a tyre that seats cleanly and one that leaks, wobbles, or fights you all afternoon.
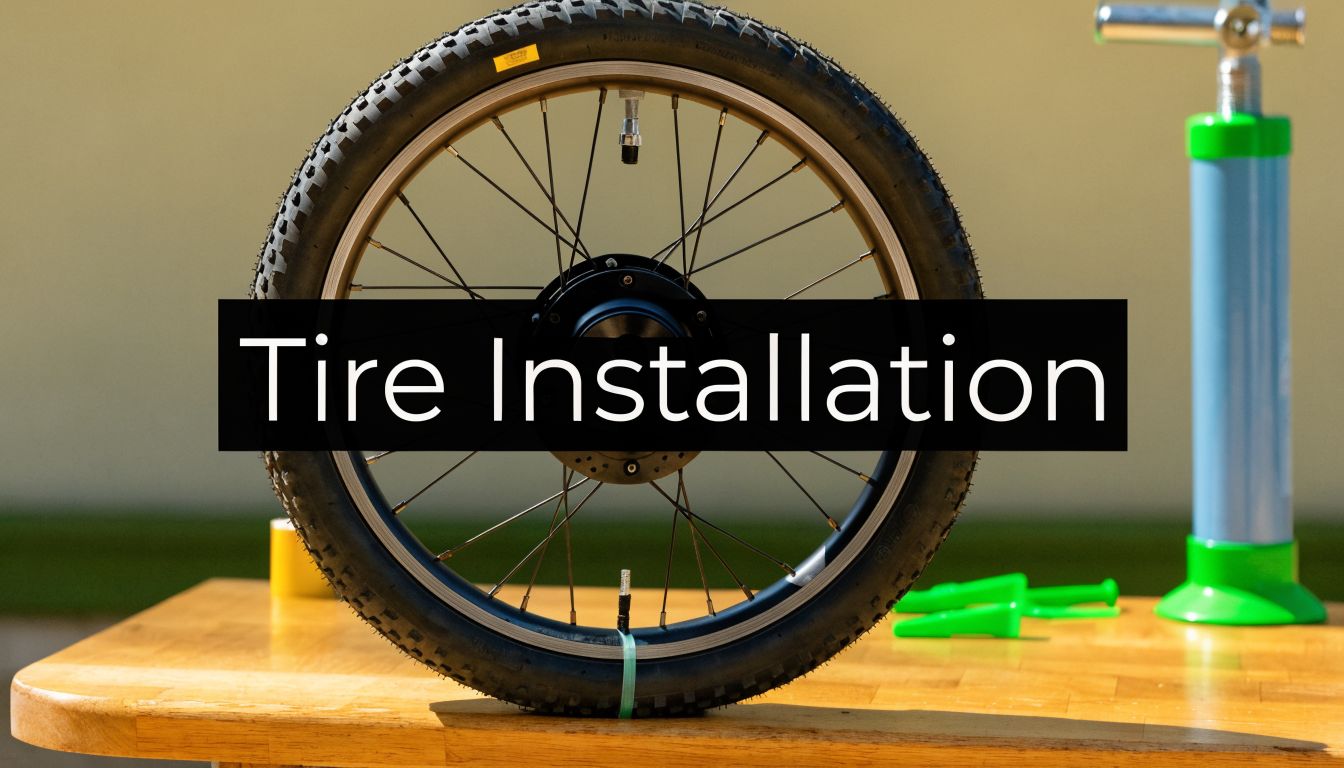
Gathering Your Tools and Supplies
You feel the difference at the bench straight away. A 10-inch scooter tyre with a stiff bead does not behave like a normal bicycle tyre, and if the wheel has a hub motor hanging off one side, every weak tool shows itself quickly.

The job goes better when everything is laid out before you start. On small UK and EU e-scooter and e-bike wheels, stopping halfway to hunt for a valve tool or a better lever usually means fighting a half-mounted tyre that has already crept out of the rim well.
What you actually need on the bench
For most e-bike and e-scooter tyre changes, keep these within reach:
- Strong tyre levers: Thin plastic bicycle levers are often too flexible for small scooter tyres. Heavy-duty composite levers or metal-core levers hold up better and give more control.
- A pump with a gauge: Bead seating problems are often pressure problems. A proper gauge saves guesswork.
- Valve core remover: Useful for deflating quickly, replacing a damaged core, and getting more air flow during seating.
- Bead lubricant: Use tyre mounting lube or a product meant for bead work. It helps the tyre slide into place without dragging or twisting.
- Rim protectors or a cloth: Worth having if the wheel has painted or soft-finish rims.
- Brushes and rags: Clean out grit, dried sealant, rust, and old rubber before the new tyre goes on.
- Appropriate spanners or sockets: Hub-motor wheels often come with axle nuts, spacing hardware, and cable routing that need the correct tools, not an adjustable spanner you happen to have nearby.
- A torque wrench: Reinstalling a driven wheel by feel is a bad habit. Tighten axle hardware to spec.
- Bead clamps or a third-hand tool: Very helpful on narrow rims and tyres with stubborn sidewalls.
Workshop rule: If the lever feels like it might twist or fold, stop using it before it damages the tube, the rim, or your knuckles.
Why tool choice matters more on e-rides
A standard tyre fitting process still applies. Remove the old tyre, inspect the rim, lubricate the bead, mount the new tyre, then inflate and check the seat. This tire installation workflow guide lays out that sequence clearly.
Small e-ride wheels make each step tighter and less forgiving. The sidewalls are often stiffer than riders expect, especially on puncture-resistant scooter tyres. The rim diameter gives you less room to work the bead into the drop centre. Hub motors make the wheel heavier and more awkward to turn on the bench. On some setups, the right tyre and a few proper fitting tools matter as much as technique, especially with the kind of tyres for electric scooters commonly sold for commuter machines in the UK and EU.
The trade-off is simple. Cheap tools can still get the tyre on, but they make the job slower, rougher, and more likely to pinch a tube or scar a rim.
Supplies people forget
These are the bits that usually hold the job up:
- New valve stem or fresh tube: Reusing an old, cracked tube or bent valve is false economy.
- Rim tape for suitable setups: Some e-bike rims need fresh tape before they are ready for a new tyre or tube.
- Nitrile gloves: Useful once bead lube, brake dust, and sealant get involved.
- A soft mallet: Handy for gentle wheel-removal work or freeing parts that are lightly stuck. It is not a bead-seating tool.
- Stable work surface: Floor jobs are possible. A bench at a sensible height gives better control and puts less strain on your back.
E-ride specific shops often bundle these items, which makes sourcing simpler if you need tyre, tube, valve parts, and workshop consumables in one order.
Matching Your New Tire to Your Rim
Most installation problems start before the wheel ever hits the bench. The tyre was wrong for the rim, wrong for the riding load, or wrong for the valve and tube setup. On UK and EU e-rides, ETRTO sizing is usually the cleanest way to avoid that mess.
Read the size properly
Ignore marketing names first. Read the sidewall and the rim markings.
You're looking for a diameter and width that correspond to the rim, not a tyre that “looks close enough.” Compatibility is standardised, and rim width matters more than many riders realise. One fitment guide notes that a P205/55R16 tyre is approved for rim widths of 5.50", 6", 6.50", 7", and 7.50", and changing rim width by 1/2 inch can alter the tyre's section width by about 1/5 inch. That's why matching manufacturer specs is not optional when checking tyre-to-rim compatibility.
That example comes from the wider tyre world, but the principle applies directly to e-bikes and scooters. On small wheels, a bad match shows up quickly as awkward bead fit, strange tyre profile, rubbing, or unstable handling.
A tyre that can be forced onto a rim is not automatically a tyre that belongs on that rim.
Tubed and tubeless are not the same job
A lot of commuter riders ask whether they should stay with tubes or switch to tubeless. The answer depends on the rim, the tyre, and how much maintenance you're willing to tolerate.
| Feature | Tubed Tires | Tubeless Tires |
|---|---|---|
| Installation feel | Usually simpler to understand, but easier to pinch a tube during fitting | More sensitive to bead fit and rim condition |
| Puncture response | Tube replacement is straightforward, though roadside work can be awkward | Small punctures may seal, but bead and valve setup must be right |
| Rim requirements | More forgiving of rim imperfections | Demands a cleaner sealing surface and compatible rim/tyre pairing |
| Pressure behaviour | Familiar for many riders | Can be excellent when set up right, frustrating when not |
| Best fit for many commuters | Good for riders who want simple serviceability | Good for riders with compatible hardware and patience for setup |
If you're still deciding what tyre type suits your scooter, this guide to tires for electric scooters is a useful companion read.
Valve type and rim prep
Presta and Schrader matter less as a debate and more as a compatibility check. Use the valve style your rim is drilled for, unless you're intentionally adapting the setup and know exactly why. A poor valve fit creates headaches that get blamed on the tyre.
For tubed installs, inspect the tube size and valve angle before you start. For tubeless, pay close attention to the valve base, rim bed, and any old tape. If rim tape is wrinkled, torn, or lifting at the spoke holes, fix that before the new tyre goes on. Installing tires on rims is a sealing job as much as a fitting job.
Removing the Old Worn-Out Tire
You find out fast whether a small e-scooter tyre wants to cooperate. On a 10-inch rim with a stiff carcass and a hub motor hanging off one side, removal can go from routine to ugly in a minute if the bead is stuck and the wheel is flopping around on the floor.
Start by getting the wheel stable and getting all the air out. Remove the valve core, not just the cap. A tyre that feels flat can still hold enough pressure to keep the bead locked in place. On hub-motor wheels, support the motor side so the cable, connector, and axle hardware are not taking the load while you work.
The hard part is usually not the levering. It is breaking the bead without marking the rim or tearing up your hands. Small EU and UK commuter tyres are often much stiffer than a casual DIY guide suggests, especially on solidly built e-scooters where the bead has been heat-cycled and seated hard for months.
A practical sequence looks like this:
- Press near the bead, not the middle of the tread. Force in the wrong place just flexes the tyre.
- Break both sides before you start levering. One free side does not mean the tyre is ready to come off.
- Use a proper bead breaker or bead clamp if you have one. On tight scooter rims, that tool saves more time than another tyre lever.
- Move around the rim. A stuck section often releases when pressure comes from a different angle.
- Protect the rim face. Plastic rim guards are cheap. A scarred alloy rim is not.
If the bead refuses to move, add controlled pressure, not aggression. I have had stubborn scooter tyres release with a compact bead breaker in seconds after ten pointless minutes with levers alone. That is the trade-off on these small wheels. Improvised methods can work, but the right tool usually makes the job cleaner and cheaper.
For riders fixing a puncture rather than doing a full tyre swap, this guide to ebike tire repair covers the repair side of the job.
Levering the tyre off
Once both beads are loose, start opposite the valve and lift a small section over the rim edge. Keep the bite short. On stiff scooter tyres, large bites overload the lever, pinch tubes, and chip paint off the rim.
Keep the section opposite your levers pushed down into the drop centre the whole time. That is what creates slack. If the tyre suddenly feels impossible again, the bead has usually climbed back out of the centre well and you are now fighting the tyre at full diameter.
Tubed and tubeless setups need slightly different care here. With tubes, reach in and tuck the tube away from the lever path as soon as you can. With tubeless scooter tyres, watch the bead wires and rim lip closely because damage there turns a simple removal job into an air-loss problem on the new install.
Rear e-bike wheels add another complication. Cassettes get in the way, rotors love to catch on the bench, and hub-motor cables limit how freely you can rotate the wheel. Set the wheel down with a plan before you start pulling.
If your wheel has electronic valve hardware or tyre monitoring gear, handle it carefully during removal. The same basic caution applies as it does in guides on how to replace truck TPMS sensors. Avoid prying blindly near the valve area, because that is an easy place to damage parts you were not planning to replace.
Mounting Your New E-Ride Tire
You feel the job go wrong at the last 10 cm. The tyre is half on, the sidewall is stiff, the hub motor makes the wheel awkward to hold, and every extra pull on the lever starts to feel expensive. Small e-scooter and compact e-bike tyres punish rushed technique more than larger bicycle tyres do. The margin for error is smaller, and the bead usually gives you less flex to work with.
Start with the rim. The bead seat and inner lip need to be clean enough that nothing drags, cuts, or holds the new tyre off its seat. Old sealant, dried rubber, burrs, corrosion, and bent rim edges all cause trouble here. On tubed setups, check that the rim tape still covers every spoke hole cleanly. On tubeless scooter rims, pay extra attention to the sealing surface near the valve and bead shelf.

Lubrication and bead position are what do the work
Use a proper bead lubricant, or a tyre-safe mounting fluid, in a light film around both beads and the rim edge. Too little and the bead drags. Too much and the tyre slides around, makes a mess, and can be harder to control on a small wheel.
What matters most is bead position. Keep the section already fitted pressed down into the drop centre all the way around. That centre well is what creates the slack that gets the final section over the rim without abusing the bead or marking the wheel. On 8-inch, 10-inch, and other small UK and EU commuter scooter sizes, that one habit makes more difference than brute force.
A mounting sequence that works on stubborn e-ride tyres
Use a repeatable order.
- Fit the first bead fully Most tyres will let the first side go on by hand if the rim is clean and lightly lubricated.
- Add the tube with a trace of air if you are running one It should hold its shape but still move out of the way. A half-inflated tube is much easier to pinch.
- Start the second bead opposite the valve The valve area is the tallest, least forgiving part of the rim well. Leaving it until later usually gives you better control.
- Work both hands close to the tight spot On small scooter tyres, long sweeping pulls waste force. Short advances keep the bead from creeping back out.
- Keep resetting the opposite side into the drop centre If the final section feels impossible, the bead has usually climbed out of the well somewhere else on the rim.
- Use levers only for the last part, and only in short bites Metal levers can mark soft alloy rims fast. Good tyre spoons or reinforced plastic levers are kinder to scooter wheels and tubes.
A bead jack can save a lot of swearing on very stiff tubeless scooter tyres. For home mechanics, it is one of the few specialty tools that earns drawer space.
Handling the awkward parts on hub-motor wheels
Hub-motor wheels add weight and remove freedom of movement. You cannot just spin the wheel around on the bench like a normal bicycle wheel, especially if the cable exit and axle hardware limit your working angle. Set the wheel so the cable is protected and the brake rotor is not carrying the load. Then mount the tyre in small steps instead of trying to roll the whole bead on in one pass.
If you need a quick refresher on valve types before inflation, this guide to inflating bike tyres properly is a useful companion.
Valve-area hardware also deserves care. Some larger e-rides and crossover machines use sensors or valve-mounted parts that can be damaged by blind levering. The same basic caution shows up in this guide on how to replace truck TPMS sensors. Keep the spoon tip shallow near the valve and know where your hardware sits before you pry.
For very tight scooter tyres, stop earlier
Heat helps. A tyre brought indoors for a while is easier to work with than one straight off a cold garage floor. So is patience.
When the last section refuses to go, stop and reset the whole circumference. Press both beads into the centre channel, relubricate the stubborn area, and try again with shorter movements. That usually works faster than forcing the final section and risking a pinched tube, a bent bead, or a gouged rim.
Inflation and Troubleshooting Common Issues
You finish wrestling a stiff 10 inch scooter tyre onto the rim, hook up the pump, and the bead still refuses to rise evenly. That is common on small e-ride wheels, especially with thick sidewalls and narrow rim wells. Inflation is the point where you find out whether the install was clean or whether the tyre is still fighting you.

Keep the wheel off the floor so you can watch both bead lines as pressure comes up. Inflate in short stages, stop often, and inspect the mould line near the rim on both sides. If one area starts climbing while another stays buried, let the air back out before pressure gets too high. Add a little more mounting lube, work the tyre by hand, and start again.
Small scooter and compact e-bike tyres punish impatience. The usual failures are a bead damaged during fitting, a tube pinched near the final section, or a tyre that looks seated from one side but is still low on the other. On hub-motor wheels, the extra weight makes this harder because you cannot quickly rotate and sight the whole rim in one smooth motion. Check it in sections.
What a properly seated tyre looks like
A good seat is easy to spot once you know what to look for:
- Even bead line: The mould line sits at a consistent distance from the rim all the way around.
- No low pocket: One dipped section means the bead is still hung up.
- No side hop or wobble: Spin the wheel and watch the tread and sidewall, not just the rim edge.
- Pressure holds steady: A fast drop means you still have a valve, tube, bead, or seal problem.
If you want a quick refresher on pressure basics and valve handling, this guide to inflating bike tyres properly covers the setup clearly.
Common problems and the fixes that usually work
| Problem | Likely cause | Usually effective fix |
|---|---|---|
| One side will not seat | Bead is dry, rim seat is dirty, tyre is still sitting high instead of in the centre channel | Deflate fully, relubricate, push the bead into the drop centre all the way around, then reinflate |
| Slow leak after install | Valve core loose, tube nicked, bead damaged, tubeless bead not sealing | Check the valve first, then inspect the tube or bead area carefully |
| Tyre wobbles when spun | Bead seated unevenly or tube trapped under the casing | Deflate and reseat it before the wheel goes back into service |
| Tubeless setup dumps air during first inflation | Beads are too far from the rim shoulders to catch air | Compress the casing by hand or with a strap, add sealant if required, and hit it again with a stronger air charge |
Here's a useful visual walkthrough if you want to compare your setup against a working example:
Pressure choice matters
Do not guess. Small-diameter tyres often run pressures that feel high if you are used to mountain bikes, but low pressure on a heavy e-scooter can let the tyre squirm on the rim, pinch a tube, or strike the rim on potholes. Overdo it, and ride quality gets harsh fast, with less grip on wet UK roads and rough paving.
Use the tyre sidewall and the manufacturer's guidance for the wheel and machine. Heavier vehicles rely on published references for a reason. These official RV tire manufacturer load tables show how load and pressure are matched in larger applications. The same habit applies here. Set pressure for the tyre, the load, and the job.
If a tyre still will not seat cleanly after a couple of proper attempts, stop there. Strip it back down, inspect the bead and rim bed, and find the fault before adding more pressure. That saves more time than forcing a bad setup and dealing with a failure later.
Final Checks for a Safe First Ride
The tyre is on and inflated. Don't rush out the door yet.
Refit the wheel properly
If you removed an e-bike or scooter wheel, refit every spacer, washer, and anti-rotation part in the exact order it came off. Hub motor cables need a clean route with no twisting, stretching, or sharp bends near the axle.
Axle nuts or wheel fasteners need to be tightened to the maker's specification with a torque wrench. On any powered wheel, that step matters more than people think. A wheel that looks seated can still be unsafe if the hardware isn't tightened correctly.
Check the tyre and then check the wheel
Run through this short list before the first ride:
- Spin the wheel: Look for side wobble, brake rub, or a tyre section that sits higher or lower than the rest.
- Check valve position: On a tube setup, a valve stem pulled off-angle can mean the tube is trapped or twisted.
- Confirm pressure again: Let the wheel sit briefly, then recheck.
- Inspect tread and casing: If you're unsure what wear and damage should look like, this article on checking your tire tread for safety is a helpful baseline.
Keep the first ride short
Take a slow test ride close to home. Listen for rubbing, feel for pulsing through the bars, and stop if the tyre feels lumpy or unsettled. A proper install should feel boring. That's what you want.
If the wheel tracks straight, holds pressure, and stays quiet, the job is done.
If you need replacement tyres, tubes, valves, or e-ride parts that match your setup, Punk Ride LLC stocks electric scooter and e-bike gear for riders in the US, UK, and Europe. It's a practical place to start if you want the parts side of the job to be simpler than the fitting side.
Share:
Best Electric Scooters Made in USA: 2026 Buying Guide
Electric Bike Moped Style Your Ultimate 2026 Guide