


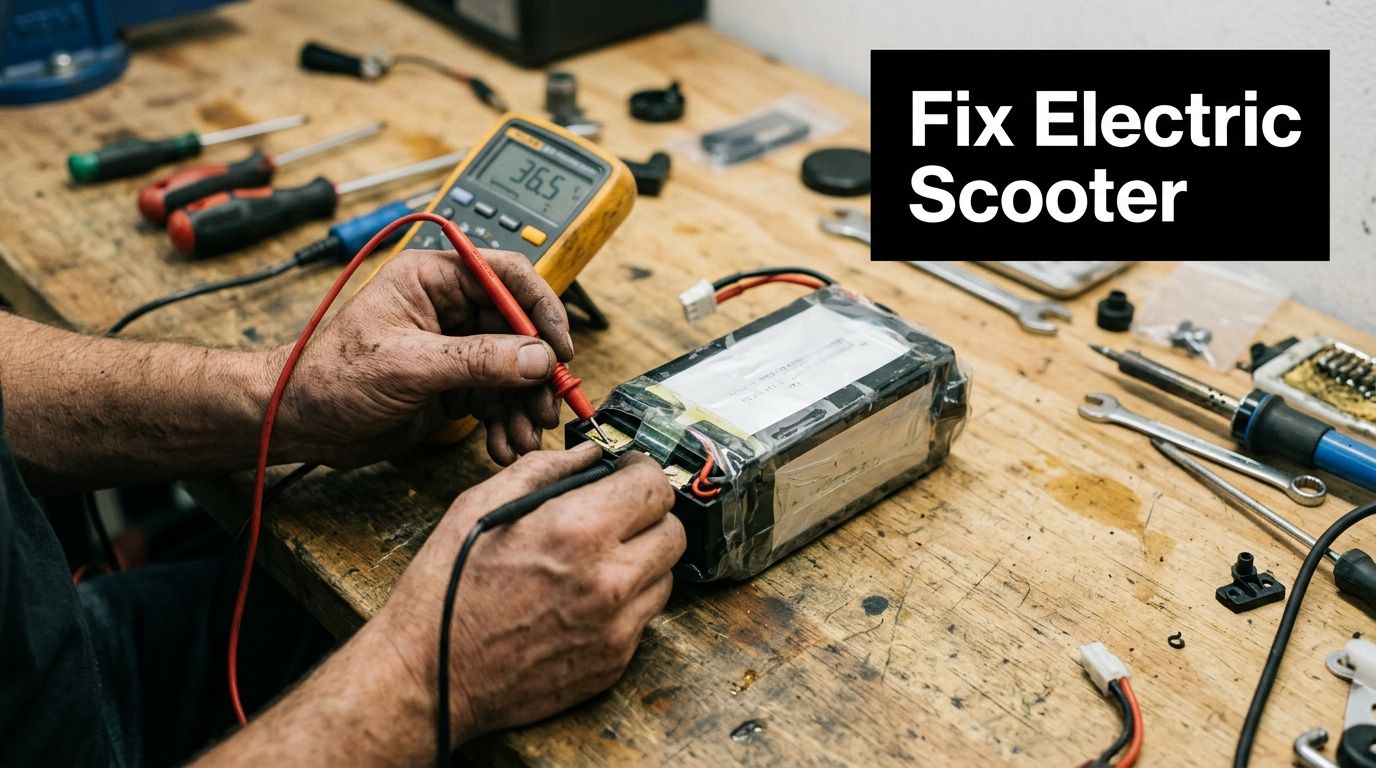
Your scooter was fine yesterday. Today the display is dark, the throttle does nothing, or the rear wheel drags like something is half-locked. That's usually the moment people start pulling screws at random and make a small fault harder to trace.
A better approach is simple. Treat an e-scooter like a compact electrical machine with a few wear parts, not like a toy. If you diagnose in the right order, most faults become much easier to isolate. And if you're in the UK or EU, the repair path can be very different from what makes sense in the US or Australia, especially once batteries, sealed controllers, and genuine replacement parts enter the picture.
Your Essential Pre-Repair Safety and Tool Checklist
Before you touch a panel, power the scooter off, unplug the charger, and let the system sit for a minute. A lot of mistakes happen when someone is rushed, annoyed, and still working around a live charging circuit.
If the scooter failed during a ride, give it a quick external look first. Check the deck, stem, brake levers, tires, and charging port. If you see obvious crash damage, a split cable sheath, liquid inside the display, or a battery case that looks distorted, stop there and move to professional help.
Practical rule: If the problem involves the battery housing, charger port, or melted wiring, don't “test one more thing” by guesswork.
Safety checks before opening anything
A safe repair setup is boring on purpose. That's good.
- Work on a dry surface. Water and electrical diagnosis don't mix.
- Stabilize the scooter so it won't tip while you remove side covers or deck screws.
- Remove metal jewelry like rings or bracelets before probing connectors.
- Keep the right protective gear nearby. Gloves and eye protection matter more than people think, and proper riding kit matters too. If yours needs an upgrade, this guide to electric scooter safety gear is a useful baseline.
- Photograph connectors before unplugging them. That saves a lot of reassembly frustration.
The tools that actually earn their place
You don't need a full workshop to learn how to fix electric scooter faults properly. You need a small kit that covers electrical checks and mechanical basics.
| Tool | What it's for | Why it matters |
|---|---|---|
| Digital multimeter | Battery and charger testing | This is the first real diagnostic tool, not an optional extra |
| Allen keys | Deck, stem, brake, and wheel fasteners | Most scooters use hex hardware everywhere |
| Screwdrivers | Covers, terminals, small fittings | Use the right tip to avoid stripping screws |
| Needle-nose pliers | Connector handling, pin alignment | Helpful for delicate wiring work |
| Tire levers | Tube or tire removal | Essential on scooters with tight beads |
| Pump with pressure gauge | Tire setup | You can't judge scooter pressure by feel |
| Clean rags and a small brush | Dirt and debris removal | Makes cracks, corrosion, and loose parts easier to spot |
What not to do
Don't start by ordering a battery, controller, and throttle because the scooter “won't go.” That's the expensive version of guessing.
Also don't use random hardware-store screws as replacements if the originals thread into the deck or battery tray. Length matters. A screw that's too long can damage wiring underneath.
Troubleshooting Power and Battery Failures
You press the power button before a commute, and nothing happens. No dash, no lights, no click from the controller. In the workshop, I treat that as a power-path problem until the scooter proves otherwise.
Battery packs and charging faults cause a big share of no-start complaints, especially on commuter scooters that live on partial charges, wet roads, and folded stems. On UK and EU models, that often means checking stricter weather sealing and charger compliance labels before opening anything. On many US and Australian models, I more often see aftermarket chargers, adapter cables, or replacement batteries in the mix, which adds another variable.

Start with the charger and charge port
Begin outside the deck. If the charger is faulty or the port is loose, opening the scooter just wastes time.
Plug the charger into the scooter first, then into the wall. Many manufacturers recommend that order because it reduces sparking at the charge port and gives you a cleaner read on charger-light behavior. Then check:
- Charger indicator response
- Bent, dirty, or recessed charge-port pins
- Cable damage near the brick and plug
- Heat marks or a burnt smell around the port
A charger showing green all the time can mean the battery is full, the charger is dead, or the charge circuit is not connected at all. That is why the next step is a meter, not a guess.
If the charging socket or low-voltage connectors are dirty, use the right product. This guide on choosing electrical contact cleaner is a good reference before you spray anything near plastics, seals, or live contacts.
Check battery voltage before buying parts
A multimeter saves money here. Display bars on scooter dashboards are rough estimates at best, and they can be wildly misleading under load or after the scooter has been sitting.
For a 36V lithium pack, a healthy full charge is usually around 42V. A reading well below nominal after charging points to a weak pack, a charging problem, or a battery management system that has cut output. The exact threshold varies by pack design and BMS settings, so compare what you measure against the battery label and manufacturer spec if you have it.
Use a simple sequence:
- Power the scooter off
- Open the battery area only if it can be done safely
- Stop immediately if the pack is swollen, leaking, hot, or smells sweet or burnt
- Measure pack voltage at the main output
- Measure charger output separately if the battery voltage is low
- Wiggle-test accessible connectors gently while watching for voltage drop or cutout
One sentence of hard-earned advice. A battery that reads normal voltage with no load can still collapse when you ask it to power the scooter. If the dash comes on but dies as soon as you try to ride, suspect internal battery resistance, a failing BMS, or a bad main connector.
Know what type of battery you are dealing with
Most current scooters use lithium-ion packs, but older budget models still turn up with sealed lead-acid batteries. The repair approach is different.
Lithium packs do not respond well to old “revival” habits like repeated deep discharges or long unmonitored charging. Lead-acid can sometimes recover a little after proper charging, but lithium is much less forgiving and much more sensitive to overcharge, cell imbalance, and physical damage. If your scooter sits unused for weeks at a time, proper storage matters more than folk remedies. This guide on how to store lithium batteries safely covers the basics well.
Region matters here too. In the UK and EU, replacing a battery with a non-matching import pack can create charger compatibility issues and, in some cases, insurance or product-compliance headaches. In the US and Australia, riders are more likely to find aftermarket battery options, but that wider availability also means more mismatched connectors, different fuse arrangements, and variable build quality.
When the battery is fine but power still cuts out
A lot of “dead battery” scooters have connection faults.
Check these points closely:
- Main battery connector fully seated
- Corrosion on terminals
- Loose inline fuse or fuse holder
- Pinched wires near deck screws and cover edges
- Water marks inside the deck
- Damage where the wiring loom flexes near the stem
Having experience aids in troubleshooting. A loose XT-style connector can pass enough current to wake the display but not enough to run the controller under load. A corroded charge port can stop charging even though the battery itself is healthy. A deck screw that is a few millimeters too long can nick insulation and create an intermittent short that only shows up on bumps.
Open the deck only as far as you need to. UK and EU commuter scooters often rely more heavily on gaskets and tighter ingress sealing, so careless reassembly can make a once-dry scooter leak on the next wet ride. US and Australian off-road or high-power models usually give better access, but they also tend to carry higher current, which makes melted connectors and heat damage more common.
If you find heat-darkened plastic, arcing marks, or a battery that will not hold voltage after a verified charge, stop there. Those are repair points, not “keep testing” points.
Diagnosing Motor Controller and Throttle Glitches
You charge the scooter, the display wakes up, and the wheel still refuses to pull. At that point, stop guessing. Controller faults, throttle faults, brake cut-off faults, and motor faults can all feel similar from the bars.
A dead controller can mimic a bad motor. A damaged throttle plug can mimic a dead controller. A brake cut-off stuck in the “on” position can shut drive down and send you hunting in the wrong place.

What a controller fault usually looks like
The controller meters battery power to the motor based on throttle input and safety interlocks. When it starts failing, the scooter may boot normally but refuse to move, surge, stutter, or cut out as soon as load goes up.
Start with what your eyes and nose can confirm:
- Burned electronics smell inside the deck
- Darkened or melted insulation near the controller
- Discoloration on the controller case
- Loose or heat-damaged phase-wire connections
- Low-voltage plugs that are half-seated or vibrating loose
If you want the theory behind those symptoms, this explainer on advanced motor control architecture gives useful background on how phase output, hall signals, and control logic interact.
UK and EU scooters often package controllers more tightly and hide them under cleaner covers with more attention to water sealing. That keeps commuter models tidier, but it also means less airflow and tighter wire runs. In the US and Australia, higher-power scooters and off-road models usually give you more room to inspect parts, but they run more current, so cooked connectors and overheated controllers show up more often.
Separate a motor problem from a controller problem
Do one isolation test before you price parts. Disconnect the motor from the controller and check the motor windings for continuity with a multimeter. As noted earlier, if the motor checks out and the scooter still will not drive, the controller becomes the more likely suspect.
That single test saves money.
It also stops a common DIY mistake, replacing the motor because the wheel will not spin when the fault is upstream in the controller or signal wiring.
| Symptom | More likely cause | First check |
|---|---|---|
| Powers on, no drive | Controller or brake cut-off | Inspect controller plugs and brake signal |
| Throttle error or no response | Throttle connector or signal wire | Check plug alignment and pin condition |
| Jerky pull or delayed pickup | Controller or weak signal connection | Reseat low-voltage connectors |
| Electronic resistance at the wheel | Motor or controller output stage | Disconnect motor and test continuity |
The small fault many riders miss
Throttle connectors cause an outsized share of no-drive complaints. Bent pins, pins pushed back into the housing, and plugs that look connected but are not fully locked are all common.
Check the throttle plug carefully:
- Unplug it without pulling on the wire.
- Compare the pins side by side.
- Look for one pin sitting lower, twisted, or recessed.
- Reconnect it squarely and fully.
- Test throttle travel again before ordering parts.
I see this a lot after stem work, deck opening, or a crash that twists the bars. On some UK and EU commuter scooters, the wiring path through the stem is tighter, so repeated folding can strain the throttle lead sooner. US and Australian models with wider cockpits are easier to access, but aftermarket throttles and adapter plugs are more common there, which adds another failure point if the connector type or pinout is wrong.
For a model-specific overview of failure signs, wiring expectations, and replacement choices, this guide to an electric scooter controller is a useful reference.
Watch the diagnostic process in action
Seeing the wiring layout often makes this job much clearer than reading about it.
One last shop rule. If you open the deck and find brittle insulation, multiple overheated connectors, or signs that someone has already spliced the harness, stop treating it like a simple parts swap. At that stage, the safer repair is a full harness inspection and a check that the replacement controller matches the scooter's voltage, current limits, and local road-legal settings for your market.
Solving Common Brake Tire and Wheel Woes
You squeeze the brake, roll the scooter out of the garage, and it feels heavy, slow, or dead on takeoff. A lot of riders jump straight to the controller or battery. On plenty of scooters, the actual fault is simpler. A dragging brake, bent rotor, bad wheel bearing, or half-flat tire can make the whole scooter feel weak.

Brakes that rub, drag, or cut motor power
Start with the brake levers and wheels off the ground. Spin each wheel by hand. If one stops quickly or you hear a steady scrape, deal with that before chasing electrical faults.
Brake cutoff sensors are a common culprit. If the lever does not return fully, the scooter may keep the motor inhibited even though the dash powers on normally. I see this after a minor tip-over, bar impact, or a cable adjustment that leaves the lever with too little free movement.
Check these points:
- Lever return. It should spring back cleanly every time.
- Cable tension or hydraulic piston return. Too tight, and the brake can stay slightly engaged.
- Pad wear and contamination. Thin pads and oily pads both reduce braking, but in different ways.
- Rotor straightness. A warped rotor causes pulsing and constant rubbing.
- Caliper alignment. The rotor should pass through the caliper without brushing one side.
If the rotor is lightly bent, a rotor truing tool can usually straighten it enough for normal use. If it has a sharp kink, replace it. On commuter scooters in the UK and EU, brake assemblies are often more tightly packaged around fenders and motor cables, so access can be fiddlier. In the US and Australia, parts swaps are usually easier because aftermarket calipers, rotors, and pads are easier to find, but fitment can be inconsistent. Bolt spacing, rotor diameter, and cable pull still need to match.
Flat tires and rough wheels
Tire work is where patience pays off. Small scooter wheels run harshly, and they punish low pressure fast. Soft tires increase rolling resistance, heat, and pinch-flat risk. They also make handling vague, especially in wet conditions.
For riders in the US and Australia, replacing the tube is often the faster and more reliable repair than patching it. For riders in the UK and EU, tube replacement is still common, but it is worth checking whether your model uses a specific valve angle, tire size marking, or split-rim design before ordering parts. Some European-market scooters also ship with tighter tire-to-fender clearances, so a tire that is technically the right size can still rub once installed.
Mobile Bike Shop's repair guidance is broadly in line with standard workshop practice on one point. Keeping tires in the maker's recommended pressure range helps prevent blowouts, pinch flats, and sluggish rolling.
Repeated punctures usually mean the first problem was never removed.
Before fitting a new tube, run your fingers carefully along the inside of the tire casing, check the rim strip or rim tape, and inspect the valve hole for sharp edges. If the new tube fails in the same spot, stop replacing parts and find the cause.
What works better than guesswork
Match the symptom to the part that causes it.
- Repeated flats in one wheel usually point to debris in the tire, shifted rim tape, a damaged rim, or a chafing valve hole.
- A wobble while braking usually comes from rotor runout, loose axle hardware, worn bearings, or a wheel that is not seated squarely.
- A thump once per rotation often means a deformed tire, a damaged bead, or a tube pinched during installation.
- Grinding from the hub area usually means bearing trouble, not tire pressure.
- Poor range after a tire change can be as simple as low PSI or a brake caliper left rubbing.
If you need a visual walkthrough, Punk Ride LLC also has a DIY guide for scooter tire replacement that covers wheel removal, tube replacement, and refitting the tire. Use it for the mechanical sequence, then slow down at the last step. The easiest way to ruin a fresh tube is pinching it under the bead during installation.
Navigating Repairs in the UK EU US and Australia
Where you live changes the smartest repair decision. The scooter might have the same fault in London, Berlin, Los Angeles, or Sydney, but the correct next step can be very different.
In the UK and EU, the default approach is usually more controlled. In the US and Australia, practical repair culture tends to lean more toward local workshop solutions for routine mechanical work.
UK and EU repair reality
For the UK and EU markets, the main rule is to contact the manufacturer first, because they often provide the quickest route to genuine parts and model-specific diagnostics, which helps keep the repair aligned with regional Personal Electric Vehicle safety standards, according to Currys' e-scooter repair guidance.
That matters most when the scooter uses:
- Sealed battery units
- Controller firmware that needs brand-specific calibration
- Proprietary harness layouts
- Model-specific replacement parts
In plain terms, a third-party shop might be able to fit something that works. The manufacturer is more likely to fit something the scooter was designed to use.

Extra constraints in the UK and parts flow in the EU
The UK adds another layer around battery integrity. The Escooter Clinic in London emphasizes battery safety in servicing PEVs and notes the need for technicians who can verify battery-system integrity for compliance-sensitive repairs in its workshop booking information.
In parts of the EU, especially when local support is limited, postal repair is a real part of the service model. Microtek Repair UK describes a postal repair option for scooters that can't be serviced locally, with parts sourced from EU-approved suppliers to meet CE-related expectations in its service information.
That changes the trade-off. In the UK and EU, speed doesn't always mean nearest shop. Sometimes it means the correct manufacturer or approved repair route, even if shipping is involved.
US and Australia repair culture
The US and Australia often feel more flexible on everyday mechanical work. Local bike or scooter shops may be the fastest answer for tires, tubes, brake adjustments, and basic cable issues. The market tends to support practical repairs with commonly available service tools, especially for punctures and wheel work.
The big distinction is this:
| Region | First move that usually makes sense | Why |
|---|---|---|
| UK | Contact manufacturer | Genuine parts and compliance-sensitive repair path |
| EU | Contact manufacturer or approved postal repair route | Better fit for sealed systems and approved part sourcing |
| US | Use a capable local repair shop for routine mechanical faults | Faster access for tubes, tires, brakes, and basic service |
| Australia | Local service where available, manufacturer support for complex faults | Practical for flats and mechanical wear, brand support for sealed electrical systems |
Most articles should stay focused on the UK and EU e-scooter and e-bike markets because that's where repair regulation and part sourcing shape the decision most sharply. At least once per week, it also makes sense to publish a guide geared toward the Australian and US markets, where routine service patterns are more workshop-driven and parts logistics follow a different path.
When to Call a Pro and Smart Maintenance Tips
You get the scooter running again, the lights come on, and then you notice the charge port smells hot or the stem has a little play under braking. That is the point to stop. A scooter that powers up is not always a scooter that is safe to ride.
Home repair makes sense when the fault is clear and the fix stays in the lane of routine service, like checking charger output with a multimeter, swapping a tube, adjusting a brake caliper, or replacing an external throttle. Hand the job over if the problem points to battery damage, heat damage, hidden wiring faults, or anything structural. Those failures can turn a cheap repair into a fire risk or a crash.
Regional practice matters here too. In the UK and much of the EU, a professional repair often means the manufacturer, an approved service partner, or a postal repair route because parts compatibility and compliance can matter as much as the repair itself. In the US and Australia, local workshops are often a practical choice for mechanical work, but sealed battery packs, controller faults, and damaged charge systems still belong with a specialist.
Stop and hand it over when you see these signs
Do not keep troubleshooting if you find any of the following:
- Battery swelling or a distorted case
- Burned wiring, melted insulation, or a sharp electrical smell inside the deck
- Cut-outs that keep returning after you reseat obvious connectors
- Frame cracks, folding-joint movement, or visible impact damage
- Brake hardware that will not stay adjusted
- A charge port with discoloration, looseness, or heat marks
Trust that hesitation for a reason. If a diagnostic step feels beyond your skill level, stop before curiosity turns into damage.
Smart maintenance that prevents expensive failures
Regular checks beat repair work. The riders who avoid the worst scooter failures usually are not doing anything fancy. They catch small problems early, before heat, vibration, and water turn them into bigger ones.
Weekly habits
- Check tire pressure with a gauge.
- Test both brakes before the first ride.
- Inspect the charging port for dirt, moisture, or bent pins.
- Listen during the first minute of riding for new rubbing, scraping, or clicking noises.
Monthly habits
- Check deck, stem, and handlebar fasteners for looseness.
- Inspect accessible wiring areas only if your model allows safe access without disturbing sealed components.
- Clean dirty connectors and terminals with products made for electrical contacts.
- Look at brake pad wear and wheel tracking if the scooter starts pulling, rubbing, or stopping unevenly.
One practical note from the workshop. Riders in wet UK and EU conditions often need to be stricter about port inspection, corrosion, and drying the scooter before charging. Riders in hotter parts of the US and Australia should pay closer attention to battery heat, charger temperature, and not leaving the scooter in a car or direct sun after a ride.
If you need parts, maintenance guidance, or a closer look at urban e-mobility options, Punk Ride LLC is a practical place to start. It carries electric rides from a wide mix of brands and publishes repair and care resources for riders in the US, UK, and EU.
Share:
Scooter for Sale: Your 2026 Buyer's Guide
Bicycle Chain Cleaner and Lube: The E-Bike Maintenance Guide