


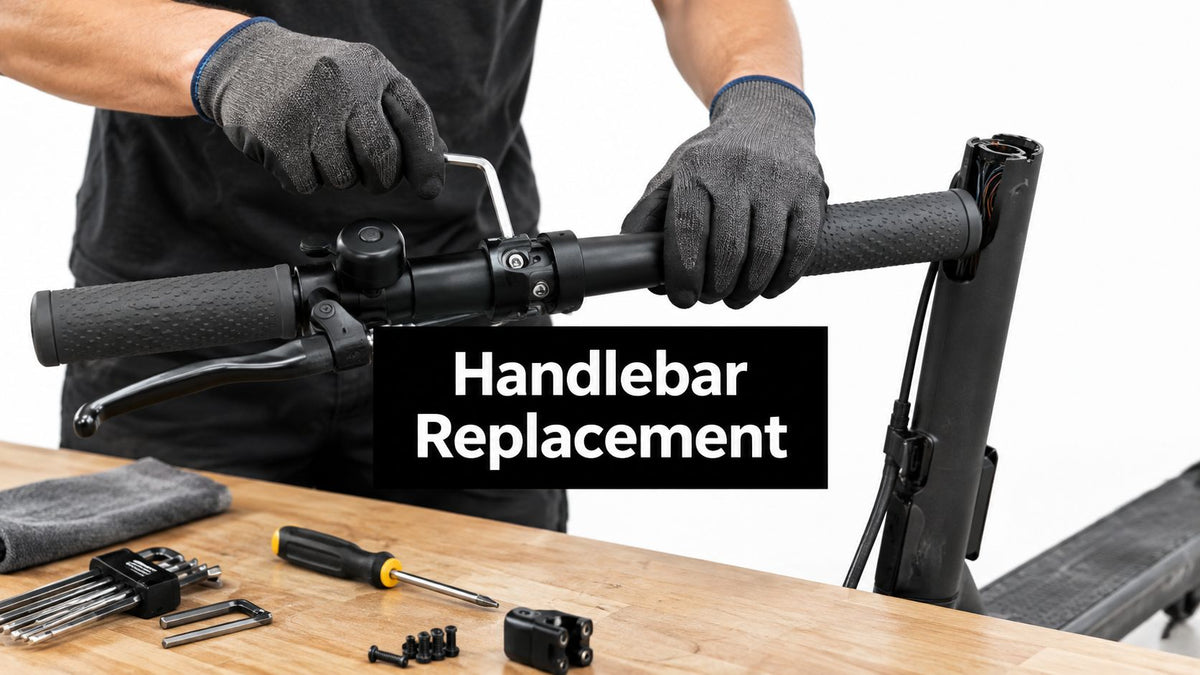
You usually notice a bad handlebar at the worst time. You squeeze the brake at the end of a bike lane, the bar twists a touch in your hands, and suddenly you're not thinking about comfort or style anymore. You're thinking about whether the whole steering stack is still trustworthy.
That's the right instinct. Electric scooter handlebar replacement is rarely just a cosmetic swap. On a lot of commuter scooters, the bar carries the throttle, brake levers, display, bell, wiring, and part of the steering load. In the UK and EU market especially, that matters because the handlebar is tied directly to steering control and, in some legal frameworks, to the vehicle configuration that underpins road legality.
When the Handlebar Is the Problem
You feel it on a hard stop. The front wheel tracks straight, but the grips sit a few degrees off and the cockpit gives a small knock through your hands. At that point, calling it a handlebar job is only a starting guess.
Most scooters that come into a workshop with "bent bars" need a diagnosis before they need parts. I regularly see three different faults get lumped together: a bar that has twisted in the clamp, a stem that is no longer straight after an impact, or play in the folding joint that makes the whole cockpit feel vague. Those repairs are not interchangeable. If you order a replacement tube before you know which part is moving, you can waste money and still ride away with unsafe steering.
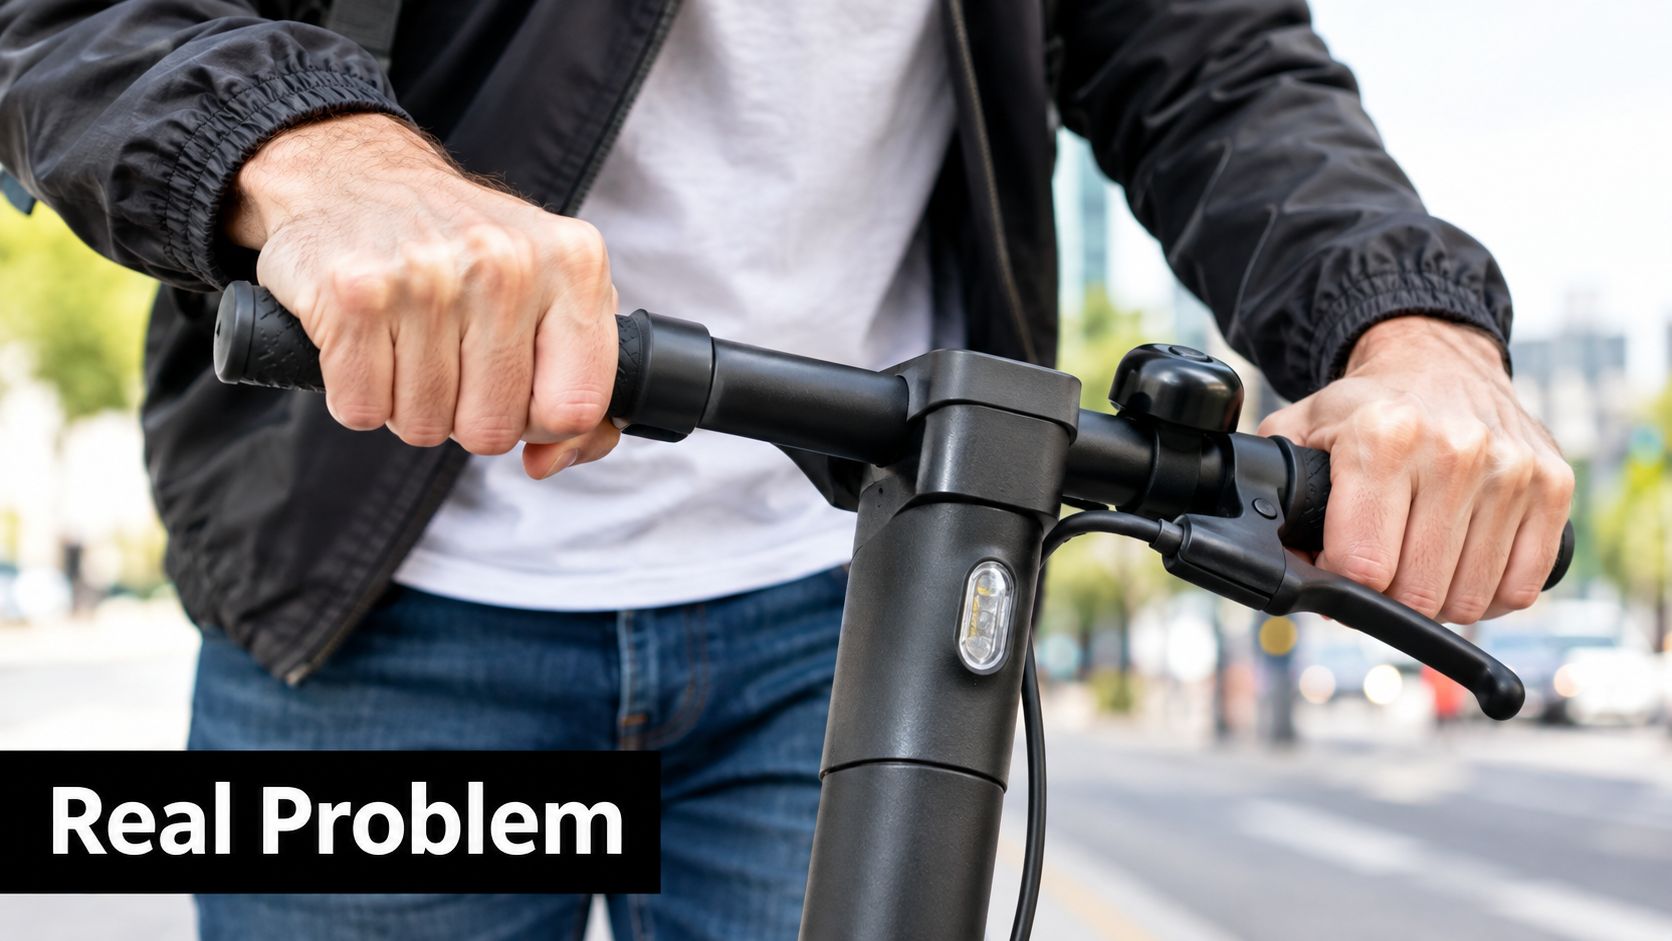
What the symptoms usually point to
These patterns show up all the time in commuter scooters:
- Bars twist while the wheel stays aligned: usually clamp slip, damaged bolts, worn clamp faces, or a bar with the wrong outside diameter for the stem.
- A knock from the front end on rough ground: often play in the folding mechanism, headset area, or stem hardware rather than the bar itself.
- One grip sits lower after a crash: that can be a bent handlebar, but it can also mean the stem tube has taken a set or the clamp is no longer pulling square.
- Throttle, brake lever, or display never sit right after reassembly: many riders call this bar damage when the actual problem is a different sweep, control mount diameter, or internal wiring path.
Treat this as a steering repair.
That matters mechanically and legally. The UK trials framework defines an electric scooter used there as a motor bicycle with handlebars mechanically linked to the steered wheel under the UK legislation. In practice, that means a loose or damaged cockpit is tied to vehicle control, not rider comfort. On some models, "handlebar replacement" also turns into stem replacement because the wiring runs through the stem, the folding latch is part of the same assembly, or the manufacturer uses a one-piece cockpit that does not separate cleanly.
That model-specific detail is where many DIY guides go thin. A Xiaomi-style commuter may let you swap only the bar. A different scooter with an integrated display harness, welded riser, or cast folding head may force you to replace the stem, hinge parts, or sections of wiring at the same time. If there is crash damage near the clamp area, inspect the stem and hinge before you spend anything on accessories.
Before ordering parts, strip the problem down to what is out of line. Check the bar, stem, folding joint, and control wiring as one system. If your riding position is the complaint rather than steering security, a broader comparison like moped vs ebike can help you decide whether you are fixing fit or fixing a fault.
Custom spacers, cable guides, and display brackets can help with odd fitment. Shops sometimes use 3D printing for replacement parts to test non-structural pieces before committing to a final part. That approach is fine for mockups and light-duty mounts. I would not use it as a substitute for an engineered steering component.
Tools, Workspace, and Pre-Ride Checks
A lot of scooter owners start this job because the bar looks crooked after a tip-over. Then they find out the bar was only the visible part, and the problem sits lower in the steering assembly. That is why the setup phase matters. Treat this as steering work from the start, not a cosmetic swap.
A clean bench and ten extra minutes up front will save more parts than fancy tools ever do. Handlebar jobs go bad when loose hardware gets mixed up, clamp bolts get rounded, or someone yanks a control before checking whether the harness runs through the bar, into the stem, or across the folding head.
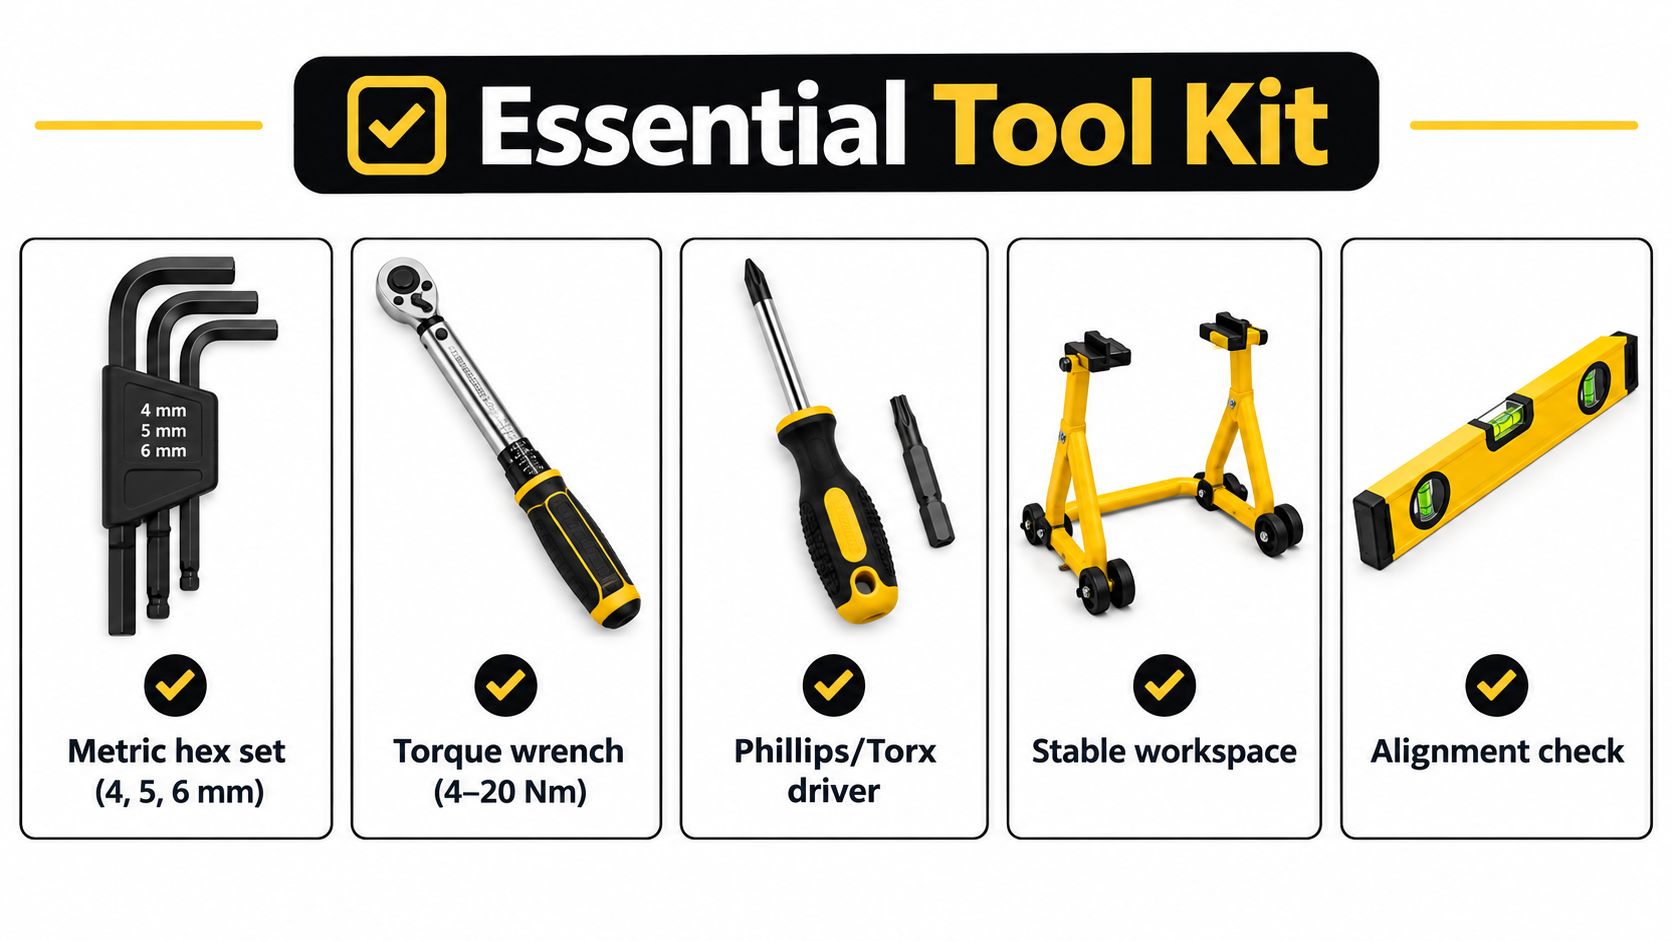
The kit that earns its place
Keep the tool list simple, but get the details right:
- Metric hex keys: most commuter scooters use 4, 5, and 6 mm around the cockpit.
- Torque wrench: one that reads accurately at low torque values is the useful one here.
- Small Phillips or Torx driver: common on display pods, brake lever clamps, and switch housings.
- Isopropyl alcohol and a rag: useful for grip removal and for cleaning clamp faces before reassembly.
- Threadlocker rated for bicycle components: use it only where the maker calls for it.
- Smartphone camera: photos beat memory once the controls are off the bar.
If your hex technique is rusty, a quick refresher on allen wrench know-how is time well spent. Stripped clamp bolts usually come from the wrong key size, poor engagement, or trying to crack loose a tight fastener at an angle.
Set up the space before the scooter is touched
Use a stable floor or bench, good light, and a tray for every washer, shim, and screw that comes off. Avoid thick carpet if possible. Small cockpit hardware disappears fast, and some scooters use odd spacers or wire guides that look unimportant until reassembly.
Shut the scooter down completely before you start. If the design allows it, isolate or disconnect the battery before unplugging throttle, brake, or display wiring. Apollo's service guidance for cockpit work follows the same logic: power down first, then handle connectors and controls carefully during the swap process, especially on models with bar or stem-routed wiring.
Power off first. Disconnect the battery where the scooter allows it. Then start loosening controls or opening connectors.
What to check before any bolt moves
Take photos from the rider's view, both sides, and underneath the bar if wiring passes there. Then inspect the parts that tell you whether this is only a bar job or a bigger steering repair:
- Grip security: a rotating grip can hide crash movement or poor previous assembly.
- Brake lever angle and position: note both sides before loosening anything.
- Harness path: confirm whether wires run through the handlebar, under it, or down through the stem and folding area.
- Throttle return: if it sticks now, fix it during reassembly instead of hoping the new bar solves it.
- Clamp gap: an uneven faceplate gap often points to bad assembly, bent parts, or a bar that never seated squarely.
- Stem and hinge alignment: if the front wheel tracks straight but the bar sits off, the stem or folding mechanism may be the damaged part.
That last check saves money. On some scooters, "handlebar replacement" turns into stem, latch, or harness work once the bar comes off. Catch that before the first bolt is loose, and you avoid forcing a clean bar onto a bent steering system.
Removing the Old Handlebar Without Damage
A lot of bars get ruined during removal, not because the metal is stuck, but because someone starts at the clamp and lets the controls, wiring, or throttle hang by whatever still holds on. On scooters, that is how a simple bar swap turns into a brake cutoff fault, a pinched harness, or a throttle that never snaps back cleanly.
The safe order is outside in. Strip the controls and free the wiring path before the bar leaves the stem.
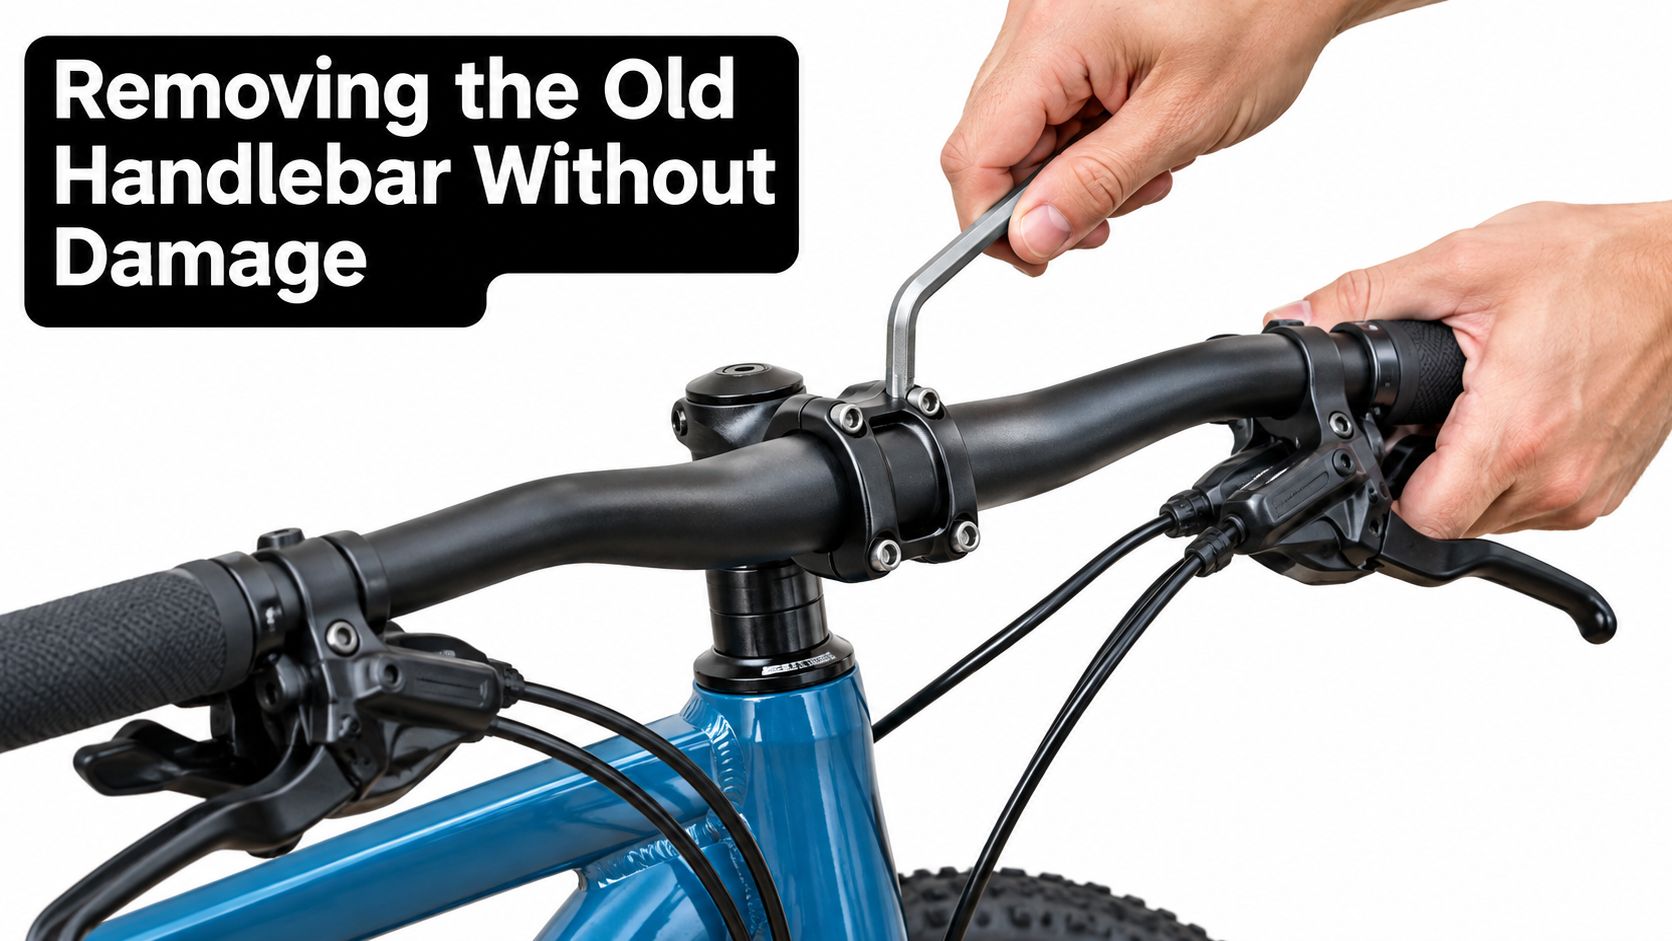
Start with the controls, not the clamp
Loosen the brake levers, display, bell, phone mount, and throttle housing one at a time. Slide each part just far enough to free the bar, then stop and keep its hardware with it. That sounds fussy, but it saves time on reassembly because lever angle, throttle position, and cable exit direction all matter on a scooter cockpit.
Internal routing changes the job. If wires pass through the handlebar or down the stem, treat removal like harness work, not just bar work. Disconnect the control and brake wiring in the order the scooter allows, support the bar as you pull it free, and watch for connectors catching inside the stem. Apollo's step-by-step handlebar swap guide also calls for a brake test after the swap, which is good practice any time cockpit wiring has been opened.
Hidden wire damage causes more trouble than stubborn bolts. I see that more often than cracked clamps.
Freeing grips without damaging the throttle side
Grips come off three ways. They slide, they peel, or they fight you.
Use isopropyl alcohol under the grip if it is only glued lightly. Use a plastic pick or a thin non-marring tool to break the bond. Keep metal blades away from the throttle housing unless there is no other option and you can see exactly where the edge is going. One slip on the throttle side can nick a wire, crack the housing, or leave the tube dragging on the new bar later.
Work slowly there. That side usually has less slack, tighter bends, and less forgiveness.
A removal routine that holds up in the workshop:
- Take photos from above, both sides, and underneath.
- Loosen one control at a time and move it clear.
- Label each connector and cable with tape before unplugging it.
- Mark left and right lever angles if the rider already likes the setup.
If the bar has crash damage, expect the grip or throttle tube to bind as it comes off. Do not force it. Binding can be the clue that the bar is bent, the throttle tube is distorted, or the replacement job is farther down at the stem or folding joint.
Loosen the faceplate evenly
Once the controls and wiring are clear, crack the faceplate bolts in a cross pattern and back them out a little at a time. Even release keeps the clamp from twisting, helps prevent gouging the handlebar, and makes it easier to spot a clamp that was already pulling unevenly.
As the bar comes free, catch the small parts immediately:
- Shims
- Thin clamp plates
- Cable guides under the bar
- Washers that stick to the bolt heads or faceplate
- Spacers hiding behind lever clamps or accessory mounts
Bag them and label them. On folding scooters, pay close attention to how the cable slack sits near the hinge and stem entry point. If the old bar only comes out after you rotate it into one awkward position, that is useful information. It often tells you where the harness is shortest, where a brake hose wants to kink, or whether "handlebar replacement" is really about a damaged folding assembly or a stem with poor alignment.
Clean removal is part of the safety check. If parts only come apart under tension, something else in the steering stack may already be out of place.
Fitting, Aligning, and Torquing the New Handlebar
A scooter can feel fine on the stand and still steer badly on the road. The usual cause is not the bar itself. It is a bar clamped slightly off-center, a harness pulled tight at full lock, or a folding stem that was already starting to shift.
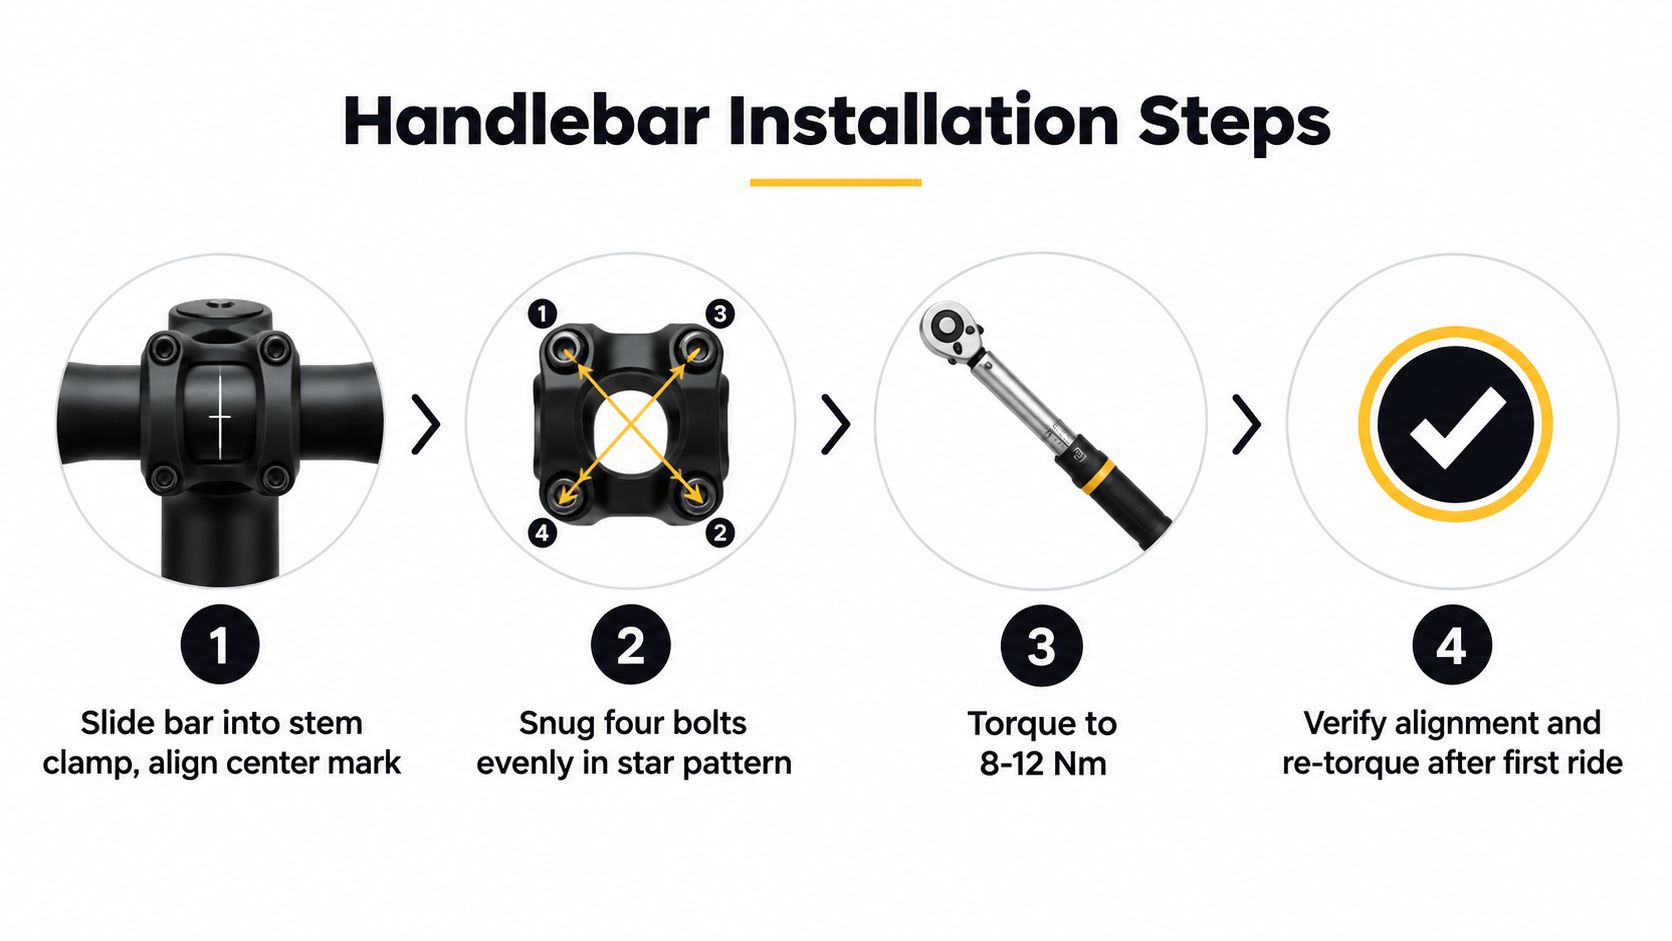
Seat the bar before you judge alignment
Set the new bar in the clamp with any center marks, flats, or shaped sections positioned exactly as the clamp was designed to hold them. If the center section does not sit flush, stop there. Forcing a mismatched profile to clamp down is how faceplates crack and bars slip under braking.
Run the faceplate bolts in by hand, then snug them in a cross pattern until the bar stays put but still rotates with firm pressure. That gives enough friction to align the cockpit without pinching the tube or masking a bad fit.
On scooters with narrow clamp windows, check that the stem is gripping the proper center section, not the start of a bend or taper. I see that mistake on aftermarket bars all the time, especially when a rider is trying to gain width or rise on a commuter model that was built around a short straight clamp area.
Set cable and harness movement with the steering, not by eye
Turn the fork from lock to lock before final torque. Watch what the throttle lead, brake hose, display cable, and headlight wiring do through the full steering sweep and, if the scooter folds, through the fold cycle too.
Three spots deserve extra attention:
- Stem entry ports: insulation gets nicked here, then water gets in later.
- Back of the display or throttle clamp: easy place to trap a wire between parts.
- Folding joint and hook area: cable slack can look fine upright and go tight as soon as the stem folds.
The UK government's construction-standards research notes that BS EN 17128:2020 is voluntary rather than a designated standard, and it recommends overload testing for the handlebars, stem, steering tube, front fork, and steering-system mounting point to the frame in its construction standards study. That matters here because a handlebar swap is part of the whole steering path. If the harness only reaches when the bar sits a few degrees off, the repair may be a damaged stem, a twisted fork alignment, or a folding assembly that no longer holds its geometry.
A video can help if you want to compare hand positions and bolt sequence while you work:
Put the controls where the rider can brake without adjusting grip
Install the throttle, levers, display, and grips only after the bar position is close. Brake levers should fall naturally under the fingers with neutral wrists. The throttle has to return freely from full travel with the grip installed and the bar turned both ways.
That sounds basic, but it is where many home installs go wrong. A straight bar with a dragging throttle or a lever tucked too low is a steering-safety problem, not a cosmetic one.
Final torque is for clamp security, not guesswork
Use the torque marked on the stem, faceplate, or handlebar if the manufacturer provides it. If there is no marking, use the scooter service information or the component maker's documentation. Tighten the faceplate evenly and keep the clamp gap consistent if the design calls for that. Then torque any stem pinch bolts or steering fasteners that were part of the job.
The Park Tool guide to threadlocker and torque practice is a better general reference here than generic scooter diagrams because it explains why clamp bolts must be brought up evenly and why overtightening can crush lightweight tubing. The number itself matters, but the pattern matters too.
For broader context, the U.S. CPSC safety summary for bicycles lists a handlebar stem to fork torsional security test of 23 N·m for sidewalk-use devices and 50 N·m for road-use devices, while EN/ISO equivalents are 15 N·m and 40–50 N·m depending on use category in the CPSC standards summary. That is not a shortcut spec for your scooter. It is a reminder that the parts you just tightened are expected to resist real twisting load once the front wheel hits a pothole or the rider brakes hard with the bar slightly turned.
Compatibility Checks Most DIY Guides Skip
A lot of bad handlebar swaps start with a part listing that says “universal” and a rider who assumes the rest will sort itself out in the garage.
On scooters, it often does not.
The first question is not whether the new bar looks right. It is whether the front end was designed to accept a bar-only swap at all. On some commuter models with a separate faceplate, replacing the handlebar is straightforward. On others, the bar, stem head, folding latch, display mount, and wiring path are tied together tightly enough that “handlebar replacement” really means replacing a larger assembly.
The measurements that actually decide the job
Before ordering parts, measure the existing setup on the scooter, not the seller's thumbnail photo. Check the bar outer diameter, the stem clamp or bore size, and the usable straight clamping area in the center. Measure the sections where the brake lever, throttle, display, and bell clamp too.
That last point catches people out. A bar can match the main clamp diameter and still be wrong because the straight section is too short, the bend starts too early, or the sweep pushes controls into the dash housing or folding hook.
Common failure points include:
- Control clamp mismatch: levers, throttles, and display pods must match the bar diameter where they mount.
- Short center section: some folding scooters leave very little clean space for the stem clamp.
- Bar shape conflict: rise and back sweep can change cable pull, wrist angle, and clearance to the display or latch.
- Proprietary cockpit parts: some scooters use a shaped center section, cast bar mount, or integrated dash shell that only fits OEM parts.
Electric Scooter Handlebar and Stem Compatibility Reference
| Scooter Family | Bar Outer Diameter (mm) | Stem Bore (mm) | Clamp Length (mm) | Bar-Specific Parts |
|---|---|---|---|---|
| Generic commuter with separate faceplate | 22 mm commonly assumed in aftermarket guidance | Verify by measurement | Measure usable straight section before ordering | Grips, brake levers, throttle, display pod |
| Folding commuter with narrow clamp area | Verify by measurement | Verify by measurement | Often limited by hinge and dashboard layout | Cable guide, hinge clearance parts, display mount |
| OEM integrated cockpit design | May be proprietary | May be proprietary | Not always relevant if bar and stem are one assembly | OEM harness, dashboard housing, stem hardware |
| Stem-and-handlebar one-piece replacement setup | Replacement may involve full assembly rather than bar only | Assembly-specific | Assembly-specific | Stem, folding mechanism, wiring harness |
Washers, shims, cable guides, and harness clips matter here as much as the bar itself. If the original setup used thin shims to take up clamp tolerance, or specific washer stacks to center the folding head, those parts are part of the steering system. Leave one out and the scooter may still bolt together, but the bar can sit twisted, clamp unevenly, or start creaking under braking.
Internal wiring deserves the same level of suspicion. A replacement bar with a different bend or width can pull too hard on the harness at full lock, especially on scooters with display wiring run through the stem. If the loom is already tight, a wider or taller bar may turn a clean install into a pinched wire fault a week later. At that point, replacement was never just the handlebar.
Why the legal side can matter
Dimensions are not only a fitment issue. In some markets, they are part of the vehicle definition. Ireland's 2023 electric scooter rules set a maximum design speed of 20 km/h, maximum continuous motor power of 0.4 kW, maximum unladen weight of 25 kg, and overall size limits of 2,000 mm long, 800 mm wide, and 1,500 mm high including the handlebars in the Irish technical rules text. A bar that adds width or height can push the scooter away from its intended specification.
Buy the front end as a system when the model calls for it. Mixing a near-fit aftermarket bar into a proprietary stem or folding assembly is how a cheap parts swap turns into a steering problem.
Safety Checks and Knowing When to Call It Done
You finish the swap, straighten the bar by eye, and the scooter looks fine on the stand. Then the first hard squeeze on the front brake makes the bar settle a few millimeters in the clamp, or the harness goes taut at full lock. That is not a cosmetic miss. It is a steering-system fault.
A good first ride feels uneventful. The scooter should track straight, steer, and brake without any twist, click, or delay from the front end. If anything feels vague at walking speed, stop there. Speed only makes a small steering problem harder to catch and more expensive to fix.
Bench checks before the wheel touches the ground
Reconnect the battery after the fasteners are torqued, the controls are positioned, and the cable guides are back in place. Power the scooter up on the stand or with the drive wheel clear. Check the throttle, brake cutoff, display, horn, lights, and any switchgear you unplugged during the job.
Then do the part many DIY installs rush. Hold the front wheel between your knees and try to twist the handlebar independently of the wheel. There should be no slip at the clamp, no knock from the stem, and no movement from the folding head. On some commuter models, that test tells you the handlebar was never the repair. The play is in the hinge, stem tube, or steering column hardware.
Run through a short post-install check:
- Full steering sweep: turn lock to lock and watch for harness tension, rubbing, or pinching.
- Brake feel check: levers should stay firm and clear the bar under a hard squeeze.
- Front-end load test: compress the front suspension or push down on the bar and listen for clicks or creaks.
- Folding latch check: if the scooter folds, latch and unlatch it several times, then confirm it locks fully without side play.
- Low-speed ride test: start in an empty area, ride slowly, and brake harder in stages.
One more check matters on scooters with internal wiring. Turn to full lock both ways while the display is on and the lights are powered. If the screen cuts out, the throttle blips, or a light flickers, the harness routing is wrong or the replacement bar changed the cable path enough to strain the loom.
What the bigger safety picture says
Post-repair caution is justified. ASTM published a new safety specification for commercial electric powered scooters, and the SGS overview of ASTM F3662-24 lays out the broader push toward tighter safety expectations for these machines. That matters here because the bar, stem, hinge, and controls all sit in the rider's primary steering path.
Injury surveillance points the same way. The U.S. Consumer Product Safety Commission tracks injuries tied to micromobility products through its micromobility product-related deaths, injuries, and hazard patterns report. A handlebar swap is a small job only if the front end passes every check afterward.
Call the job done only when the scooter stays quiet and repeatable under load. The bar must hold position in a hard brake test. The steering must return smoothly from side to side. The folding mechanism, if fitted, must lock without doubt or fuss.
If it still clicks, shifts, binds, or needs “one more try” to feel right, park it and reopen the repair. If you cannot tell whether the problem is in the bar clamp, stem, headset, hinge, or wiring harness, a competent shop should take over before the scooter goes back into traffic.
If you're sorting out a repair, replacing a worn commuter, or figuring out which scooter or e-bike setup fits your riding, Punk Ride LLC carries a broad mix of electric rides and practical urban mobility options across the US, UK, and EU markets. For current models, brand selection, and gear that matches real-world commuting needs, take a look at Punk Ride LLC.
Share:
Bike Battery Maintenance That Actually Works in 2026