


Your morning commute can go wrong even when you're wearing a helmet and carrying a charged phone. A route may send you onto an illegal pavement, a downhill stretch may push your speed beyond the local limit, low winter light may hide you from a turning driver, or a neglected brake may fail when you need it most.
The safest approach combines local rule-checking, protective equipment, a pre-ride inspection, and defensive judgment. UK and EU e-scooter access depends heavily on the country, city, road type, and whether the scooter is private or part of an approved rental scheme. In the US and Australia, requirements can also change by state, city, territory, or council.
These ten scooter safety rules follow your real journey. Start by confirming where you may ride, then prepare your helmet and vehicle, control speed, improve visibility, manage traffic and pedestrians, adapt to weather, respect age restrictions, and maintain the machine after every regular commute.
1. Helmet Compliance and Certification Standards
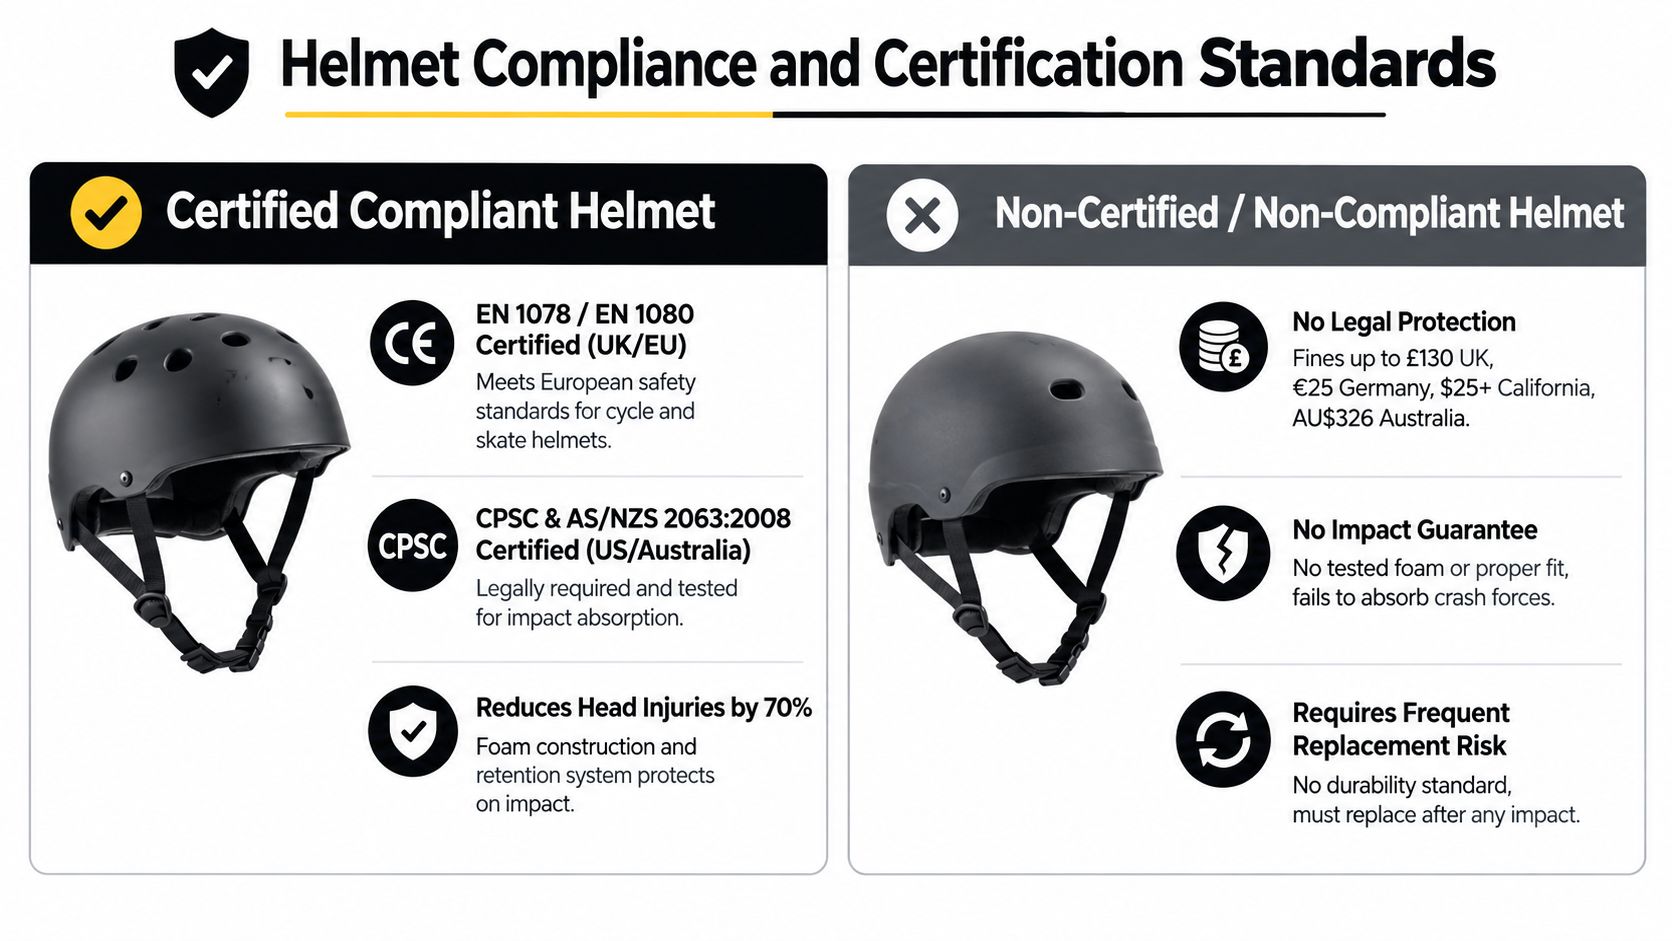
A properly fitted, certified helmet belongs on every scooter commute. Legal requirements differ across jurisdictions, so confirm the exact rule for your route before riding, but the practical decision is simple: don't leave home without head protection that fits securely and carries a recognized certification mark.
For UK and EU cycling-style helmets, check whether the product carries the relevant EN 1078 certification. Skateboard-style helmets may use EN 1080. In the US, look for CPSC certification, while Australian buyers should check for AS/NZS 2063:2008 compliance. Treat the label as a purchasing requirement, not a marketing extra.
A helmet should sit level, with the front positioned above the eyebrows rather than tipped backward. Tighten the chin strap until it stays in place without pinching, and check that the shell doesn't move when you shake your head.
Fit matters more than appearance
Replace a helmet after any impact, even if the damage isn't obvious. Follow the manufacturer's replacement guidance for normal aging, and inspect the shell, straps, buckles, and inner foam before each ride. Ventilation helps on warm commutes, but airflow mustn't come at the expense of a stable fit.
For a practical buying guide, compare the fit and features discussed in this guide to choosing the best helmet for an electric scooter.
Practical rule: A helmet that sits loose, tilted, or unbuckled isn't protective equipment. Adjust it before you move.
Don't assume a helmet removes every legal risk. Check your local authority's current requirements, and use the Florida scooter laws guide if you're checking how local rules may affect a commute there.
2. Designated Path and Lane Riding Restrictions
A commuter can have a safe scooter and still choose an illegal route. In Great Britain, privately owned electric scooters cannot be ridden on public roads, pavements, or parks. They are limited to private land with the landowner's permission. Rental scooters are restricted to official rental schemes in designated areas, according to the UK government's electric scooter rules.
The scooter's appearance does not determine its legal status. A privately owned model may look identical to a rental scooter yet remain unlawful on a public route. Check current government, city, or transport authority guidance before buying, and verify the route again before commuting. Manufacturer maps, old social-media posts, and other riders' habits are not legal permission.
Build a legal route before you build a habit
EU rules differ by country and city. One authority may allow scooters in cycle lanes, while another may limit them to roads or approved paths. Some areas create local access zones. US requirements can differ by state and city, while Australian path access and riding conditions vary by jurisdiction. Treat every regional claim as a prompt for local verification.
Use this route check:
- Check official sources: Confirm permitted roads, cycle lanes, paths, parking areas, and crossing rules with the relevant authority.
- Read signs on arrival: Maps may miss no-scooter signs, pedestrian-only sections, or dismount zones.
- Prepare a legal alternative: Choose a second route before congestion makes an illegal shortcut tempting.
- Separate riding from walking: Dismount wherever signs require it, particularly near stations, crossings, and crowded pedestrian areas.
A route is ready only when you know where riding ends and walking begins. Check those points before departure, not after reaching a barrier.
3. Speed Limit Compliance and Throttle Control
Speed control starts with the local legal limit, then continues with your judgment. In Great Britain, rental e-scooters are capped at 15.5 mph, or 25 km/h, and some busy areas use automated “go slow” zones that reduce speed further, as reported by the BBC. That cap doesn't make every route safe at full speed. A crowded shared path, blind junction, or wet bend may require much slower riding.
Australia illustrates why you must check the location as well as the device. Western Australia sets eRideable limits at 10 km/h on footpaths and pedestrian crossings, and 25 km/h on bicycle paths, shared paths, roads up to 50 km/h, and bicycle lanes, according to the Western Australia Road Safety Commission. Queensland guidance also requires e-scooters and similar devices to be limited to 25 km/h, and permits riding on roads, including on-road bicycle lanes, where the speed limit is up to 60 km/h, subject to the applicable rules, as explained by StreetSmarts Queensland.
Make the throttle predictable
Test acceleration in a safe private area before commuting. Apply the throttle progressively, avoid abrupt starts, and release it early before bends, junctions, pedestrians, and parked cars. On a downhill, use controlled braking rather than allowing gravity to carry you beyond the permitted or sensible speed.
Read your model's limiter settings and manual. A display can help you monitor speed, but it doesn't replace attention to traffic or local signs. For more detail on legal limits and device settings, see this explanation of the electric scooter speed limit.
4. Visibility and Lighting Equipment Requirements
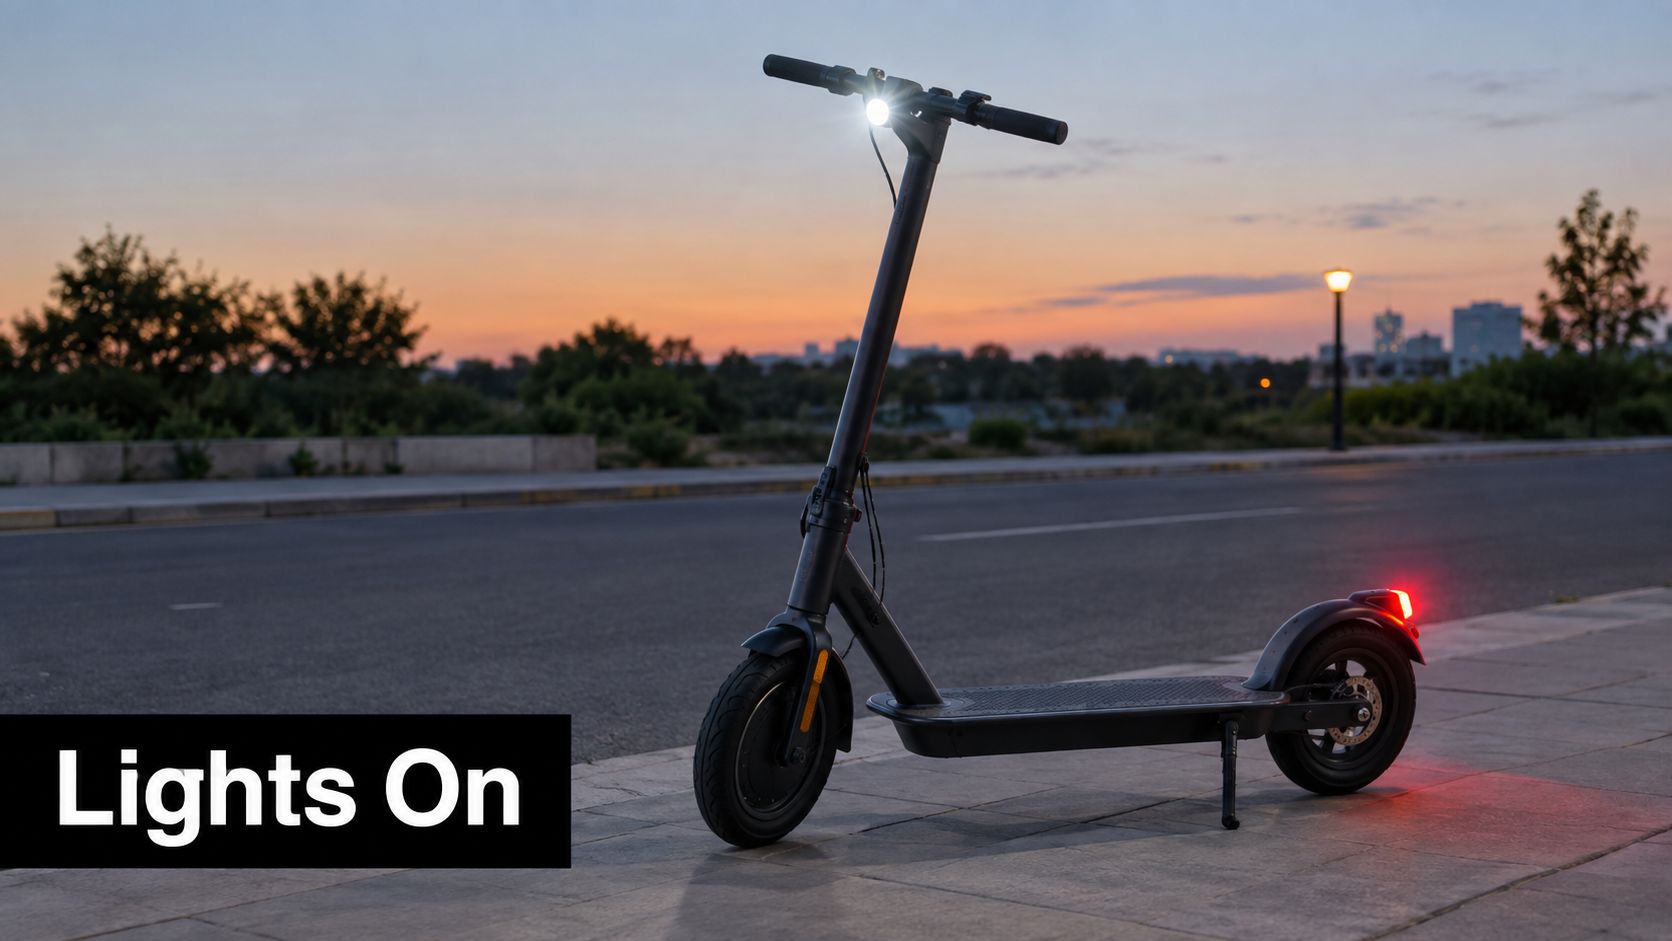
Drivers and pedestrians need time to recognize you, judge your speed, and react. Fit a white front light and a red rear light where required, and use them whenever visibility is poor, not only when the law explicitly demands it. Early-morning and evening commuters should treat lighting as standard equipment.
Lighting rules vary across the UK, EU, US, and Australia. UK and EU requirements commonly distinguish white front and red rear lights, while US rules differ by state. Australian guidance generally requires lights for dusk and night travel. Check your local code before riding, especially if you cross a council or state boundary during the trip.
Make yourself visible from more than one angle
A single tiny lamp can disappear behind a vehicle, street furniture, or a rain-covered jacket. Combine integrated scooter lights with reflective details on your clothing, helmet, bag, or ankle area. Keep lights aimed so they illuminate the road without dazzling oncoming riders.
Use this quick lighting routine:
- Test before leaving: Confirm front, rear, brake, and indicator lights work.
- Secure every mount: Vibration can loosen clip-on lights during a commute.
- Carry a backup: A small spare light can prevent a dark return journey if the main unit fails.
- Choose a visible mode: Steady lighting helps others judge your position while flashing modes can attract attention when stationary.
For practical commuter equipment ideas, browse these electric bike accessories.
5. Protective Gear Beyond Helmets
A helmet protects your head, but a fall often sends riders forward onto their hands, knees, or elbows. Wrist guards, knee pads, elbow pads, and impact shorts add protection in situations where a helmet can't help.
Adults may not have to wear every item by law, but commuters should choose gear based on route exposure. A short, slow trip on a quiet cycle path calls for a different setup from a fast, traffic-heavy journey. Young riders may face additional protective-equipment rules in some US states and Australian jurisdictions, so families should verify local requirements before a child rides.
Choose protection you'll actually wear
Start with wrist guards and knee pads if you want a practical first step. Select breathable materials for warmer climates, and check that the closures hold the pads firmly without restricting movement. Pads that slide during a fall won't protect the area you intended to cover.
Wear the equipment over or under clothing according to comfort, but don't let discretion produce a poor fit. Inspect foam after a hard impact and replace damaged or compressed padding. Impact shorts can make sense for regular commuters who use faster routes or ride over rough surfaces.
A useful standard: Protective gear should stay in position when you bend, steer, brake, and step off the scooter. Test the fit while moving through those actions before commuting.
6. Traffic Rules and Right-of-Way Compliance
Follow traffic signals, stop signs, lane markings, and yielding rules wherever your scooter is legally permitted. Don't treat a cycle lane, shared path, or road as a private corridor. Your route position determines which rules apply, and local codes can distinguish between an e-scooter, an e-bike, a rental vehicle, and a pedestrian-area device.
At intersections, slow down even when you have a green signal. Turning vehicles may not see you, and a parked van can hide both you and a crossing pedestrian. Signal turns early using the method required in your jurisdiction, then check behind you before changing position.
Protect the people around you
Pedestrians deserve priority on shared paths and crossings. Pass only when there's enough room, reduce speed before approaching, and give a clear verbal warning when appropriate. Never force someone toward a kerb, wall, grass verge, or mobility obstacle.
Use these habits every day:
- Stop at red lights: Don't copy riders who treat signals as optional.
- Yield early: Giving way before the conflict develops is safer than braking late.
- Check turning lanes: Position yourself where drivers can see you, not beside a vehicle's front or rear blind spot.
- Keep both hands ready: Avoid phone use, eating, or carrying unstable loads while moving.
- Walk crowded sections: Dismount where signs, staff, or congestion require it.
A courteous rider makes legal micromobility easier for cities and safer for everyone using the route.
7. Weather Condition Riding Restrictions and Adaptations
Rain changes braking, cornering, visibility, and grip at the same time. Ice and snow can make a routine commute unsuitable, while crosswinds can move a lightweight scooter toward traffic or pedestrians. Treat the forecast as part of your route decision, not as an inconvenience to ignore after you leave home.
Check the weather before setting off and identify another transport option for hazardous conditions. In Australia, severe weather and flood conditions may trigger local restrictions or warnings. In the UK and EU, wet winter roads, poor light, and icy surfaces demand slower riding and may make postponing the trip the safest choice.
Change the ride, not just the clothing
If you ride in light rain, reduce speed before corners, increase following distance, and brake smoothly. Avoid standing water because it can conceal potholes, drain covers, and damaged surfaces. Don't assume a water-resistant rating makes every scooter suitable for heavy rain. Check the manufacturer's guidance before exposing the battery, display, charging port, or motor to water.
Use a simple decision rule:
- Dry but windy: Avoid exposed bridges and open roads if gusts affect steering.
- Wet: Slow down, corner upright, and begin braking earlier.
- Icy or snowy: Leave the scooter at home. Walking or public transport is safer.
- Flooded: Never ride through water whose depth or current you can't judge.
- Low visibility: Add reflective clothing and lights before the route becomes dark.
Dry the scooter after a wet ride and store it somewhere ventilated. Moisture can damage electrical connections, bearings, and fasteners over time.
8. Age Restrictions and Youth Rider Requirements
Age rules depend on the scooter, location, and whether it is private or rented. In Great Britain, rental e-scooter riders must be at least 18 and hold a provisional licence, according to the UK government rules for rental e-scooters. That requirement does not apply universally to private scooters or to laws in the EU, US, or Australia.
Before buying a scooter for a young rider, verify the current local rules. Minimum ages, supervision requirements, helmet obligations, speed limits, licence conditions, and rental eligibility can differ between nearby cities or states. A route that permits a particular e-bike may still prohibit an e-scooter.
Set a family standard above the legal minimum
A short demonstration is not enough. Have the rider practise braking, shoulder checks, signalling, dismounting, and yielding to pedestrians in a quiet private area. Supervise the first route, then set firm boundaries for roads, paths, weather, passengers, headphones, and phone use.
Require protective equipment on every youth ride, even if local law lists only some items. One person rides one scooter. Do not allow passengers or bags that affect steering, balance, or access to the controls.
Before independent travel, confirm that the young rider can control the scooter consistently, recognize unsafe conditions, and follow the agreed route. Supervisors remain responsible for checking the rider, scooter, and route before each trip. Recheck local requirements whenever the family travels, changes rental providers, or the rider moves into a new age category.
9. Maintenance Checks and Equipment Safety Inspections
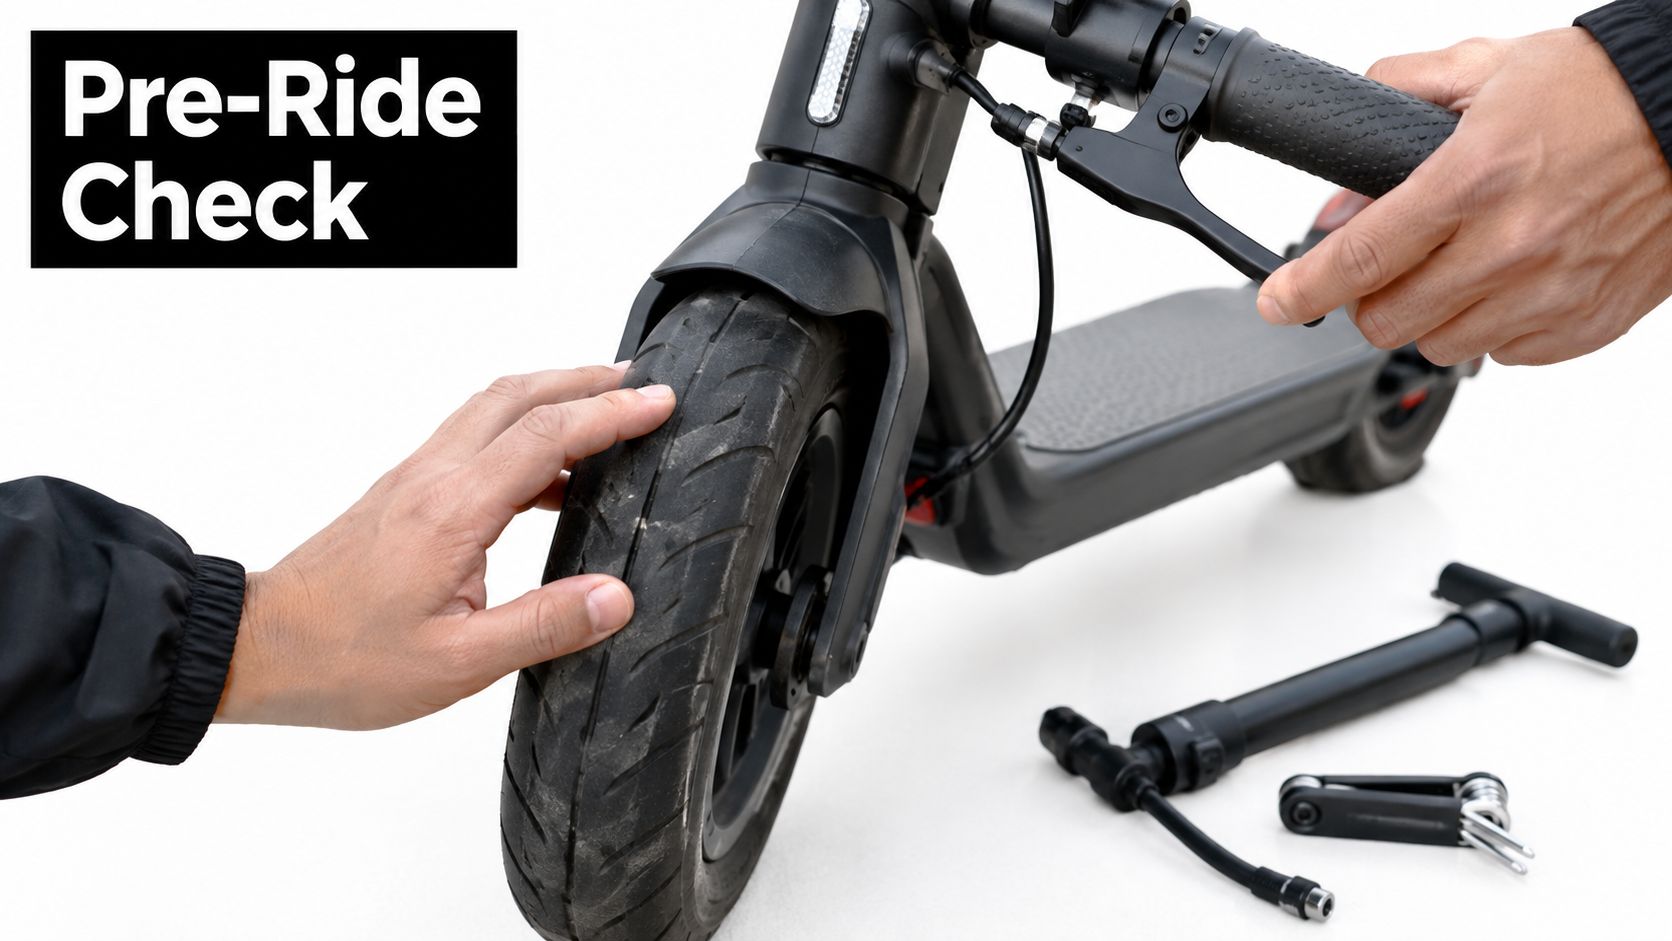
A scooter with a flat tyre, loose folding joint, weak brake, or damaged cable can become unsafe before the rider notices a serious problem. Make inspection part of the commute rather than waiting for a strange noise or warning message.
Before every ride, look over the tyres, stem, deck, handlebars, folding mechanism, lights, and visible fasteners. Squeeze the brakes while stationary, then test them gently in a safe area at the start of the journey. The controls should respond consistently, without excessive lever travel, grinding, wobble, or delay.
Keep a record, not just a memory
Follow the manual for tyre pressure, brake adjustment, battery charging, storage, and inspection intervals. Don't open a battery pack or attempt electrical repairs unless you're qualified to do so. Stop riding if the battery swells, overheats, smells unusual, loses power unpredictably, or shows physical damage.
Record repairs and recurring checks in a maintenance log. That record helps you identify deterioration and gives you useful information when speaking with a service centre or manufacturer. For fleet and operational teams, an inspection checklist template from OperatorCompliance can help organize documented checks.
Watch the maintenance demonstration only after completing the written checks and following the device manual.
10. Safe Interaction with Motor Vehicles and Pedestrians
Ride where others can see you, and assume they may still fail to notice you. Position yourself away from vehicle blind spots, leave room beside parked cars, and watch for doors opening into your path. At junctions, make eye contact with a driver when possible, but don't treat eye contact as proof that the driver will yield.
Your safest position changes with the route. On a permitted road, maintain a predictable line and signal before moving. In a cycle lane, watch for vehicles crossing it to turn or park. On a shared path, lower your speed near pedestrians and be prepared to stop rather than squeeze through a narrow gap.
Communicate before conflict
Use a clear hand signal before turning, check behind you, and make your movement gradual. A short verbal warning such as “passing on your left” can help pedestrians, but it doesn't give you permission to pass at speed or in a space that's too narrow.
Near large vehicles, avoid the sides where mirrors may not cover you. Never pass a turning lorry or bus on the inside unless you know the route is clear and the traffic rules allow it. If you can't see the driver, the driver may not be able to see you.
Defensive riding means giving yourself an exit. Leave enough space to brake, steer away, or dismount when a car, pedestrian, cyclist, or door moves unexpectedly.
Scooter Safety Rules, 10-Point Comparison
| Item | 🔄 Implementation Complexity | ⚡ Resource Requirements | 📊 Expected Outcomes | 💡 Ideal Use Cases | ⭐ Key Advantages |
|---|---|---|---|---|---|
| Helmet Compliance and Certification Standards | Low 🔄: straightforward purchase and certification checks | Moderate ⚡: certified helmet cost & periodic replacement | High 📊: reduces serious head injuries ≈70% | Commuting, rentals, legal compliance scenarios | High ⭐: legally backed, proven impact on injury reduction |
| Designated Path and Lane Riding Restrictions | Medium-High 🔄: varies by jurisdiction; mapping/enforcement needed | Medium ⚡: signage, apps, infrastructure investment | Moderate-High 📊: reduces pedestrian conflicts and vehicle interactions | Urban areas with bike lanes, city trials and shared fleets | High ⭐: improves pedestrian safety and traffic separation |
| Speed Limit Compliance and Throttle Control | Medium 🔄: firmware/app limits and rider behaviour management | Low-Medium ⚡: speed governors, app control, rider training | High 📊: lowers accident severity and extends range | Commuting, fleet operations, legally restricted zones | High ⭐: enforces legal limits and reduces speed-related incidents |
| Visibility and Lighting Equipment Requirements | Low 🔄: simple installation and routine charging | Low ⚡: lights, mounts, rechargeable batteries | High 📊: up to ~85% reduction in low-visibility accidents | Night/dusk commuting, low-visibility weather, urban routes | High ⭐: inexpensive, high safety ROI |
| Protective Gear Beyond Helmets (Pads and Guards) | Low 🔄: purchase and correct fit required | Low ⚡: pads/guards cost; occasional replacement | High 📊: reduces fall injury severity 50–80% | Youth riders, high-risk commuters, training sessions | High ⭐: significant secondary-protection benefits |
| Traffic Rules and Right-of-Way Compliance | Medium 🔄: learning and applying varied traffic codes | Low ⚡: education, signage, occasional enforcement | High 📊: prevents accidents and legal penalties | Road riding, intersections, mixed-traffic urban routes | High ⭐: legal protection and improved public acceptance |
| Weather Condition Riding Restrictions and Adaptations | Medium 🔄: condition-based decision-making and gear changes | Medium ⚡: weatherproofing (IP rating), tires, alternate transport | Moderate-High 📊: reduces weather-related crashes and equipment damage | Seasonal climates, commuter planning, adverse-weather days | High ⭐: protects rider and extends device lifespan |
| Age Restrictions and Youth Rider Requirements | Low-Medium 🔄: verification and policy enforcement | Low ⚡: ID checks, youth training, protective gear | High 📊: protects minors and clarifies liability | Families, rentals, school-area commuting | High ⭐: reduces youth injuries and legal ambiguity |
| Maintenance Checks and Equipment Safety Inspections | Medium-High 🔄: scheduled inspections, professional checks for fleets | Medium ⚡: tools, parts, time, possible professional service | High 📊: cuts equipment-failure accidents (~15–20%) and extends lifespan | Frequent riders, fleet operators, rental services | High ⭐: prevents mechanical failures and preserves warranties |
| Safe Interaction with Motor Vehicles and Pedestrians | Medium 🔄: ongoing training and situational awareness | Low ⚡: training, communication tools (bells, lights) | High 📊: significantly reduces severe vehicle collisions | Urban streets, mixed-traffic routes, delivery riders | High ⭐: minimizes high-risk incidents and improves predictability |
Make the Safe Choice Your Commute Routine
Safe riding becomes easier when the same decisions happen in the same order. Before leaving, verify that your route is legal for your exact scooter and location. A private scooter in Great Britain can't be treated like an approved rental scooter, and a rule from one EU city can't be assumed to apply in another. Check the relevant government, transport authority, city, state, territory, or council source whenever you change routes or locations.
Next, fit your helmet correctly and add protection that matches the journey. Confirm that the front and rear lights work, then inspect the tyres, brakes, stem, folding joint, deck, and visible fasteners. A brief test of the controls in a safe area can reveal a problem before you reach traffic.
Set a compliant speed before you move, but remember that the legal maximum is not a target for every surface. Reduce speed around pedestrians, junctions, parked vehicles, poor road surfaces, rain, wind, and low visibility. Keep both hands available, put your phone away, and never carry a passenger on a scooter designed for one rider.
Weather should have the power to cancel the journey. Postpone the trip or choose public transport when ice, snow, flooding, severe wind, or poor visibility makes controlled riding unrealistic. Dry the scooter after wet conditions and store it safely so moisture doesn't turn a small exposure into an electrical or mechanical fault.
Save a local-rule note on your phone, but don't use the phone while riding. Include permitted riding areas, speed limits, helmet and age requirements, lighting rules, parking restrictions, and the date you last verified the information. Keep a separate maintenance schedule for tyre condition, brake response, fasteners, battery behavior, and professional servicing.
Punk Ride LLC can be relevant when you're choosing equipment for a safer commute. Its headquarters are in Florida, with warehouses in the UK and Germany, and its range includes brands such as ISCOOTER, AOVO, HIDOES, ENGWE, and others. Select a model and accessories with suitable lights, brakes, tyres, visibility features, and manufacturer guidance for your jurisdiction. The safest product is still one you can legally ride, inspect properly, and control within local conditions.
Punk Ride LLC offers a curated selection of electric scooters, electric bikes, and commuter accessories from brands including ISCOOTER, AOVO, HIDOES, and ENGWE. Visit Punk Ride LLC to choose equipment that supports your local scooter safety rules and your daily riding routine.
Share:
E Bike Battery Management System Explained Simply