


You've loaded the bikes, tightened the straps, and pulled onto the road. A few miles later, the rack has shifted, one bike is rocking against the bumper, and you're looking for somewhere safe to stop. That's not just an annoying start to a ride. It's a sign that installation didn't end when the rack felt tight.
A reliable setup starts with choosing a rack that fits the bike and vehicle, checking the load limits and clearances, mounting it according to the manufacturer's instructions, then testing the complete setup with bikes aboard. That matters especially for heavier e-bikes and scooters, where extra weight, wider tires, and accessories leave less room for guesswork. Treat the rack as a vehicle modification, not a casual add-on, and finish the job with a loaded road check.
Why Most Bike Rack Setups Fail Before the First Ride
The trouble often starts before anyone reaches for a wrench. A rack can be attached firmly and still be the wrong type for the vehicle, overloaded by the bikes, or positioned where it blocks a lamp, plate, sensor, or hatch. Once the vehicle is moving, loose contact points and poor bike spacing can turn those small mistakes into an unstable load.
A dependable installation follows a simple sequence: choose a compatible rack, work out the load and clearances, mount it correctly, then verify the loaded setup after driving. Skip the planning and you may find that the rack doesn't fit your frame, that the vehicle's rear end sits too low, or that a bike rocks into the paint. Tight bolts can't fix a bad match.
That's especially true for e-bike and scooter riders. A wide tire may not sit in a narrow wheel tray, and a step-through frame may not suit a rack that relies on a top-tube clamp. Heavier bikes also make awkward lifting and movement more consequential, so the same setup mistake can be harder to correct once you're on the road.
A bike rack isn't installed just because it's attached. It's installed when the loaded rack stays secure, the vehicle remains usable, and the required lights and plate remain visible.
Before a longer outing, sort the equipment at home rather than improvising at the trailhead. If you're mapping a ride around the North Bay, plan your 2026 ride with Sonoma County and check that your transport setup suits the bikes and destination. The trail plan is the easy part. The rack needs to be ready before you set off.
Calculate the Load, Match the Rack, and Choose the Mount
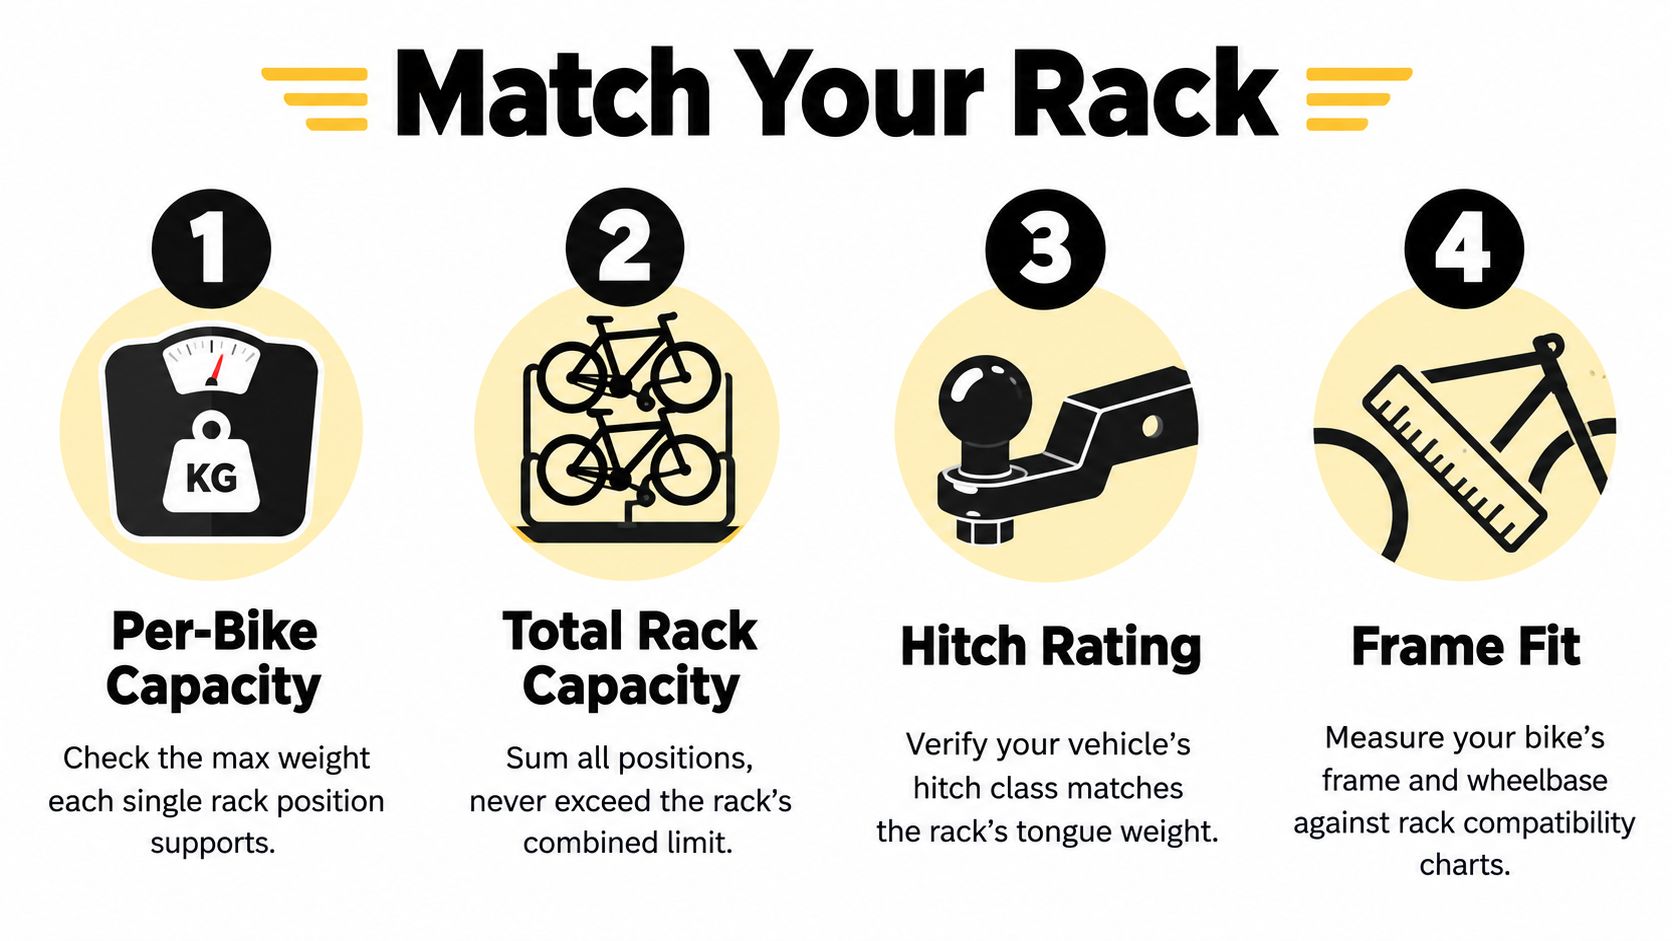
Read the rack label before buying or mounting anything. E-bike owners should check four separate limits: the maximum weight for each bike position, the rack's combined capacity, the vehicle's hitch or roof rating, and the vehicle's maximum permissible rear load. A rating that looks adequate in one place doesn't override a lower limit elsewhere.
Some bike-rack instructions cap each bicycle at 35 lb, while many e-bikes exceed that before accessories or batteries are added, as noted in consumer guidance on choosing and using a bike rack. Weigh the bike in the configuration you plan to carry, then check the rack and vehicle documentation. Don't count on a rack's total rating if one individual position is under-rated.
For heavier or unusual frames, a platform-style hitch rack is often a more practical starting point than a trunk rack or a design that depends on a convenient top tube. Platform trays support the wheels, which can help with step-through frames and wider tires. But “hitch rack” doesn't mean “automatically safe for an e-bike.” Confirm the actual rack capacity, receiver rating, vehicle limit, and fit for your wheel and frame dimensions.
The load calculation also affects vehicle clearance. Check whether the rack or loaded bike covers the number plate or rear lamps, obstructs a camera or parking sensor, or interferes with a hatch or tailgate. If you're comparing vehicle ratings and towing terminology, this GVWR vs. GCWR breakdown can help distinguish the figures, but the rack and vehicle manuals remain the authority for the limits that apply to your setup.
Tools, Torque Specs, and Pre-Mount Checks
Get the right tools together before starting: a socket set, hex keys that fit the supplied hardware, measuring tape, marker, level, and a torque wrench when the manufacturer specifies a value. Keep the rack manual open, and use gloves and eye protection if you're drilling or working around sharp edges. Don't substitute a guessed torque figure for the one given for your rack and fasteners.
A common driveway mistake is treating “tight” as a specification. A bolt can loosen if it's under-tightened, while excessive torque can damage hardware, crush a mounting surface, or distort a component. For any ground-mounted rack, the substrate matters too. Toronto's municipal bicycle-parking guidance calls for racks to be firmly secured to the ground or floor, and gives a horizontal parking envelope of 0.6 m by 1.8 m with 1.9 m of vertical clearance; those dimensions help show why a rack's footprint alone isn't enough for planning. See the bicycle-parking standards for the cited layout requirements.
Compare mounting styles against the bike you own. A trunk rack may suit lighter bikes and vehicles without a receiver, but contact points, straps, and vehicle-specific fit need careful attention. A hitch rack is often more convenient for heavy e-bikes, though only when every load rating checks out. A roof rack keeps the rear of the vehicle clear, but lifting a heavy bike overhead can be a poor trade. A fork-mount system can hold a compatible bike firmly, but it requires a compatible fork interface and the rider must secure the removed front wheel separately.
Before mounting, inspect the vehicle and the installation area. For a vehicle rack, check door and liftgate movement, camera and sensor positions, paint contact points, and access to the number plate and lamps. For a fixed ground rack, mark the pedestrian route first and make sure doors, ramps, curbs, drainage, and utilities won't conflict with its location. If drilling into concrete, use the anchor maker's specified hole diameter and depth, clear dust from each hole, and use the specified secure hardware.
| Item | Typical spec | Why it matters |
|---|---|---|
| Fastener torque | Use the rack or anchor maker's stated value | Surface strength and fastener design affect the safe setting |
| Ground-rack planning space | Toronto guidance gives 0.6 m × 1.8 m and 1.9 m vertical clearance for horizontal parking | Leaves room for a bicycle and its user, not just the rack |
| Vehicle clearances | Check against the vehicle and rack manuals | Helps prevent interference with doors, sensors, lamps, and the plate |
Mounting Trunk and Hitch Racks the Right Way
Park on level ground and follow the rack manual. A helper can steady a heavy rack while you align it, especially at the hitch. Fit the rack before loading bikes, then check that every attachment point and moving part is seated as designed. Small alignment errors can turn into strap slip or movement once the vehicle is underway.
Trunk rack
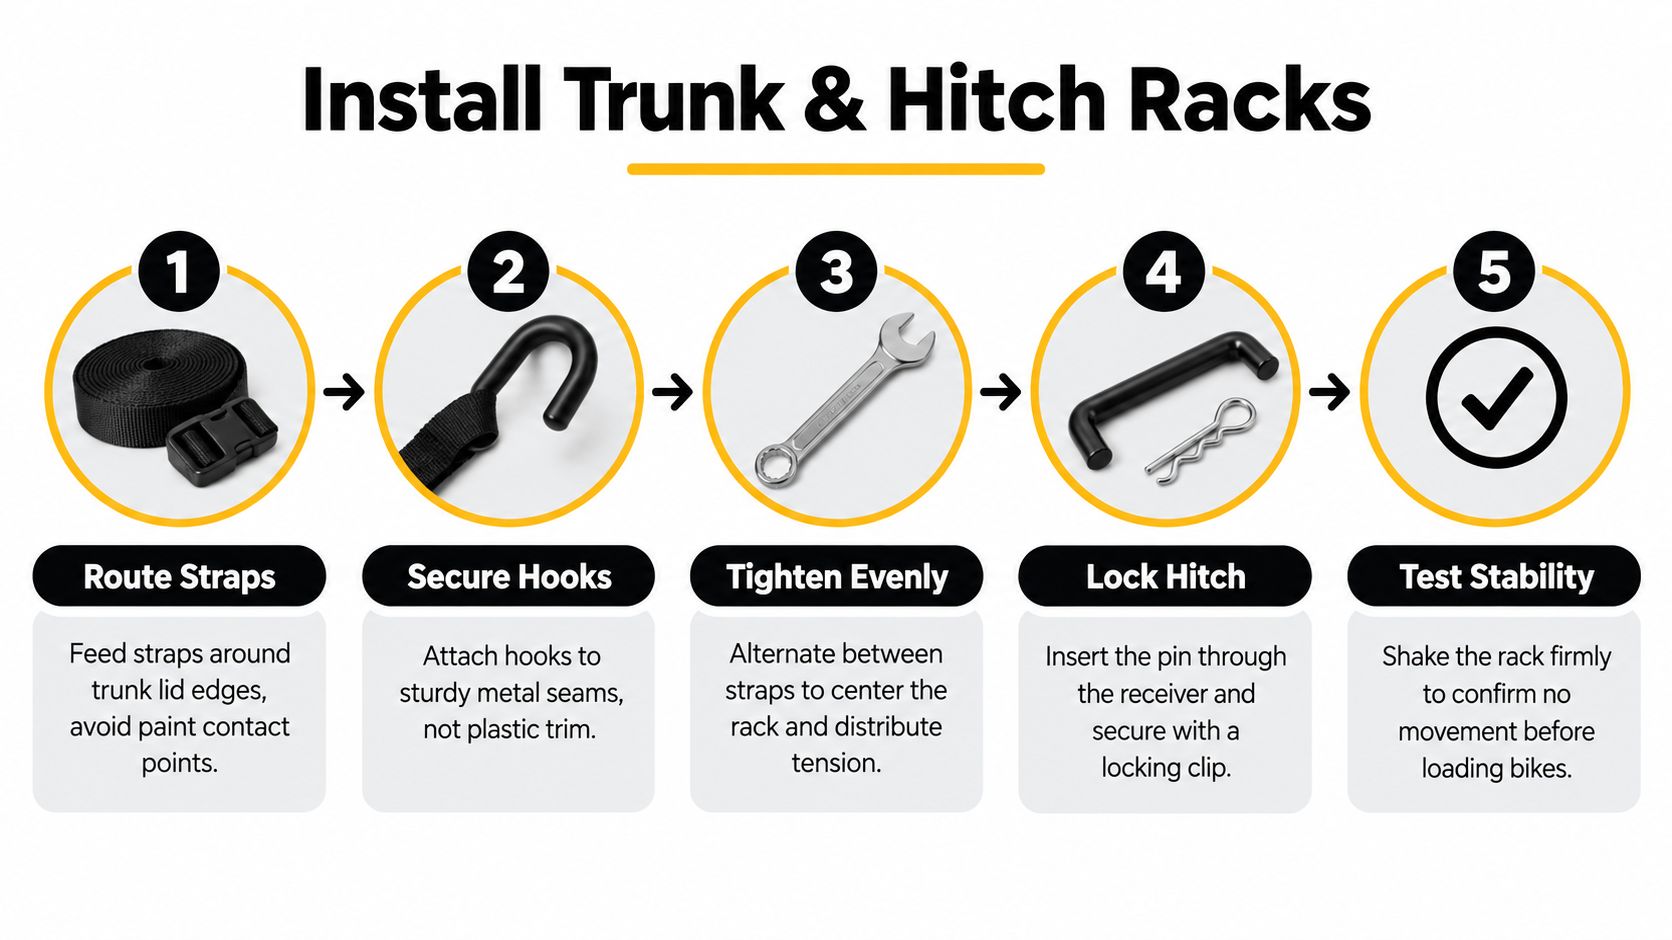
Set the rack against the vehicle at the positions shown by its manufacturer. Route each strap around the correct trunk or hatch edge, keeping hooks on suitable structural seams rather than plastic trim. Check that closing the lid won't pinch a strap. Tighten in stages, alternating between straps to keep the rack centred.
Fit the anti-sway straps once the main supports are secure. They should control side-to-side movement without twisting the rack or forcing it against the vehicle. Give the fitted rack a firm tug before loading. If it shifts, slips, or contacts the vehicle somewhere unexpected, stop and correct the fit. More tension on one strap can worsen the problem.
Hitch rack
Push the rack fully into the receiver and confirm the connection matches the rack and vehicle specifications. Install the specified pin or bolt, secure its clip or lock, and engage the anti-wobble mechanism as directed. Adjust the wheel trays for the bike's wheelbase, then check that each clamp or strap meets the intended contact point.
For a heavy or step-through e-bike, a platform rack can make loading and frame restraint easier, provided its ratings cover the bike and its tires and frame fit. A hanging rack may lack a suitable frame contact point. Clamping a carbon or unusual frame with a top-tube arm can damage it. Remove the battery only if the manuals allow it and doing so helps meet the rack's load limit or makes handling safer. Keep the battery protected in the vehicle, following its maker's instructions, so it cannot roll or take an impact.
Before driving, shake the rack and inspect each bike's wheel, frame, and strap restraints. Check the combined load against the rack and vehicle limits, including the bike, battery, and any accessories. Confirm the loaded assembly stays within your jurisdiction's rear-overhang limit before driving. Measure the overhang with the bikes fitted, because an empty rack can pass while a loaded one exceeds the limit.
If a visual walkthrough would help, watch this rack installation video before starting:
Roof and Fork-Mount Setups for Heavier Bikes
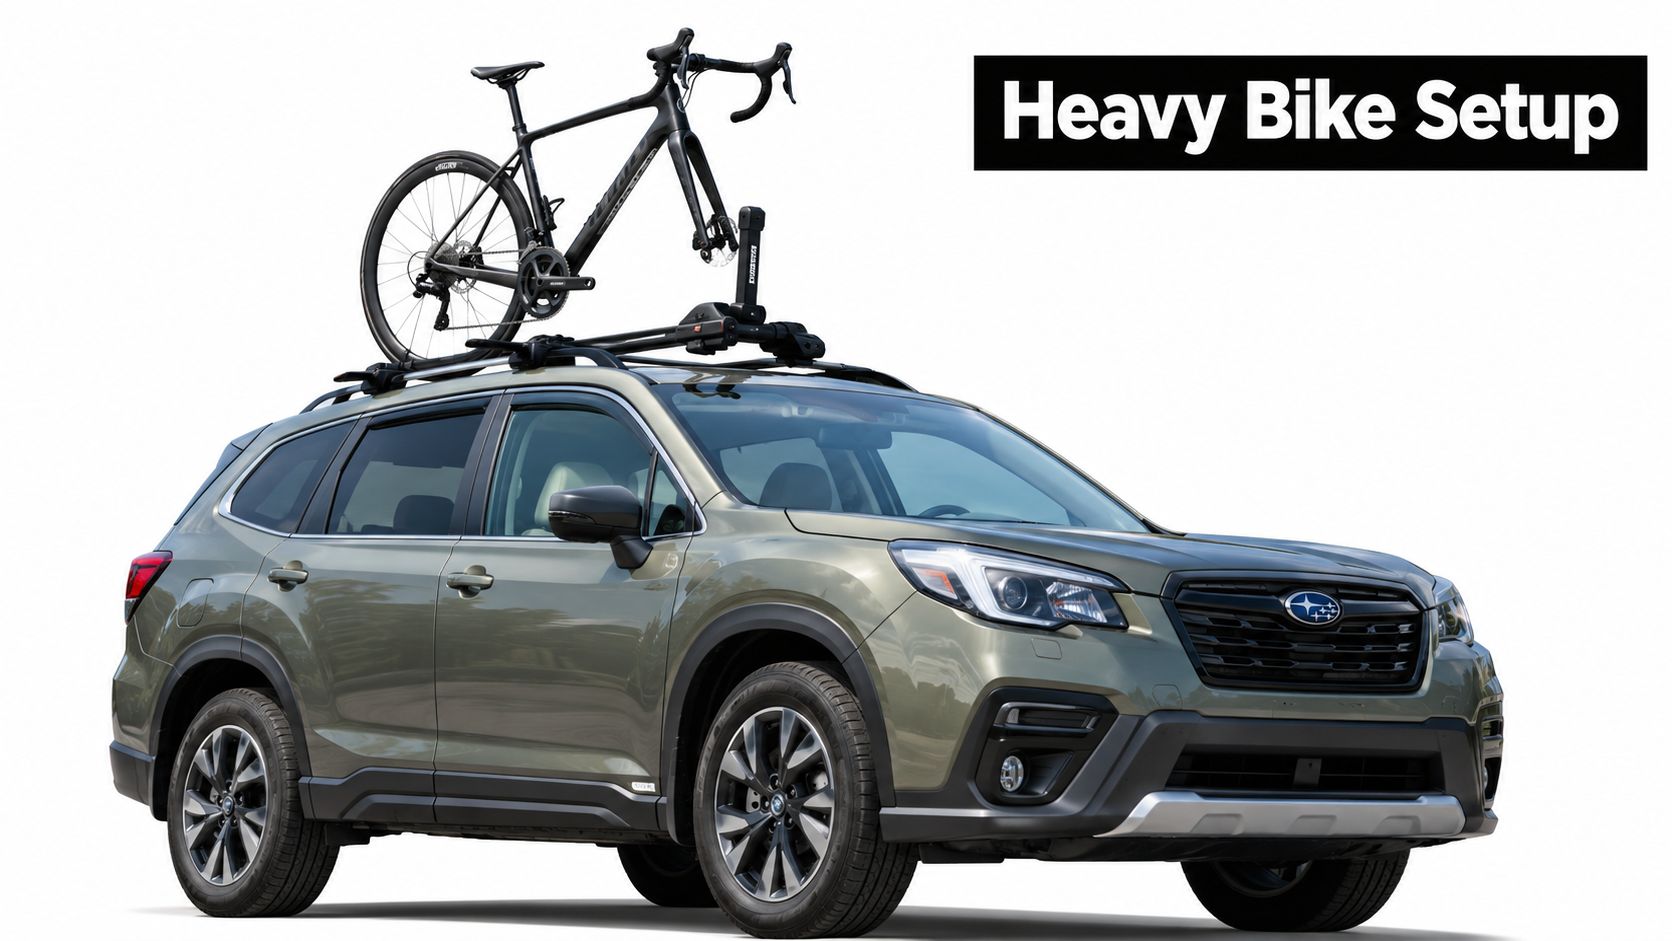
Roof and fork mounts keep the rear of the vehicle available, but they trade rear clearance for overhead lifting. That's a serious trade-off with a heavy e-bike. If you can't lift and control the bike safely at roof height, choose another mounting style rather than risking a dropped bike, a damaged frame, or an injury.
Roof rack
Install the crossbars and towers at the locations specified for your vehicle, and check that the bar profile and clamp range match the rack. Tighten each connection to its manufacturer's specification with a torque wrench where called for. Before lifting the bike, position the wheel tray and clamps so the bike can be secured without pressing on fragile frame sections.
If you carry an e-bike on the roof, remove its battery only when the manuals permit it and the reduced load makes the lift manageable. Use a controlled lift, keep the bike close to your body, and ask for help if it's unwieldy. Secure the wheels and the intended frame or fork contact points, then lock the bike and rack as the system allows. Check that the front wheel, pedals, and handlebars won't contact the roof or other bikes.
Fork mount
A fork mount can provide a stable connection for a compatible fork, but confirm the axle standard and mounting hardware before buying. Secure the fork in the mount as directed, then fasten the rear wheel into its tray. Keep frame clamps and straps away from vulnerable carbon areas unless the bicycle maker approves that contact.
The final check must follow the whole chain, not just the bike clamp. New South Wales guidance says to check the connection from bicycle to attachment, attachment to carrier or roof rack, and roof rack to vehicle, while staying within every rated limit (NSW bicycle-transport guidance). Give each connection a deliberate hand check before setting off.
Post-Drive Checks Most Installers Forget
The driveway test only proves the empty rack holds. Load the bikes, drive slowly over a bumpy stretch, then stop somewhere safe and check every contact point before continuing. A loaded rack can settle differently, and straps or wheel restraints may shift once the vehicle is moving.
Check the details people often miss:
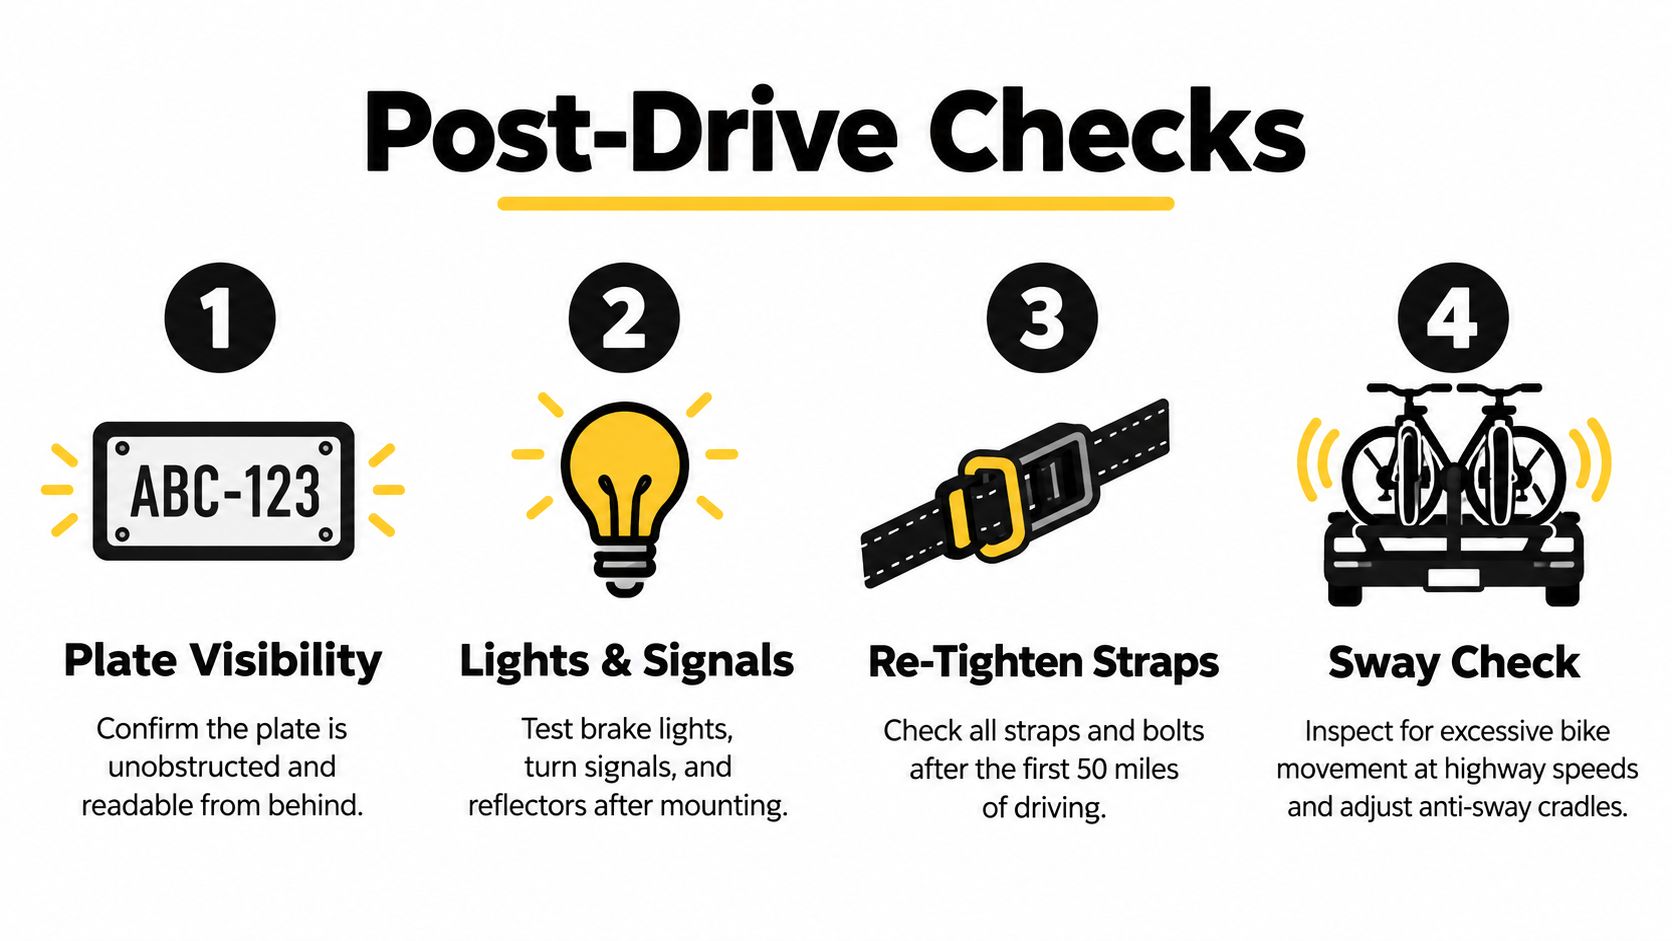
- Number plate: Confirm it is visible and readable. In New South Wales, if a rear rack or bicycle blocks the original plate, an auxiliary plate is required. Its top edge must be no higher than 1,300 mm from the ground.
- Lights and signals: Check that brake lights, indicators, and other required rear lighting remain visible.
- Vehicle access and sensors: Test the camera, parking sensors, hatch, and tailgate. A wider or heavier bike can obstruct a sensor or trigger an automatic liftgate.
- Rack and bike contact: Recheck straps, bolts, wheel restraints, and frame contact. Look for movement or rubbing against the bumper, glass, or another bicycle.
Australian vehicle-compliance rules also cover visibility, side protrusion, and rear overhang. Check the loaded setup against those requirements, since the bikes can change what the rack obscures. If a strap has moved or a bike is rubbing, fix it before driving on.
A Repeatable Bike Rack Installation Routine
A reliable rack routine is short enough to repeat and thorough enough to catch the mistakes that matter. Check the bike and rack ratings, account for the full loaded weight, and confirm that the rack suits the frame and vehicle. Mount it to the specified points, secure every connection, and check plate, lights, sensors, and access before leaving.
Then drive cautiously, stop safely, and inspect the loaded setup again. Don't wait for a long trip to discover that a strap has moved or a bike is rubbing the bumper. Build that recheck into every ride, especially when you're carrying a heavier e-bike or changing vehicles.
For e-bike and scooter riders comparing practical transport options, Punk Ride LLC offers a curated selection of electric rides, including models for commuting and outdoor use. Check your bike's weight and frame style against your vehicle and rack limits before choosing your next ride.


Share:
Water Proof Bike Explained: A Complete Practical Guide