You've arrived at work with a wet stripe up your back, gritty shoes and a chain that sounds rougher than it did yesterday. A set of e bike mudguards looks like the obvious fix, until you notice the motor cable beside the rear wheel or the tiny gap beneath your suspension fork.
Start with fit, not length. A full-length guard is excellent when the bike has room for it. When it doesn't, a shorter guard that stays clear of the tyre is a better choice than maximum coverage squeezed into an unsafe gap.
Which Mudguard Style Suits Your E-Bike
Mudguard style by e-bike setup
| Bike setup | Recommended guard | Coverage | Common material |
|---|---|---|---|
| 26 to 28 inch city commuter, 35 to 50 mm tyres | Full-length front and rear fenders with a long front flap | Most of the tyre arc | Plastic guard with aluminium stays |
| Fat tyre bike, 4 inch or wider tyres | Wide-clearance fenders with adjustable stays | Partial to full, subject to clearance | Aluminium or stainless stays |
| Folding e-bike, 16 to 20 inch wheels | Short clip-on or snap-on guards | Partial | Plastic |
| Cargo e-bike with rear rack | Full rear guard plus front fender | Full rear, full front | Steel or alloy stays |
| Suspension fork commuter | Shorter or flexible front guard | Partial, clears fork travel | Flexible plastic |
| Off-road or trail e-bike | Quick-release guards or mud flap only | Low | Plastic |
Treat these setups as starting points, not compatibility guarantees. A folding bike also needs to fold without crushing its guard, while a cargo bike needs clearance around the rack, bags and any passenger equipment. Stay material alone won't tell you whether the complete assembly fits.
Coverage that actually catches spray
A rotating tyre carries water away from the road and throws it upwards behind the wheel. A short guard can leave that rooster tail largely untouched, even if it looks substantial from above. Sheldon Brown's fender guide explains why sufficient coverage and a long front mudflap matter: the flap protects your feet, chainrings and bottom-bracket area, while rear coverage helps protect riders following you.
That's why a handsome guard over the top of the front wheel can still leave your shoes soaked. Look at where the water exits, not just how much plastic you can see. Road spray also carries grit and grime, so useful coverage is about keeping contamination away from moving parts, not just saving your trousers.
Practical rule: Choose the longest guard that fits safely, not the longest guard you can force into place.
Match protection to the job
A seatpost-mounted rear guard is handy for occasional showers, but it won't shield the lower frame like a full rear guard. Flexible trail guards accept more spray in exchange for space around moving suspension and muddy tyres.
For group rides, rear spray protection is a courtesy as well as a personal comfort choice. If you organise those rides, Samba's tools to manage guided bike tour bookings can help with the booking side; suitable guards still need checking on each bike.
Keep the rest of your wet-weather setup in mind, including light visibility and luggage clearance, using this e-bike accessories guide. For daily British or EU winter commuting, choose full coverage when clearance allows it. When it doesn't, choose shorter or flexible protection and accept some spray.
Measure Clearance Before You Buy
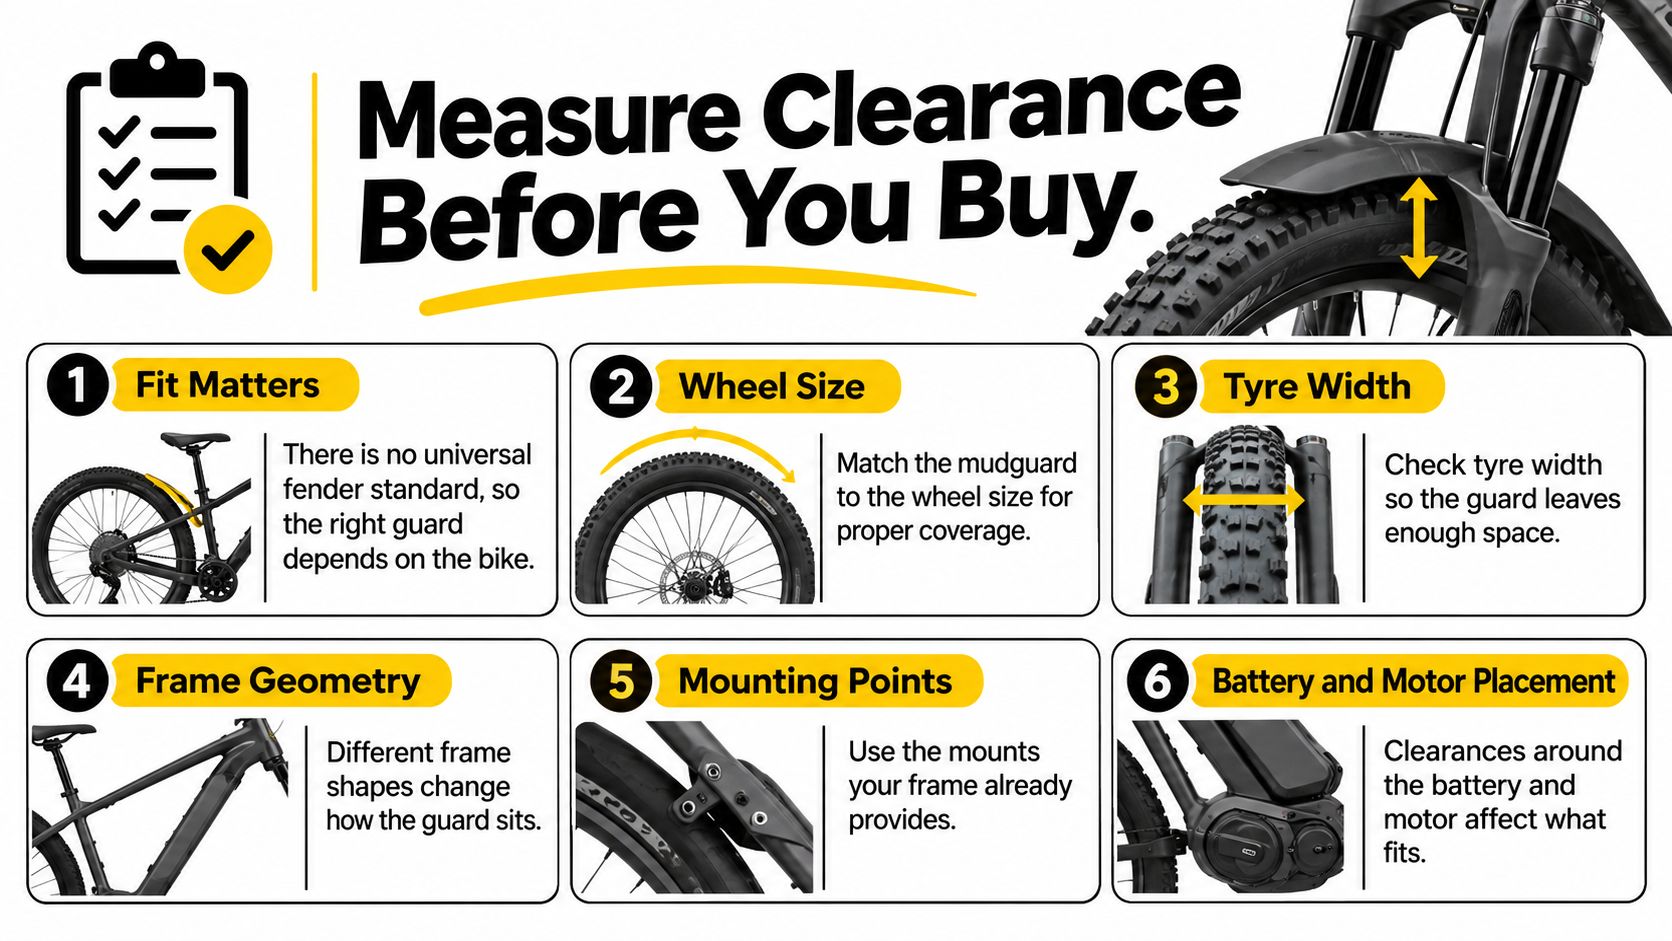
Fit decides what works. There's no universal bicycle-fender standard, and compatibility involves tyre width, wheel size, frame geometry and mounting space, as the bicycle-fender overview explains. On an e-bike, add the battery housing, motor and wiring to that inspection.
Use a ruler, vernier callipers if available, a torch and a notebook. Inflate the tyres to your normal riding pressure before measuring, and have someone steady the bike during loaded checks.
Record the tightest spaces
- Measure actual tyre width. With the bike carrying its normal rider and luggage load, measure across the widest part, including protruding tread. Don't rely solely on the sidewall marking; a guard barely wider than the tyre leaves little useful side clearance.
- Check the gap beneath the fork crown and between the seat stays, then inspect the bridges and chainstays. Measure the narrowest opening rather than the easiest one to reach; a tight pinch point can rule out an otherwise suitable full-length guard.
- Confirm wheel diameter. Copy the complete tyre-size marking and match it to the guard listing, using the e-bike tyre-size guide if the naming is confusing. The wrong curve can leave the guard close at one end and awkwardly distant elsewhere.
- Look for threaded mounting eyelets, rack brackets, battery fittings and the motor cable exit near the rear hub. Trace the proposed stay route with your finger; if it crosses a cable or requires forcing hardware sideways, that route is too tight.
- Check suspension movement. Compress the fork using the fork manufacturer's inspection procedure and recheck the guard's proposed position through its travel. If you can't establish full-travel clearance, don't assume a comfortable-looking static gap is enough.
- Note the brake type and inspect the caliper, hose and cable routing. A stay must clear the brake assembly without trapping a hose; contact or forced cable bends mean you need a different mounting arrangement.
Turn measurements into an order
Write down the tyre width, wheel size, narrowest gaps and available mounts. Photograph the awkward areas, especially the rear motor cable and fork crown.
Compare those notes with the guard's width, mounting instructions and specified clearance requirements before ordering. If the listing doesn't explain the space its hardware needs, resolve that uncertainty before buying rather than planning to bend everything into place.
UK and EU Rules That Shape Your Choice
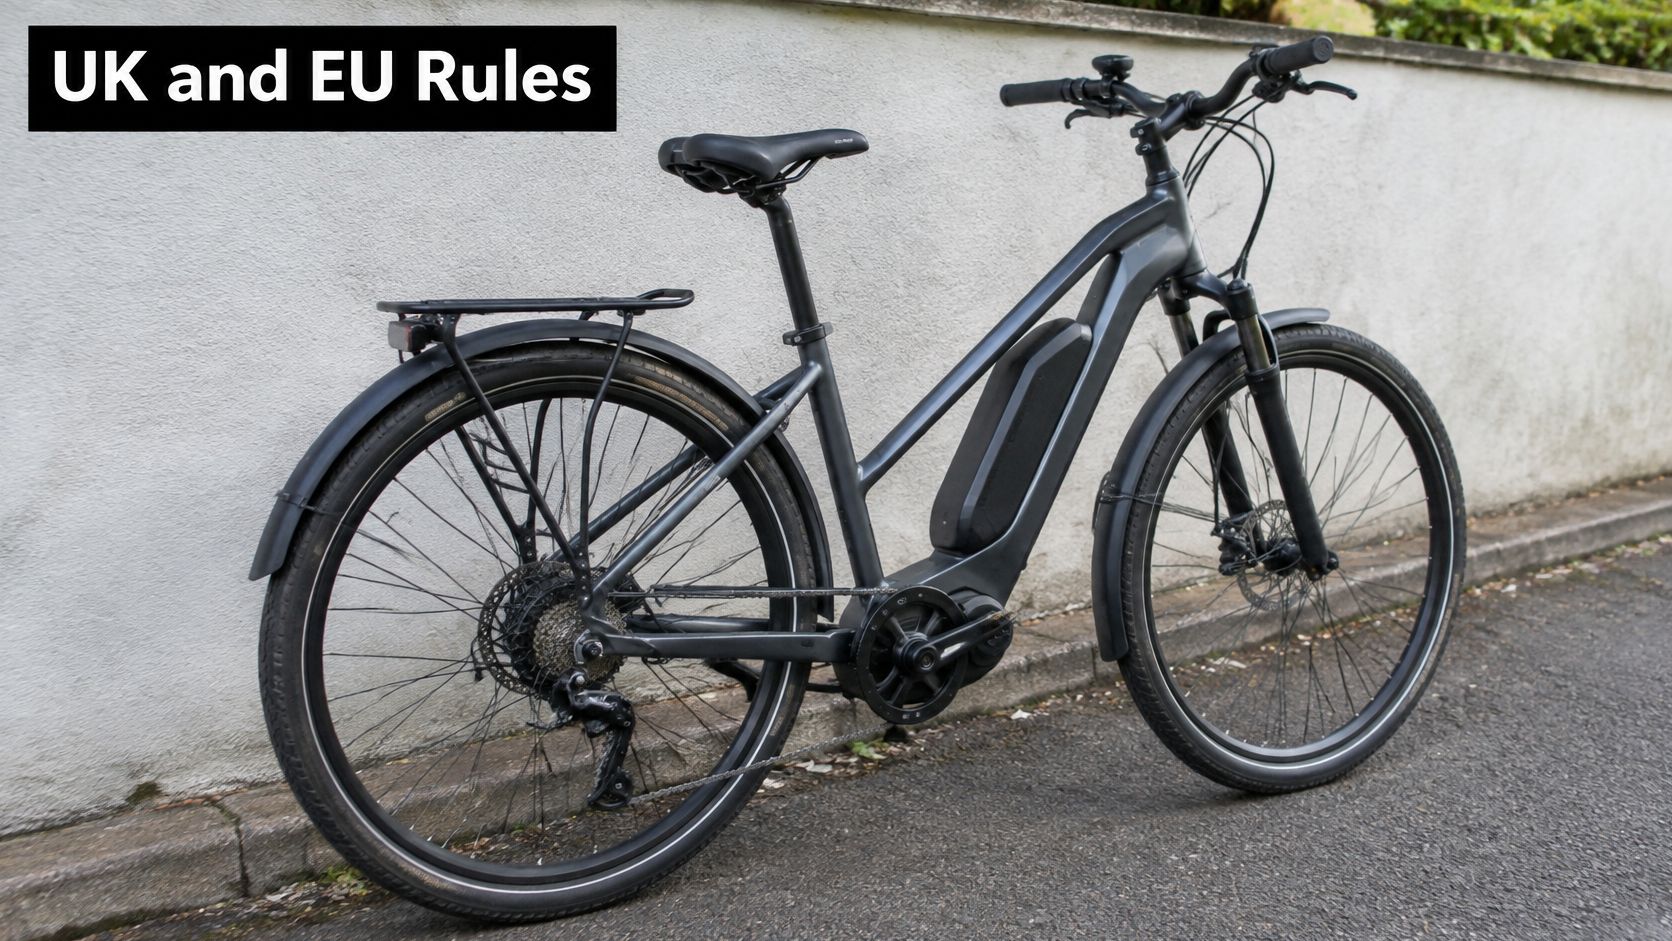
In Great Britain, 250 watts maximum continuous rated motor power and assistance cutting out at 15.5 mph (25 km/h) are core EAPC requirements, alongside pedals capable of propelling the bike, according to the GOV.UK electric-bike rules. The same guidance says riders must be at least 14, and compliant EAPCs don't need registration, insurance or vehicle tax.
Those rules describe the bicycle, not a mudguard specification. Your fitting job should preserve normal pedal operation and leave the drive system unobstructed. Turn the cranks through their complete rotation and check shoe clearance too, particularly where a front flap sits near the pedal path.
Keep accessories separate from classification
Walk-assist must cut out at 3.7 mph (6 km/h) under Transport for London's e-bike safety guidance, which also explains that non-compliant machines can be treated as motor vehicles, with registration, insurance, taxation, licensing and approved motorcycle-helmet requirements. An unrestricted twist-and-go machine doesn't become a compliant pedal-assist bike because you've fitted commuter accessories.
Keep stays away from wheel magnets, speed sensors and their wiring. Don't move a sensor to make a bracket fit, and don't route accessory straps over handlebar controls used for walk assistance.
For EU-market pedal-assist bikes, EN 15194 is a relevant design and testing reference, including assessment of front-mudguard safety. It isn't a reason to assume any aftermarket guard will fit, nor does a standard replace the road-use rules where you ride.
A mudguard can improve a suitable bike's wet-weather practicality. It can't change the bike's legal classification.
Before accepting the installation:
- Confirm the bike specification: Check the continuous motor rating and assistance cut-off, not just advertising language.
- Preserve operation: Leave pedals, sensors, wiring and controls unobstructed.
- Check local rules: Great Britain's requirements aren't a substitute for the rules in your EU destination.
How to Fit and Test Your E-Bike Mudguards
Treat the front guard as a safety-critical assembly. If it shifts into the tyre, it can cause an abrupt wheel lock, so a quiet wheel on a workstand isn't enough to approve the job.
The EN 15194 EPAC standard covers bicycle and subassembly design, assembly and testing, including front-mudguard safety assessment. For a home fitting, use a deliberate installation and inspection process rather than treating a successful bolt-up as proof of safety.
Install without forcing alignment
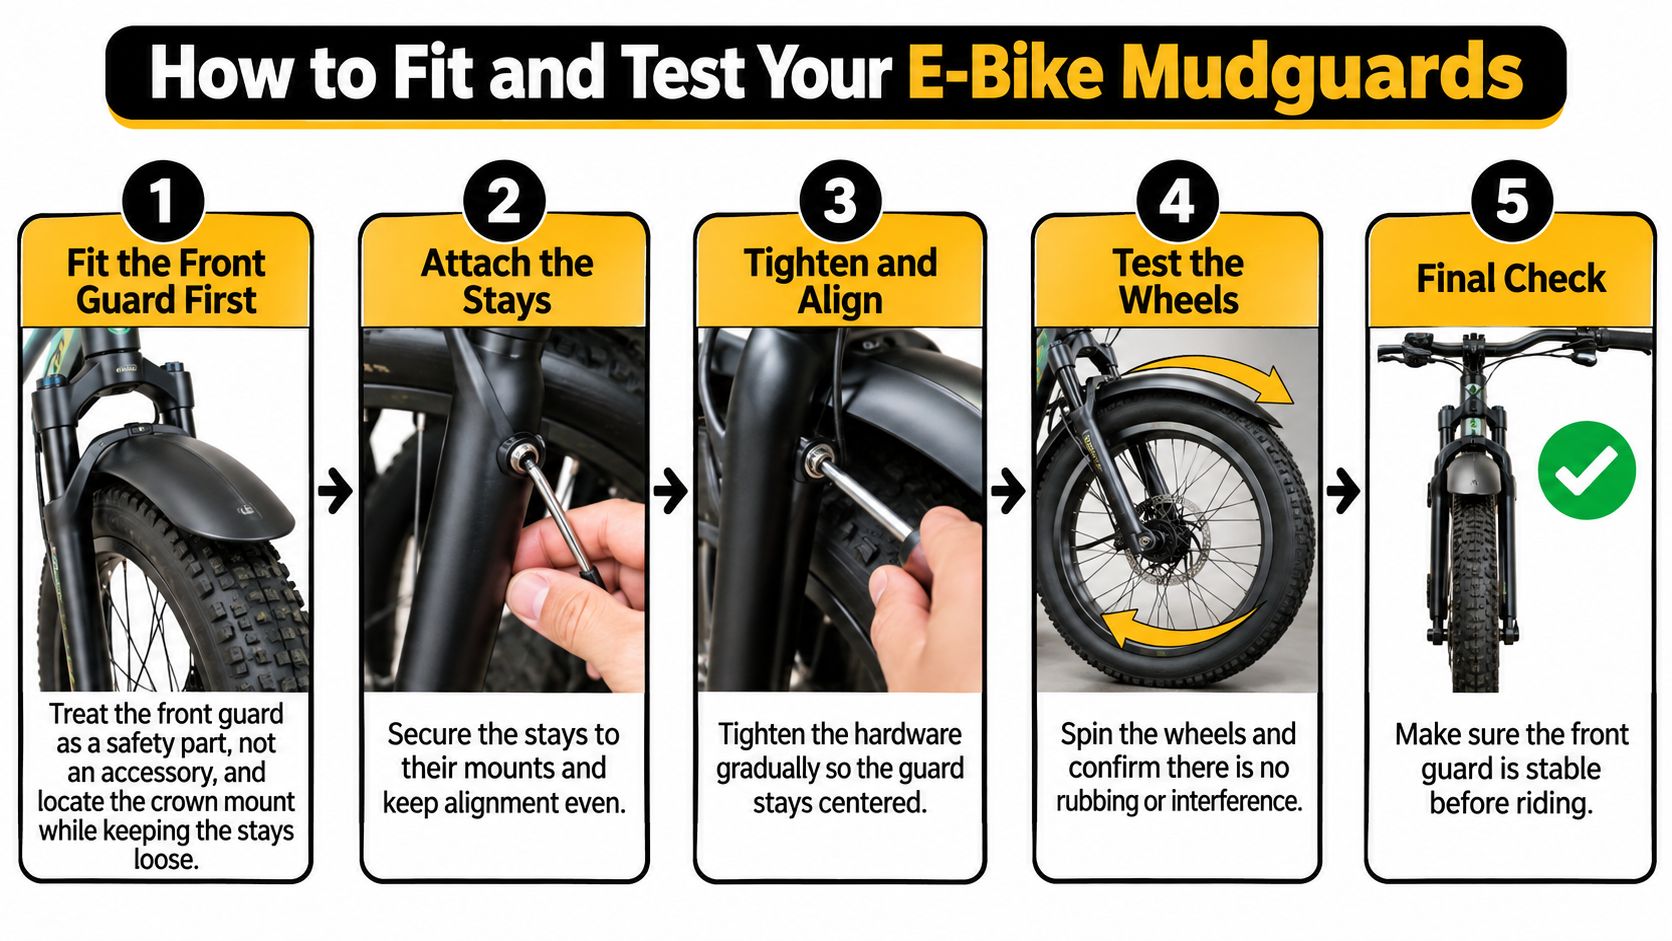
- Fit the front guard first. Switch the bike off, locate the approved crown mount and loosely install the bracket. Leave adjustment available so tightening one fixing doesn't pull the guard off-centre.
- Attach the stays to their designated mounts and centre the guard over the tyre. Check behind each bracket for trapped cables or brake hoses, and retain any supplied safety-release hardware.
- Tighten progressively. Use the manufacturer's torque values and a suitable torque wrench rather than tightening until the bracket stops moving. Recheck alignment as you tighten, because a rotating bracket can steal clearance.
- Spin the wheel by hand, then slowly turn the handlebars to full left and right lock while checking for interference. Keep fingers clear of spokes and brake discs; repeat clearance checks with normal load and relevant suspension compression, not just with the wheel centred and unloaded.
- Fit the rear guard. Check the chain, seat stays, rack and motor-cable route, then rotate the rear wheel. Make sure shared mounting hardware remains suitable for both the rack and guard rather than adding extra parts beneath an existing bolt.
Test in controlled stages
- Start on dry pavement in a traffic-free area, then progress to shallow standing water with a visible surface, loose gravel and controlled firm braking stops. Build up gently, and never use deep or unknown water as a test obstacle.
- Inspect after each stage. Stop and look for rubbing marks, loosened stays, cracking, displaced brackets and steering obstruction. Any contact means stop testing and correct the cause before continuing.
Workshop check: A guard that clears the tyre only while nobody's sitting on the bike hasn't passed.
Record a simple pass or fail against wheel rotation, full-lock steering, loaded clearance, secure hardware and unobstructed brakes and cables. Note the date and any adjustment made, and repeat the relevant test after that adjustment.
If the assembly can't stay centred without stressed brackets or improvised cable routing, change the guard or mounting system. Don't solve an unsuitable fit by tightening harder.
Fixing Rubbing, Rattles and Grimy Chains
Mudguard symptoms, causes and fixes
| Symptom | Likely cause | Fix |
|---|---|---|
| Guard rubs the tyre at speed | Loose stay or guard set too close | Re-seat stays and reset clearance with the rider on board |
| Rattle over bumps | Loose fasteners | Tighten to specified torque and check mounts after the first week |
| Mud packs in behind the guard | Short guard flaring spray, or insufficient debris clearance | Clear the blockage and check space first; add a clip-on flap or extender only where safe |
| Chain coated in grit after rain | Spray reaching the drivetrain | Wipe, degrease and relube the chain |
| Cracked plastic stay | Impact or fatigue | Replace the stay before the next wet ride |
A flap can redirect incoming spray, but it won't fix a guard that traps mud against the tyre. If debris keeps packing into the gap, reconsider the clearance or guard style rather than adding more coverage.
Likewise, don't keep bending a cracked support back into position. Replace damaged hardware before riding again if it can no longer hold the guard securely.
A wet-ride routine that still matters
Mudguards reduce road spray; they don't make electrical components waterproof. Volt and Velo's wet-weather e-bike guide distinguishes water resistance from waterproofing and recommends drying the bike and electrical contact areas before charging, plus cleaning and relubricating the chain after wet use.
Follow this sequence once you're home:
- Wipe the bike down. Remove surface water and road grime with a soft cloth, paying attention to the underside of the frame.
- Dry the charging-port area and accessible battery contacts according to the bike's care instructions. Don't poke tools into connectors or dismantle sealed electrical parts.
- Allow everything to dry before charging. If you suspect water has entered the battery or electrical system, don't connect the charger.
- Clean the chain, use drivetrain degreaser where needed, dry it and apply suitable lubricant. This e-bike chain-lube guide helps match the lubricant to your riding conditions.
Rain can remove lubricant and encourage rust, so a cleaner-looking frame isn't proof that the chain needs nothing. Wipe excess lubricant off after application rather than leaving a sticky coating for grit.
- Inspect monthly: Check stays and bolts, and inspect sooner after impacts or new rattles.
- Avoid pressure washing: Keep concentrated jets away from the drive unit, bearings and electrical connections.
- Let moisture escape: Don't seal a wet bike in a storage bag overnight.
Deep standing water remains a hazard regardless of guard coverage. You can't judge electrical protection by how dry your trousers stay.
Confirm the Fit Before Your Next Wet Ride
Run this final check with your normal commuting load, not an empty bike that never leaves the workshop.
- Record the dimensions. Write down actual loaded tyre width, wheel diameter and the fork-to-tyre gap with suspension movement accounted for. Keep the notes with your fitting instructions.
- Choose the appropriate guard style and compare your measurements with its listing before ordering. Confirm the mounting hardware as well as the guard width.
- Complete installation and testing. Fit front, then rear, check full steering lock while stationary, and progress through dry pavement, shallow visible standing water, loose gravel and controlled braking.
- Verify the bike's continuous motor rating, assistance cut-off and walk-assist behaviour against the applicable local requirements. Don't assume an accessory listing confirms road legality.
- Log the result. Date a pass or fail record confirming no contact with the tyre, pedals, sensors or controls. A fail means adjustment or replacement, not riding carefully and hoping.
Get the tape measure out and complete the fit test before the first wet ride, not after it.
Punk Ride LLC offers Adult Bikes, City & Commuter Bikes, Folding Bikes, Fat Tyre Bikes, Off-Road Bikes and Cargo Bikes, alongside accessories including bike parts, tyres, pumps, repair tools, lights and bags. Visit Punk Ride LLC with your tyre measurements and mounting notes ready, so you can compare your bike and wet-weather equipment needs without guessing about fit.