You're half a mile from home, dusk is settling in, and the rear tire has gone soft. The scooter starts to feel vague under you, and the throttle no longer behaves as predictably as it did on firm rubber. A repair kit might help you get moving again, but only if it matches the tire on your scooter and the damage is repairable.
A scooter tire repair kit isn't a pocket workshop. It's a way to handle some roadside problems, check pressure, and avoid being stranded by a minor puncture. The right kit depends first on whether your scooter has an inner tube, a tubeless tire, or a solid tire. Here's how to tell, what to carry, and when to stop trying to repair the tire.
Why Every Rider Should Think Twice About Tire Kits
A soft tire can turn a routine trip into a roadside problem before you've worked out what's happening. Small scooter wheels contain less air than car tires, so pressure loss can affect handling and rim protection noticeably. On a commute, that may mean a tense ride to a safe stopping place. On a weekend route, it could mean walking the scooter home.
Pressure loss also doesn't always announce itself with a dramatic puncture. The U.S. Government Accountability Office reported that air-filled tires can naturally lose about 1–2 psi per month through permeation, and its review found that more than one-quarter of automobiles and approximately one-third of light trucks had at least one tire underinflated by 8 psi or more below the manufacturer's recommendation (GAO review of tire pressure). Those figures describe road vehicles, not scooters, but the basic maintenance lesson applies: a tire can be underinflated before it looks obviously flat.
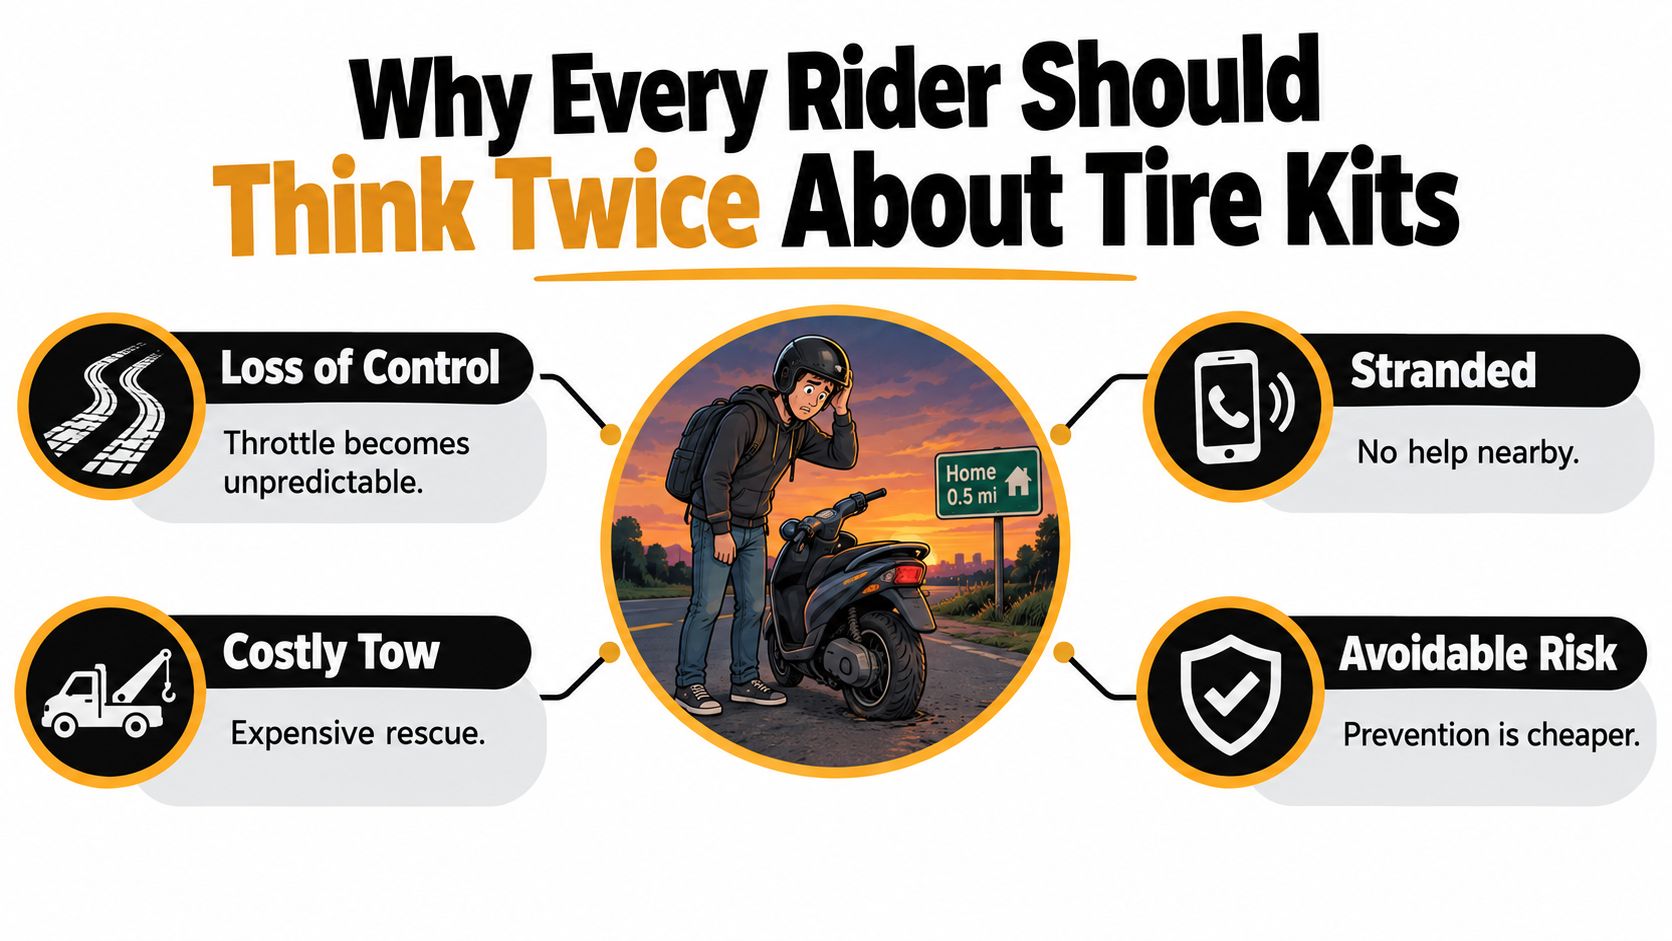
A compact kit can help you inspect a tire, restore pressure, and deal with some minor tread punctures. It can't make a sidewall cut safe, reveal every kind of internal damage, or replace a tire that's worn or structurally compromised. Think of it as mobility insurance, not permission to keep riding on damaged rubber.
Practical rule: Carry the repair gear that suits your tire, a way to check pressure, an inflation method, and a backup plan for getting home. If the tire looks unsafe, put the screwdriver down and walk.
What Actually Goes Inside a Repair Kit
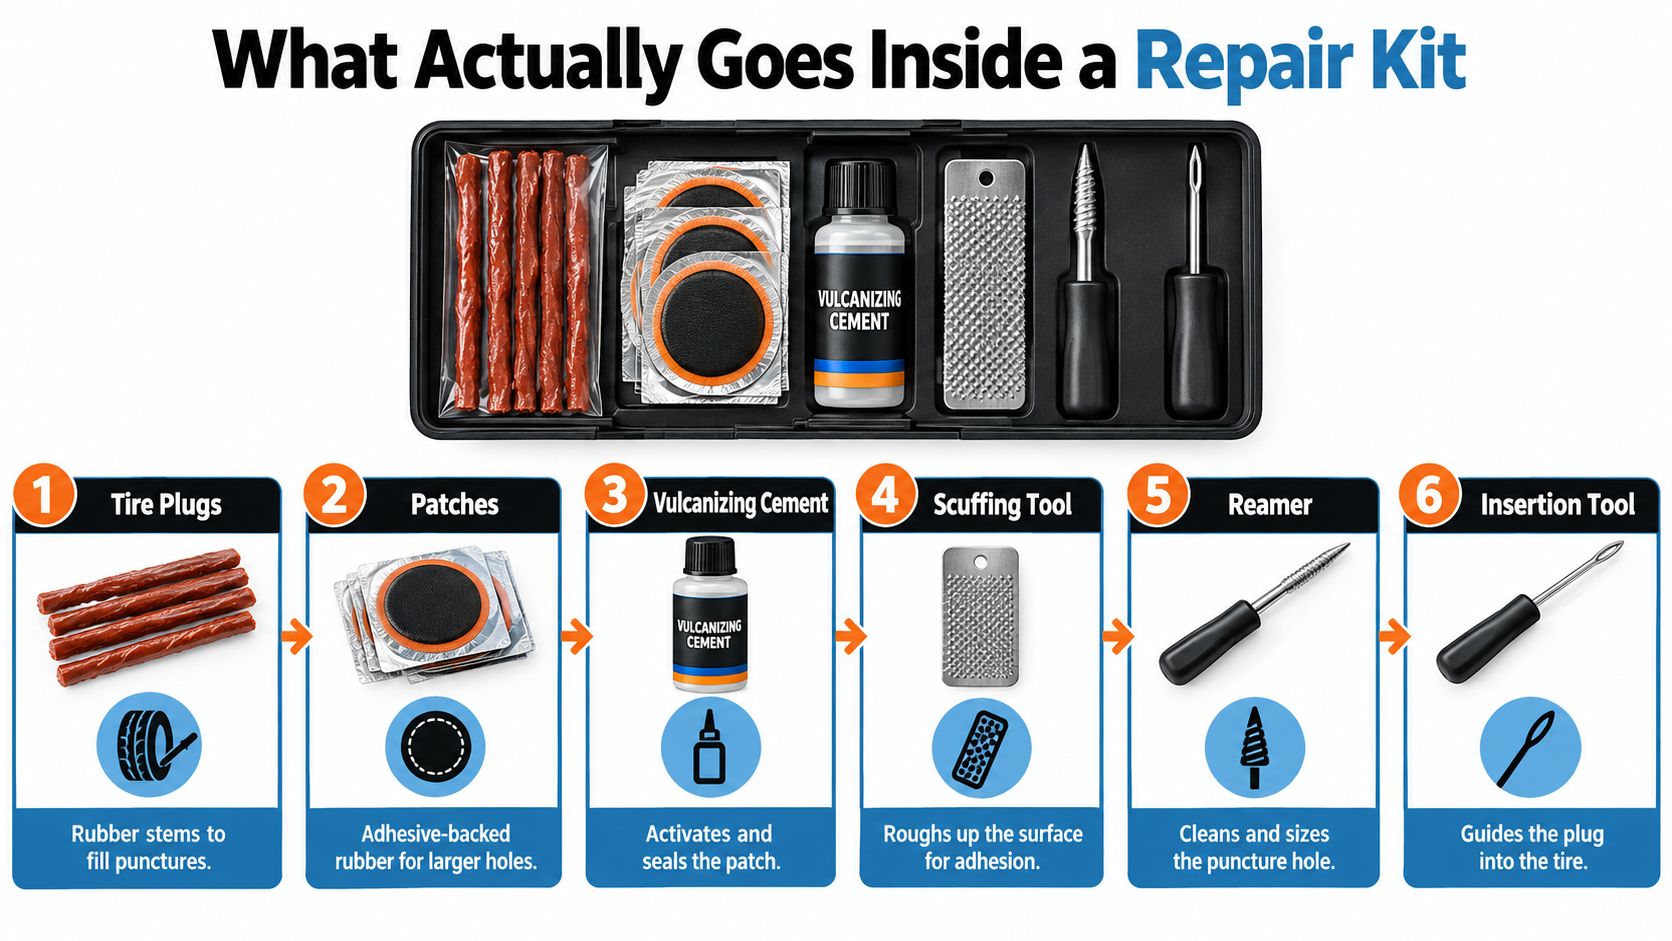
Open a kit and start with the parts that match the tire's construction. A tubeless repair kit may include plugs, a reamer, and an insertion tool. A tube-type setup needs tire levers and a compatible patch or spare tube instead. The tools are only useful if you know which job they're meant to do.
Match the consumables to the repair
For a tubeless tire, a rubber plug or stem fills the puncture channel. A patch seals the inside liner. The U.S. Tire Manufacturers Association describes a technically acceptable repair as a two-part system, and says a plug alone or patch alone isn't acceptable as a permanent repair (USTMA puncture repair guidance).
That distinction matters when you're comparing kits. A box of outside-in rope plugs might offer a temporary roadside option, but it doesn't do the same job as an inspected internal repair. A more complete repair setup can include a combination stem-and-patch unit, vulcanizing cement, a scuffing tool to prepare the liner, and leak-check materials. Don't assume every kit includes those parts.
Check the tools you'll actually reach for
- Reamer and insertion tool: Clean and prepare a tubeless puncture, then guide the plug into it. Use them only when the tire is compatible with plugs.
- Tire levers: Help remove a tire from the rim when a tube needs repair or replacement. Wheel removal and tight scooter beads can make this a harder job than the kit suggests.
- Valve-core tool and valve accessories: Help with some valve-related tasks. They won't fix a damaged tire casing.
- Pressure gauge and pump: Let you check and restore pressure rather than guessing. A kit with puncture consumables but no inflation method may leave you unable to ride even after sealing a small leak.
Read the contents list carefully. Puncture consumables address holes; pressure-maintenance hardware helps you detect and correct low pressure. They're related, but they aren't interchangeable.
Tube, Tubeless, or Solid How Tire Type Changes Everything
The first question isn't how many plugs come in the box. It's what kind of tire is on the scooter. Think of an inner-tube tire like a sandwich with an air-filled tube as the filling. In a tubeless tire, the tire seals against the rim and holds air directly. A solid honeycomb tire is more like a pre-baked block: there's no air chamber to patch.
Tubeless tires may accept a plug or sealant. Inner-tube tires need the tube removed for patching or replacement, and a tubeless plug kit won't seal a punctured tube. Solid tires can't be fixed with either a tube patch or a tubeless plug (Pure Electric's tyre and puncture guidance). In other words, the cheapest kit can become useless the moment you choose the wrong architecture.
| Tire Type | Plug Works | Patch Works | Spare Tube Needed | Sealant Compatible |
|---|---|---|---|---|
| Tubeless | May suit some tread punctures | Internal repair may be appropriate | No | May be compatible |
| Inner tube | No, not as a tube repair | Yes, after removing the tube | Useful as a replacement option | Depends on the tube and product |
| Solid honeycomb | No | No | No | No |
A quick check helps narrow it down, but don't rely on one clue alone. Look for construction and size markings on the sidewall, inspect the valve, and check the scooter's model information or manual. A valve doesn't prove that the tire is tubeless, and some scooters may use different constructions front and rear.
Before ordering, confirm both wheels. A kit that fits the rear tire may be the wrong answer for the front.
Riders comparing other off-road tire systems may find this enduro mousse guide useful for understanding why tire construction determines what a roadside kit can do. The principle is the same: the tire's internal design dictates the repair method.
Step by Step How a Proper Plug and Patch Repair Works
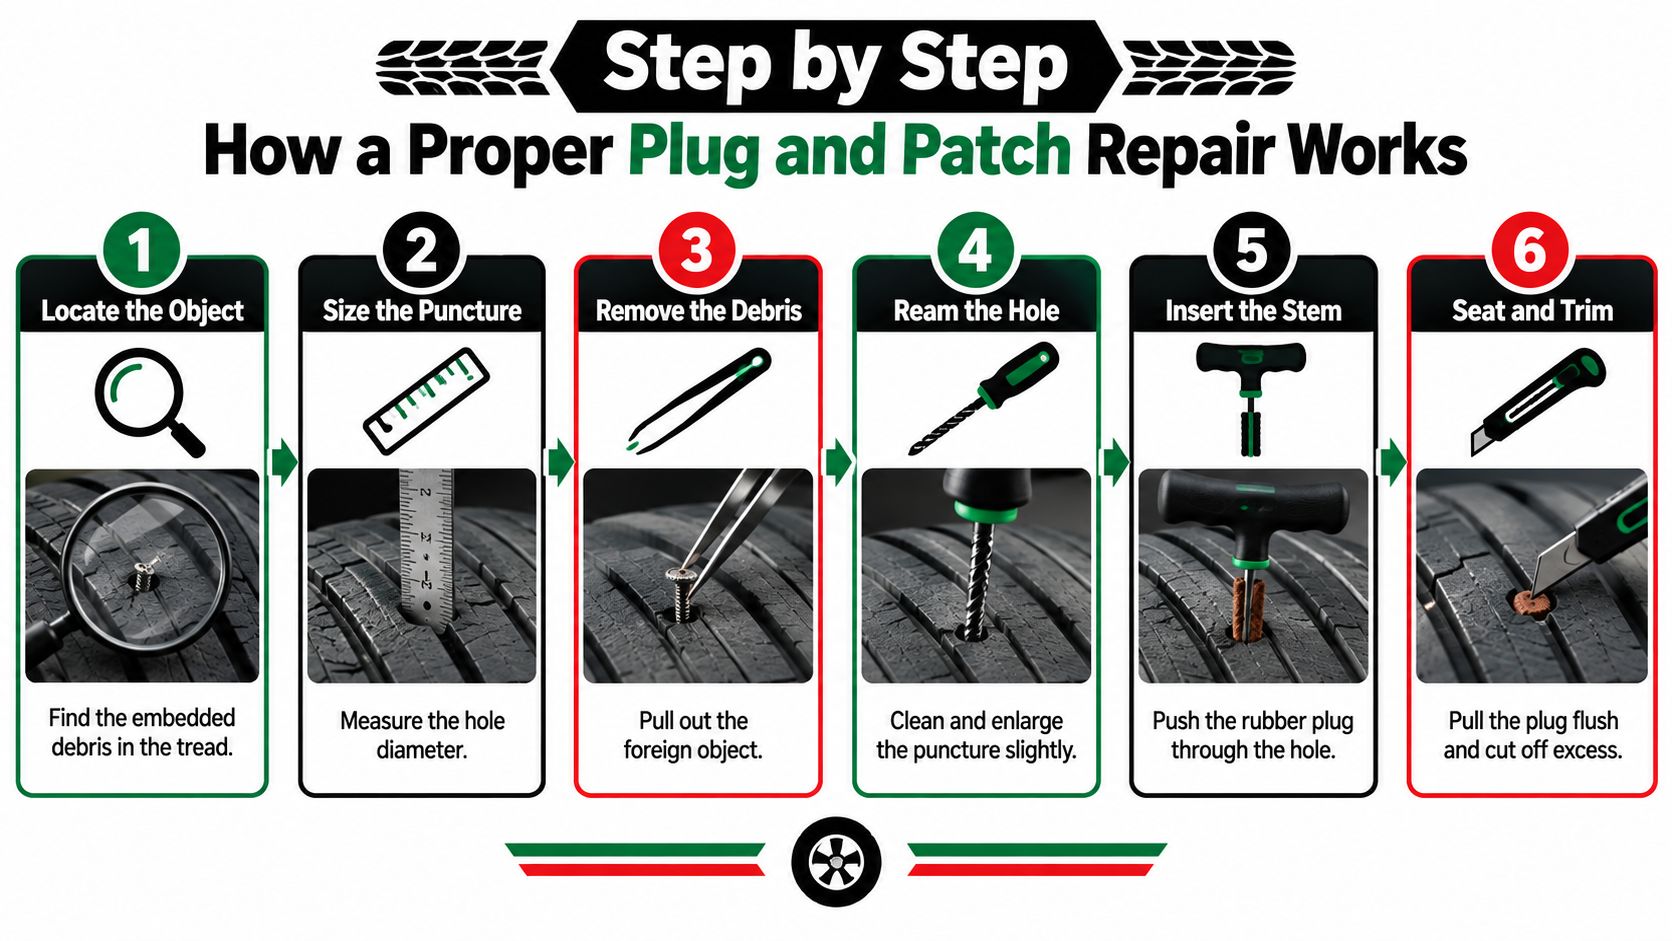
A plug-and-patch repair sounds simple until you learn that the permanent repair isn't just a plug pushed in from the outside. The proper approach calls for removing the tire from the rim, inspecting it internally, and limiting repair to an eligible tread puncture. USTMA sets the maximum puncture threshold at 1/4 inch (6 mm) and excludes the shoulder and sidewall (USTMA tire repair basics).
What to check before touching the puncture
Find the leak and identify where it is. If there's an object embedded in the tread, mark its location before removing it. Check the puncture's size and angle, and stop if it's near the shoulder or sidewall, looks large, or has left the tire visibly damaged.
An outside-in plug can be a temporary roadside measure, not a guarantee that the tire has been properly repaired. A permanent repair requires internal inspection so concealed damage to the liner or casing isn't missed. If you're not equipped to remove the tire and inspect it safely, treat the plug as a way to manage an emergency, then arrange proper service.
The repair sequence in plain language
- Locate and size the puncture. Confirm the leak is in the tread and measure the opening. Don't enlarge a hole just to make a plug fit if the damage is already beyond the repair limit.
- Remove the debris and prepare the hole. Work carefully with the appropriate tool. A damaged or angled puncture may not seal reliably.
- Fit the stem and patch. The stem fills the channel; the patch seals the inner liner. Follow the product's instructions for cement and surface preparation.
- Inflate and check for leaks. Restore pressure to the scooter manufacturer's specification, then check the repair for escaping air.
Here's a visual walkthrough of a plug-style roadside sequence:
A demonstration can help you understand the tools, but it can't confirm that your tire is safe to ride on. If the damage is uncertain, don't turn a roadside shortcut into a permanent repair by assumption.
When to Stop Repairing and Replace the Tire
Not every puncture is fixable, and trying to seal the wrong damage can make a bad situation worse. A tire with a sidewall cut, shoulder puncture, exposed cords, damaged bead, bulge, or tear isn't a good candidate for a plug-and-go fix. Small scooter wheels also have little margin for a compromised casing, especially when the scooter is carrying a rider over rough pavement.
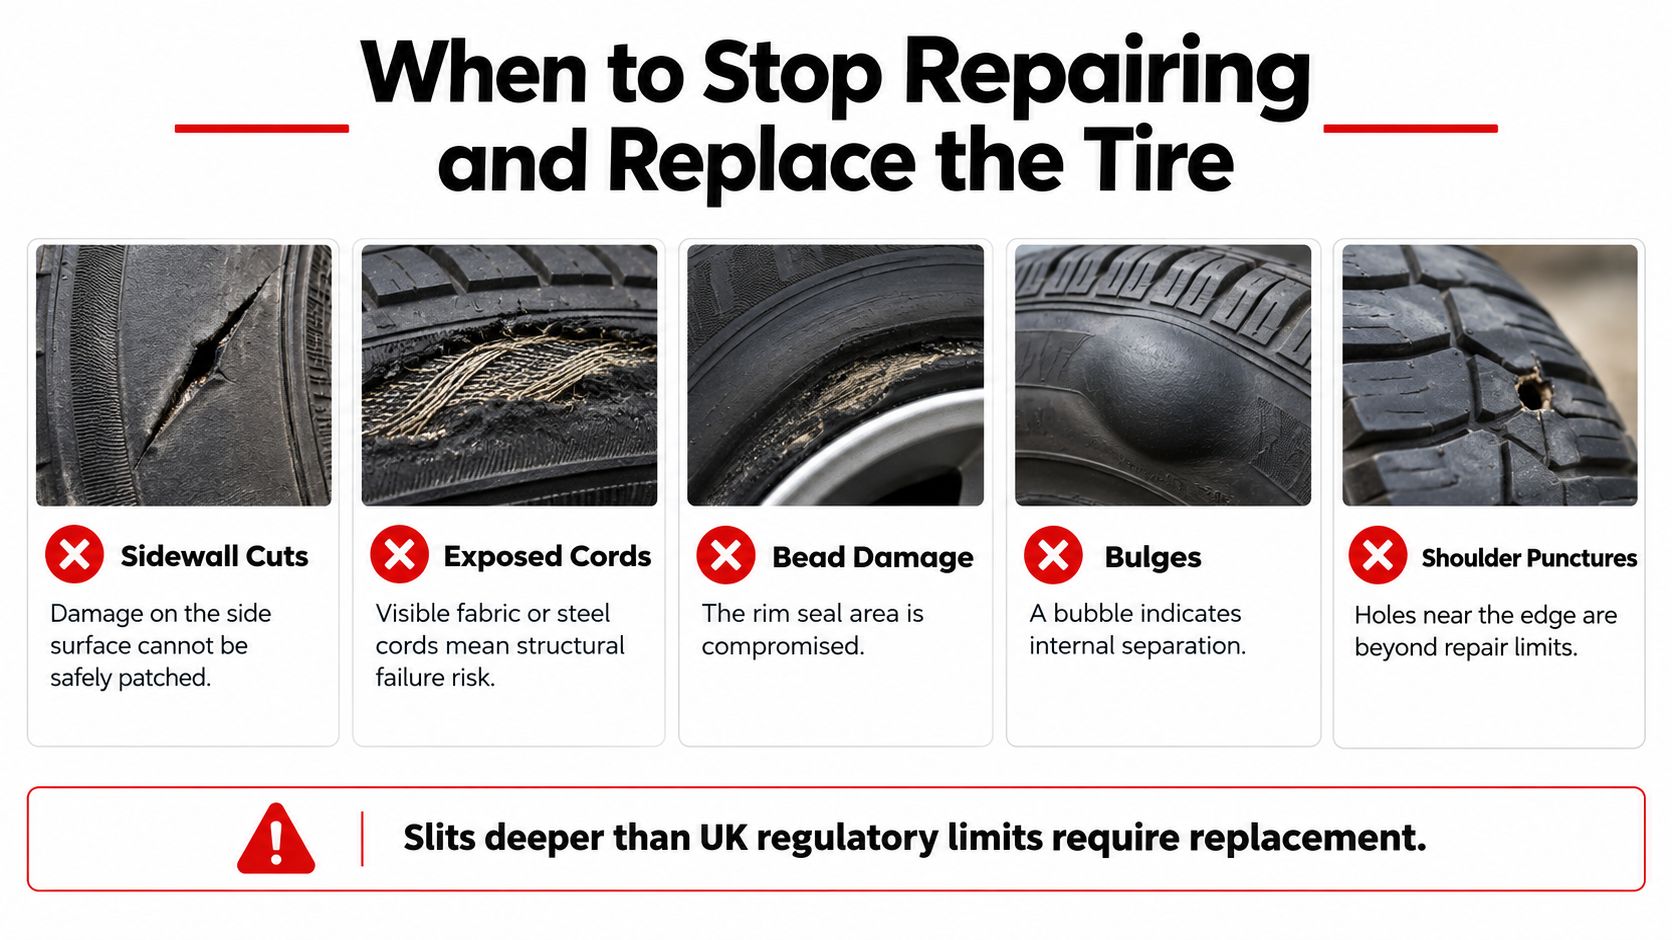
UK tyre regulations prohibit cuts that reach the ply or cord when they're deeper than 25 millimetres or 10% of the tyre's section width, whichever is greater. The regulations also prohibit exposed ply or cord, structural lumps, bulges, tears, and unrepaired penetration damage (UK tyre regulations). These are regulatory requirements for covered road-vehicle tyres, not a scooter-specific repair guide, but the damage signals are clear reasons to stop and seek replacement or professional assessment.
Leave the kit in the bag if you see
- Sidewall or shoulder damage: A plug isn't a safe answer for punctures outside the repairable tread area.
- Exposed cords, a bulge, or a tear: These suggest structural damage, not just a hole to seal.
- Bead or rim damage: The tire may not seal or sit safely on the wheel.
- Repeated pressure loss: A repair that keeps leaking needs inspection, not another plug pushed into the same problem.
- Damage you can't size or identify confidently: Uncertainty is a good reason to stop riding.
If the tire is visibly underinflated, don't keep riding at speed while deciding what to do. The practical sequence is simple: use a plug only as a temporary roadside measure when the damage is suitable, ride cautiously only if it's safe to do so, then arrange an internal inspection or professional repair. Replace the tire if the damage crosses a safety limit.
Matching the Kit to Your Riding Style
The right kit depends on what your scooter's tires can accept and how far you ride from help. A commuter on a tubeless tire may want a compact plug kit and pump. A rider with an inner tube may get more from tire levers, a patch kit, and a compatible spare tube. Carrying rope plugs on a solid honeycomb tire won't help.
Underinflation deserves attention beyond the inconvenience of a flat. NHTSA reported that underinflated tires contributed to 247 of 32,061 U.S. traffic fatalities in 1999, and that tires underinflated by more than 25% of recommended pressure appeared in approximately 10% of relevant pre-crash cases, compared with 3.4% among correctly inflated tires (NHTSA data reviewed by GAO). These figures concern road vehicles, not electric-scooter crash rates. They reinforce a general point: pressure checks belong in the safety routine, not just the repair plan.
Choose for the job, not the piece count
| Kit Style | What It Covers | Best Fit |
|---|---|---|
| Ultralight roadside pouch | Basic consumables for a compatible tire, with limited ability to handle other faults | A commuter who knows the tire type and has a backup way home |
| Commuter set | A compatible repair method plus a pressure gauge and portable pump | Regular riders who want to diagnose and manage pressure loss |
| Workshop bundle | More complete tools for wheel access and internal inspection | Riders comfortable removing wheels and doing careful repair work |
Piece count alone doesn't tell you whether a kit is useful. Check for the tools your tire needs, and consider how difficult wheel removal will be on your scooter. Integrated brakes, axle hardware, or motor cables may make roadside disassembly unrealistic.
Punk Ride LLC sells a TireFix tyre repair kit for scooters, e-bikes, motorcycles, and cars, with a plug gun, repair strips, tools, and a carry case in several kit-size options. Check compatibility with your scooter's tire construction before relying on any plug-based kit.
A Smart Pre Purchase Checklist for Compatibility
Don't choose a kit because the packaging says “universal.” Before buying, identify the tire and confirm the tools will fit the scooter. A product that matches your wheel is more useful than a larger kit full of parts you can't use.
Take this checklist to the shop or product page:
- Tire construction: Is it tubeless, inner tube, or solid? Check the manual, model details, and tire markings. Confirm both wheels rather than assuming they match.
- Wheel size and tire width: Read the sidewall markings and compare them with the kit's stated compatibility. Make sure any replacement tube matches the tire.
- Valve type: Check whether the valve and pump connection are compatible. A gauge or pump that won't attach properly won't help at the roadside.
- Wheel access: Find out whether the kit includes the right tools for axle hardware, and whether removing the wheel means dealing with a motor cable or integrated brake.
- Repair materials: For a tube, look for the right patch or a compatible spare tube. For tubeless tires, check which puncture consumables are included and whether the kit is intended for temporary roadside use or internal repair.
- Pressure gear: Consider adding a gauge and a compact pump if the kit doesn't include them.
For riders using pneumatic mobility devices in Australia, VicRoads advises carrying spare inner tubes and restoring pressure to the manufacturer's specification before riding. Its guidance notes that underinflation can create stability problems and increase battery consumption through higher rolling resistance (VicRoads mobility-device guidance). It's a useful reminder for e-scooter riders too: buy for the tire you have, not the repair method you've seen online.
Routine, Inspections, and Quick Answers
Make pressure and condition checks part of your riding routine. Before each ride, scan the scooter's tires and other key components. The U.S. Consumer Product Safety Commission recommends checking the handlebars, brakes, throttle, bell, lights, tires, cables, and frame, and warns that damaged parts can cause loss of control or crashes (CPSC electric scooter safety alert).
- Do repair strips last forever? Check their packaging and condition. Replace materials that are dried out, damaged, or past the manufacturer's stated shelf life.
- Is a roadside plug legal everywhere? Don't assume so. Rules can vary, and a temporary plug isn't automatically a permanent repair. Check local requirements and have the tire inspected.
- What should I do after a roadside repair? Restore the specified pressure, check for leaks, and avoid riding if the tire still loses air or looks damaged. Arrange a proper inspection.
- Can a damaged inner tube be patched? A small, suitable tube puncture may be patchable, but replace a tube that's torn, repeatedly leaking, or otherwise compromised.
Before your next ride, confirm your tire construction, pressure specification, and the repair method that suits your wheels. Punk Ride LLC offers electric rides and accessories for urban and outdoor journeys, so visit Punk Ride LLC to explore options and make sure your repair setup is ready for the scooter you ride.