It's 7:40 on a Tuesday, you're already late, and the charger has been plugged in for twenty minutes with nothing to show for it. The brick's indicator is green, the display won't wake up, and the pack that carried you home last night has apparently retired. So you do the obvious things. Wiggle the plug. Unplug and replug. Press the power button four times, then a fifth.
None of that is unreasonable, and none of it tells you anything useful. An e bike battery won't charge for a dozen different reasons, and only some of them live in the battery itself. The rest sit in the charger, the wall socket, the charge port, the fuse, or the protection board that decides whether the pack is allowed to accept energy at all.
It's worth understanding one point before you touch a screwdriver. A refusal to charge is very often the pack protecting itself rather than the pack failing. Treat it that way and you'll either fix it in ten minutes or stop cleanly before you turn a cheap problem into an expensive one.
Match Your Symptom to the Likely Cause
A charger light that stays off points first to the outlet, charger or cable. If the light comes on but the battery takes no current, suspect the port, fuse or battery management system (BMS), which may have blocked charging for protection. Match the symptom before replacing parts.
| Symptom | Likely cause | First action |
|---|---|---|
| Charger light stays off | Dead outlet, faulty charger or cable | Test the outlet with another appliance, then inspect the charger |
| Charger lights but battery takes no current | Port fault, blown fuse or BMS lockout | Check the port and fuse; do not force charge |
| Charging starts then stops early | Temperature protection or cell imbalance | Let the pack reach room temperature, then retry once |
| Won't charge after a hot car or cold ride | Temperature lockout | Bring the pack to room temperature, wait, then retry once |
| Battery warm, swollen, leaking, hissing or smelling odd | Damaged cells or wiring fault | Stop using it, disconnect it and get professional help |
Before troubleshooting, check for warning signs: swelling or a bulge in the shell, heat that remains after the battery has been off the charger for a while, hissing, popping or crackling, smoke, sparks, scorch marks, cracks or leaking electrolyte, a sharp solvent or burning smell, or water inside the housing. Any one of these means unplug the charger and stop. Do not retry charging or test the pack.
Practical rule: if you can smell it, feel heat through the case, or see the shell deformed, the diagnosis is over. No further testing.
The U.S. Consumer Product Safety Commission review of micromobility incidents identified 107 e-bike incidents involving lithium-ion battery hazards reported through 2023. Fire was recorded in 75 of them, about 70% of the cases reviewed, and 47 of those 75 fires began while the battery was charging. Six fires started while packs were resting and not charging, three during use, five during maintenance such as removing or replacing a battery, and two from faulty wiring or overloaded extension cords.
These are reported incidents, not a forecast for your bike. The pattern is still useful: charging is not a safe test when a battery shows signs of damage. A refusal to charge can be a protective lockout rather than a dead pack, so repeated retries may bypass the warning you need to take seriously. Avoid a universal charger, too. A connector that fits does not establish that the charger is suitable for the battery.
The same sequence of checks applies to lithium battery packs generally: check the charger, inspect the port, then consider whether protection circuitry has blocked charging. For background on a related battery-repair service, see Perth laptop battery repair options. That page does not establish an e-bike fault order.
Use the symptom row to choose your first check. If a stop-use warning appears, disconnect and stop instead.
How to Check the Charger and Outlet
Six checks, cheapest and safest first. Each one rules out a specific failure, so don't skip ahead to the multimeter.
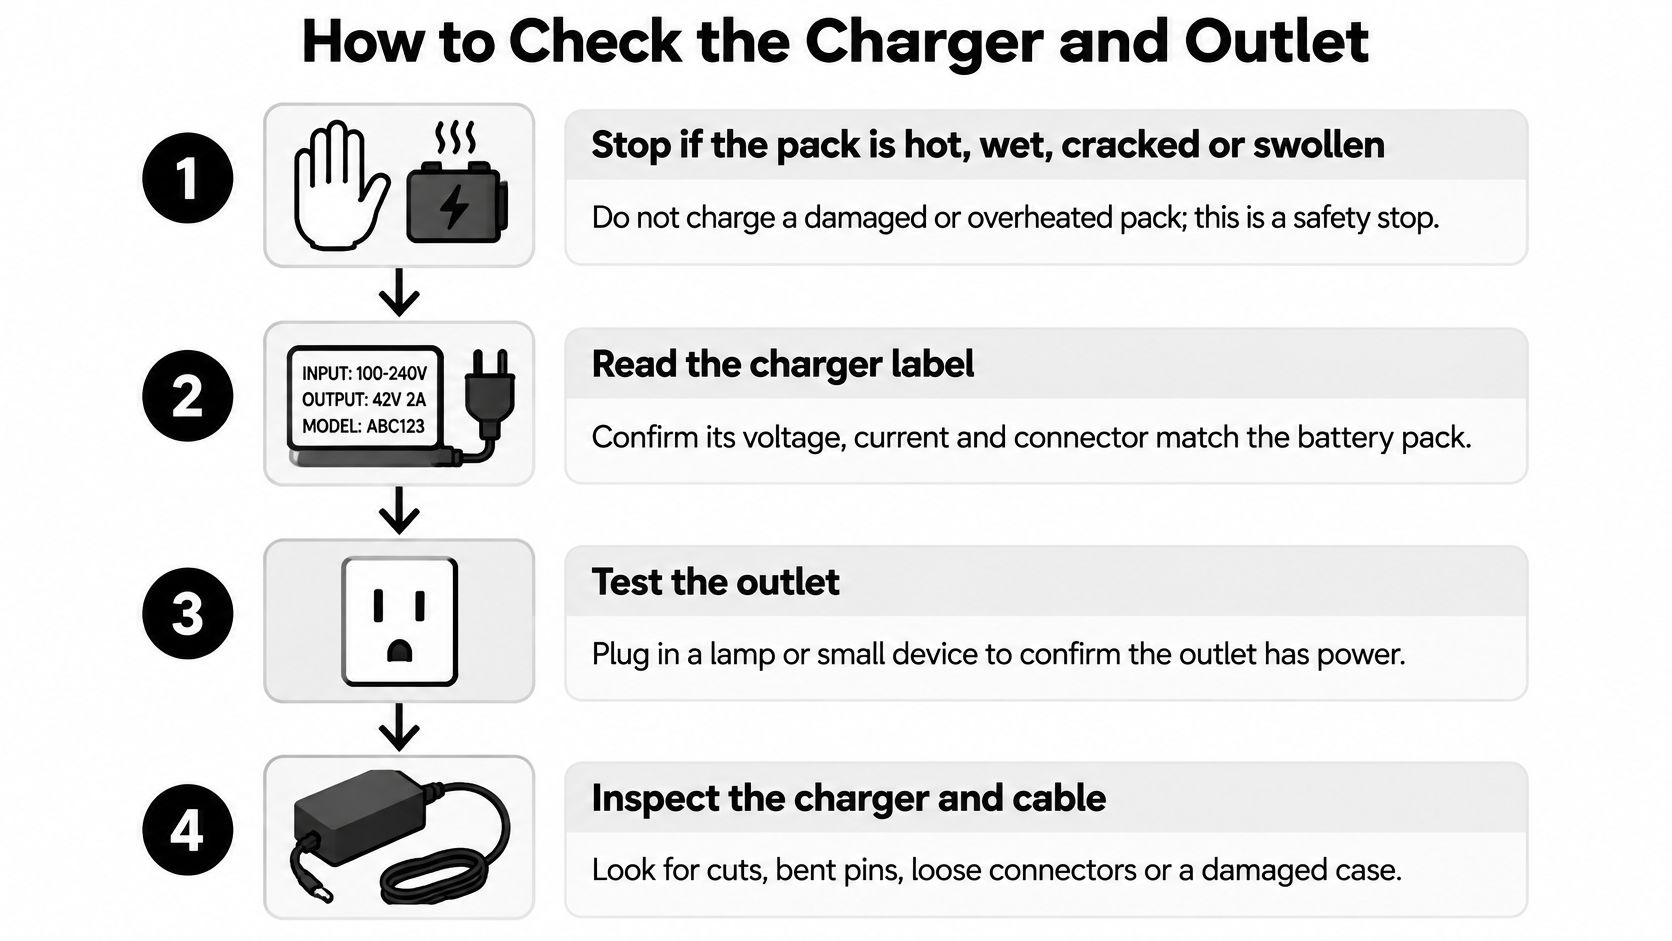
1. Stop if the pack is hot, wet, cracked or swollen. Charging a damaged pack pushes current into cells that may already have an internal short, which is how a small fault becomes a fire. Disconnect, move it away from anything combustible if you can do that without handling a hot pack, and get it assessed.
2. Read the charger label against the battery label. The output voltage printed on the brick has to match what the pack expects, not just the connector. A 36V pack charged by a 48V brick is being over-driven every cycle.
3. Test the outlet with something else. Plug in a lamp or a phone charger. It takes ten seconds and eliminates the most embarrassing cause on the list, including a switched socket or a tripped circuit.
4. Inspect the hardware, not just the light. Look at the charger LEDs, the cable where it bends at the plug (that's where strands break), the connector pins, and the bike-side socket. You're hunting bent pins, scorch marks, green corrosion, grit and moisture.
5. Reseat the pack and clean the contacts. Pull the battery, wipe the terminals dry with a clean cloth, check the mount for debris, then push it home until it clicks. A pack sitting 2mm proud of its mount will not charge.
6. Follow the maker's plug-in order. Some systems want the charger connected to the bike first, some to the wall first. Only use a power-cycle sequence if the manufacturer specifies one in the manual.
Charger mismatch is not a rare edge case. In the first four and a half months of 2024 the CPSC received 156 reports of fires and thermal incidents involving universal chargers for micromobility products, and 47 known fires tied to those chargers caused more than $100,000 in property damage. A plug that fits proves the connector matches and nothing else. Voltage, current, polarity, communication protocol and charge cutoff behaviour all have to line up too.
Use the charger that came with the bike, or an exact replacement from the original manufacturer. Stay in the building while it charges, and unplug when it's full. The routine matters as much as the hardware, and the same discipline applies across small EV packs, which is why how to charge scooter batteries is worth reading if you also run a mobility scooter. If you're weighing up chemistries, our LiFePO4 battery charger guide explains why a lithium iron phosphate pack won't charge correctly on an NMC charger even when the plug fits perfectly.
A healthy charger behaves boringly. The LED changes on connection, the cable stays cool to the touch, the connector holds firm with no play, and the light switches to full within the expected window. If yours does all of that and the pack still won't take current, the problem is on the battery side of the connector.
Why the Battery Protection Blocks Charging
"The battery is dead" is the assumption nearly everyone starts with, and it's the one that sends people to a marketplace for a wake-up charger that defeats the very circuit keeping them safe.
The battery management system is a guard, not a fault. UK statutory guidance on lithium-ion battery safety for e-bikes requires an e-bike pack's protection system to monitor the voltage of individual cells, pack current and cell temperature during both charging and discharging. It must prevent over-voltage, under-voltage, over-current, over-temperature and under-temperature conditions, and it must prevent thermal runaway when an incompatible charger is connected. A no-charge state is exactly what that system is designed to produce when one of those limits is breached.
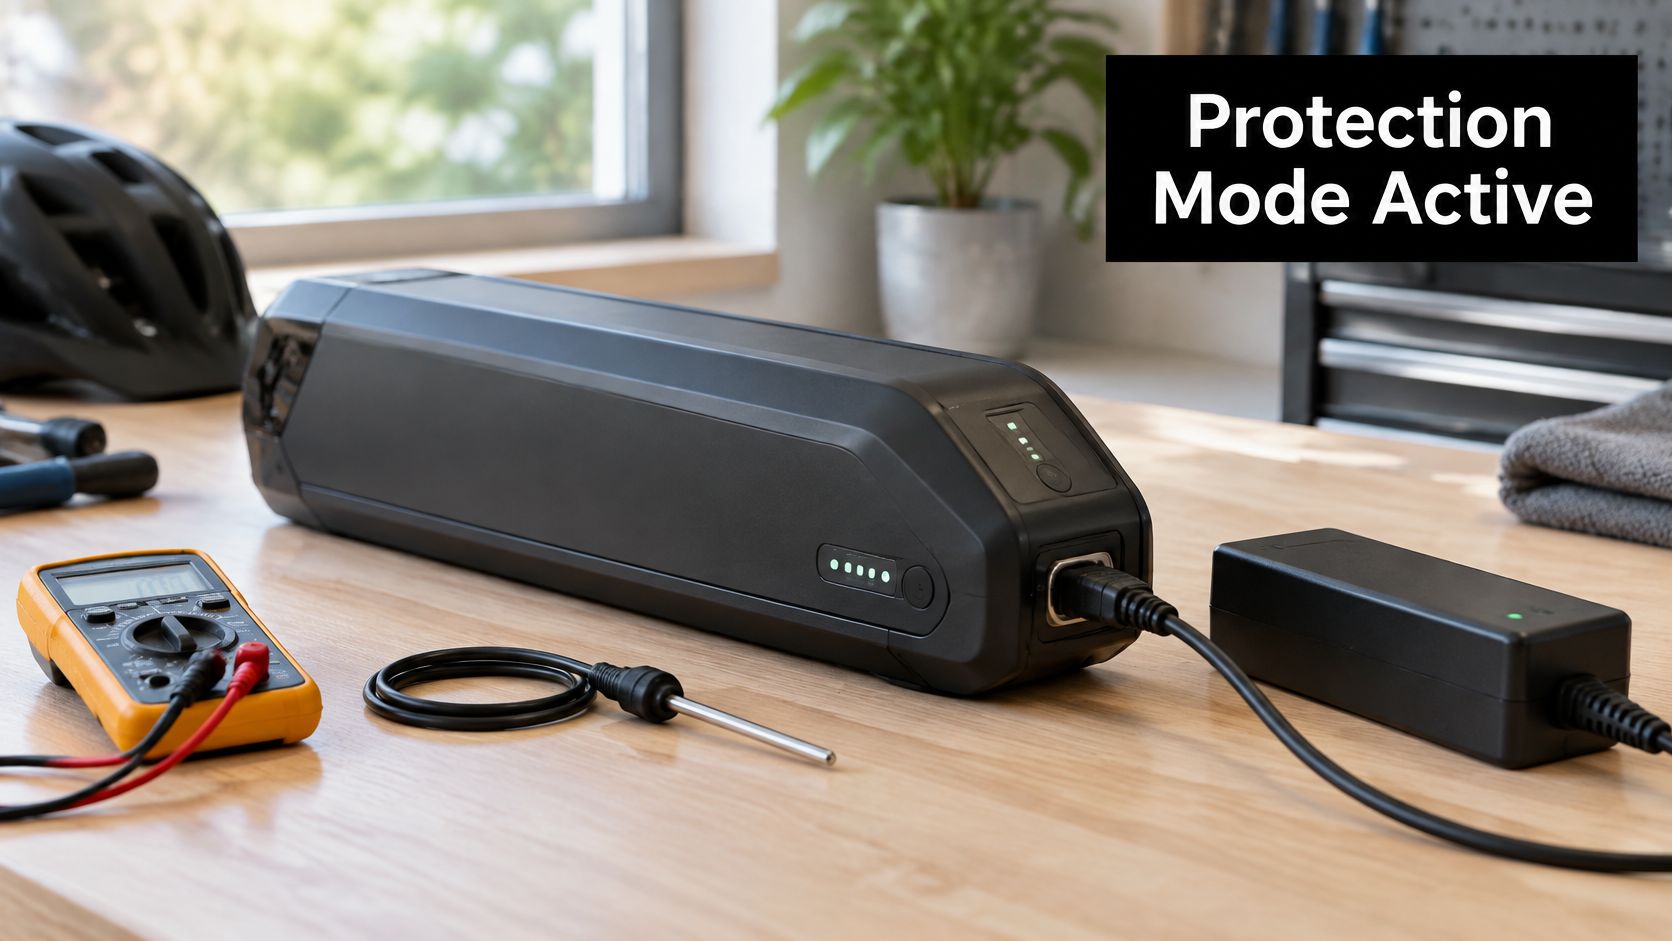
Three lockouts that look like a dead battery
The hot-car pack. Left in a black car on a sunny day, the pack climbs past its charge temperature ceiling and the BMS refuses. Nothing is broken. Let it sit at room temperature for a few hours and try once.
The cold-ride pack. Come home in near-freezing conditions, plug in immediately, and the pack blocks charging because lithium plating at low temperature damages cells permanently. Same answer, opposite direction: bring it indoors, wait, then retry once.
The discharged pack. Left flat for months, one series group drops below its safe threshold. The BMS sees an unbalanced pack and stops the charge to prevent the healthy groups from being over-driven while one lags. Force it and you're the one supplying the energy for a thermal event.
A protective lockout clears on its own once conditions return to normal. A charger fault doesn't. A damaged pack never does.
So split the outcome three ways. Protective lockout means wait, warm or cool the pack, then retry once. Charger fault means replace it with the exact unit the manufacturer specifies, not a lookalike. Damaged pack means stop, and that includes any pack with physical or thermal symptoms.
The contrarian point is where people get hurt. Repeated unplugging, aftermarket wake-up chargers, and DIY cell swaps don't fix a lockout, they remove the thing that was protecting you. A protection trip is a controlled refusal. A short circuit is an uncontrolled one, and On Time Home Services electricians explain the difference between a ground fault and a short circuit in household wiring: one is a device sensing an abnormal path and opening the circuit, the other is the abnormal path itself. Inside a pack, the BMS is that device. Bridge the terminals and you delete it.
Removable packs are far easier to inspect because the contacts are visible, and our guide to the electric bicycle with removable battery covers the mount and contact side of this. But visible contacts don't give you permission to open the case. That's a bench job with a fuse puller and a fire blanket nearby.
Reading Battery Voltage Without Guessing
A battery that will not charge may be below its safe operating range, or its protection system may be blocking the charger. Voltage helps narrow the cause, but only when you compare the reading with the battery label and the manufacturer's service limits.
| Pack type | Series cell groups | Full charge (approx.) | Check against |
|---|---|---|---|
| 36V e-bike pack | 10 | about 42.0 V | Battery label and manufacturer service limits |
| 48V e-bike pack | 13 | about 54.6 V | Battery label and manufacturer service limits |
| Charger nameplate | Not applicable, read the nameplate | Must match the pack voltage | Battery label |
The four numbers to write down
Record the nominal voltage from the battery label, usually marked 36V or 48V, and the charger nameplate voltage and current, read directly from the charger rather than its product listing. Then note the resting pack voltage, with the charger disconnected and the battery settled, and the voltage while the charger is connected. These readings help show whether the charger is delivering the right output and whether the pack is accepting charge.
Use the battery label and the manufacturer's service limits as your reference, since the exact values depend on cell chemistry. The Faraday Institution's battery safety analysis describes typical 36V packs with 10 series groups reaching roughly 42.0V when full, and typical 48V packs with 13 series groups reaching about 54.6V.
What the numbers mean
If charger output is absent, intermittent, or materially different from the required voltage, suspect the charger. Correct output with no current entering the battery can point to an open charge port, blown fuse, BMS lockout, or discharged or failed pack. Voltage alone cannot distinguish these faults.
Bench rule: never force charge a pack that reads abnormally low. A cell group below its safe threshold may have triggered the BMS protection. Repeated attempts or a universal charger can bypass safeguards or worsen a fault.
A multimeter check is appropriate only for someone qualified, using safely accessible connectors and DC voltage mode. Keep the probes from bridging the terminals. A technician can assess cell-group balance, charge-port continuity, fuse integrity, temperature-sensor readings, and BMS fault history before deciding whether the pack needs replacement.
Storing, Repairing or Returning a Battery That Won't Charge
No. A battery that won't charge shouldn't sit in your hallway while you figure out why, and it definitely shouldn't sit by the front door of a flat.
Why a failed pack can't stay in the hallway
The instinct is to treat overcharging as the only danger and unplug the charger. UK government figures for 2025 recorded 267 e-bike and e-scooter fires, with the battery or generator identified as the ignition source in 235 of them, 88%. 92 of those fires happened while the product was not charging, more than the 86 confirmed while charging. The London Fire Brigade reports batteries failing because they are poorly built, counterfeit, damaged, overcharged, or paired with an incorrect charger, and it recorded 206 e-bike and e-scooter fires in London during 2025.
A no-charge condition doesn't prove the pack is electrically safe. It only proves it won't accept energy right now. For commuters and apartment residents, that distinction matters most, because the storage spot is usually the hallway, the bedroom, or the shared stairwell that everyone needs to get past.
Storage answer: treat an unexplained no-charge pack like a damaged one until someone qualified tells you otherwise. Out of the flat, away from exits, away from anything that burns.
What to do with the pack today
- Stop using it and stop retrying. One attempt after temperature recovery is diagnostic. Five is gambling.
- Don't open the pack. No cell swaps, no terminal bridging, no "just checking inside".
- Move it somewhere non-combustible, outdoors or in a detached garage, but only if you can carry it without handling a hot or swollen case. If it's hot, hissing or smoking, leave it, evacuate, and call the fire service.
- Keep it clear of exits, bedrooms and shared hallways while it waits for assessment.
Route the fault before you ring anyone
Use the symptom table from the top of this page. A charger fault means buying the exact manufacturer charger and nothing else. A port or fuse fault needs a technician with continuity testing and the right replacement part. A lockout that clears after the pack returns to room temperature gets one retry, not four. Any stop-use sign ends the process and goes to a battery service or the retailer.
Returning early is normal. A 2025 survey reported by Singletrack World found 36.09% of e-bike owners had an e-bike-specific problem they couldn't solve themselves and had to take back to a retailer. A 48V 8Ah pack, like the NAKTO Classic we list, carries its voltage and capacity on the case, which is exactly the information a service desk asks for first. How you treated the pack over the last two winters matters as well, and our notes on electric bike battery life cover storage charge and temperature, which is where most of these failures start.
What to have ready when you make the call
- The bike model and year, plus the frame or serial number if it's printed.
- The battery label details, meaning nominal voltage and Ah or Wh capacity.
- The charger details, including output voltage, current and whether it's the original.
- A plain description of the symptom, such as "light stays green, pack never warms".
- The date of first failure and anything that happened before it, like a cold ride, a hot car, or a drop.
- Photos of the label, the connector and any damage, which saves a round trip.
One action for today: unplug the charger, move the pack off anything that burns, and don't plug it back in until you have a diagnosis or a verdict from the people who sold it.
Punk Ride LLC lists over 100 e-bikes and over 100 e-scooters, from 36V 10.5Ah commuter scooters to 48V city and cargo bikes, with the voltage and capacity printed on each listing so you can match a charger before you buy. If this fault has you pricing a replacement pack or a second bike, checking the battery spec first is cheaper than guessing at a marketplace brick that may not match. Visit Punk Ride LLC to compare the packs and chargers on the models you're considering.